
Themes Instructions
Select a Theme from the drop down menu
Table of Contents
- 1.Theme Installation
- 2.How to setup front page as shown in the demo?
- 3.How to manage Site Title, Logo, Tagline, Show and Site Icon?
- 4.How to manage Color Options?
- 5.How to manage Theme Options?
- 6.How to manage Header Image?
- 7.How to manage Background Images?
- 8.How to manage Menus?
- 9.How to add Widgets?
- 10.How to manage Static Front Page?
- 11.How to manage Additional CSS?
Business Hub
After you download your theme from Rigorous Themes, you can choose either of the approaches given below to install your theme.
- Log in to the WordPress Administration Panels.
- Select the Appearance panel, then Themes.
- Select Add New.
- Then select Upload Theme.
- Click Browse Locate business-hub.zip Theme in your computer.
- Select business-hub.zip and click Install Now.
You can use FTP client like FileZilla to connect your web server.
- Unzip business-hub.zip to your Desktop.
- Using an FTP client to access your host web server, go to /wp-content/themes/ and upload your new copy of Business Hub Theme.
- Now, log into the WordPress Dashboard with your login details.
- Select the Appearance panel, then Themes.
- You will see the theme in the list.
- Then click Activate button.
- Now the theme will be activated and go through the following options to set up the theme step wise.
The demo is divided into different section as shown in the image below:

The different sections are described below:
- Top Header Section: This section is setup from Admin Panel / Appearance / Customize / Theme Options / Header Options. Refer below How to manage Header Options? for more details.
- Site Identity and Primary Menu Section: The Site Identity section is setup from Admin Panel / Appearance / Customize / Site Identity and for Primary Menu section you need to setup from Admin Panel / Appearance / Customize / Theme Options / Header Options. Refer below How to manage Header Options? for more details. Refer below How to manage Site Title, Logo, Tagline and Site Icon? and How to manage Menus? for more detail.
- Featured Slider Section: This section is setup from Admin Panel / Appearance / Customize / Theme Options / Slider.
Refer below How to manage Slider Options? for more detail. - Get A Quote Section: This section is setup from Admin Panel / Appearance / Customize / Theme Options / Get a Quote.
Refer below How to Get a Quote? for more detail. - Our Services Section: This section is setup from Admin Panel / Appearance / Customize / Theme Options / Home Sections.
Refer below How to manage Home Sections? for more detail. - Why Choose us Section: This section is setup from Admin Panel / Appearance / Customize / Theme Options / Home Sections.
Refer below How to manage Home Sections? for more detail. - About/Welcome Section: This section is setup from Admin Panel / Appearance / Customize / Theme Options / Home Sections.
Refer below How to manage Home Sections? for more detail. - Our Works Section: This section is setup from Admin Panel / Appearance / Customize / Theme Options / Home Sections.
Refer below How to manage Home Sections? for more detail. - Our Blogs Section: This section is setup from Admin Panel / Appearance / Customize / Theme Options / Home Sections.
Refer below How to manage Home Sections? for more detail. - Footer Widget Section: This section is setup from Admin Panel / Appearance / Customize / Theme Options / Widgets.
Refer below How to add Widgets? for more detail. - Footer Copyright Section: To setup this section you need to go to Admin Panel / Appearance / Customize / Theme Options / Footer.
Refer below How to manage Copyright Text? for more detail.
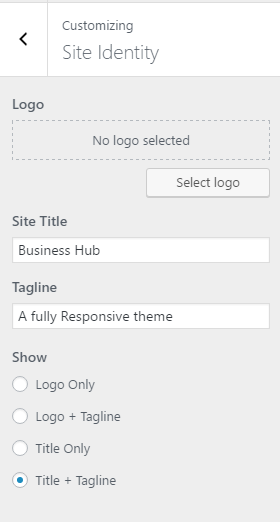
1. From Customize section, go to Site Identity.
2. From Site Identity, you will be able to add various options related to site identity like:
- Logo ( Only available in WordPress version greater than or equal to 4.5 ): It changes the main logo of the site.
- Site Title:It changes the main site title of the site.
- Tagline:It changes the tagline (i.e:Description) of the site.Just below site title.
- Show:There are various options available for displaying about the Site. They are:
- Logo only
- Logo+Tagline
- Title Only
- Title+ Tagline
You can check any of the above options as per your requirement.
- Site Icon:The Site Icon is used as a browser and app icon for your site.Icon must be square, and at least 512px wide and tall.
![]()
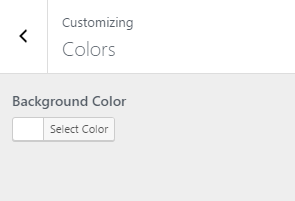
1.From Customize section, go to Color Option..
2. Under Color Options you will see Background color option. Now change the color as per your need.
1. From Customize section, go to Theme Options.
2. From Theme Options, you will see different sections. They are:
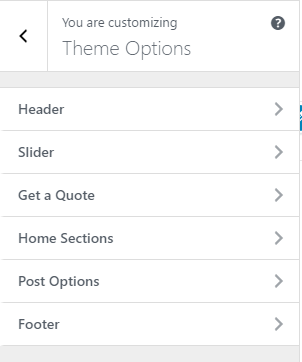
The above section are described below:
1. From Customize section, go to Theme Options.
2. From Theme Options, you will see Header.
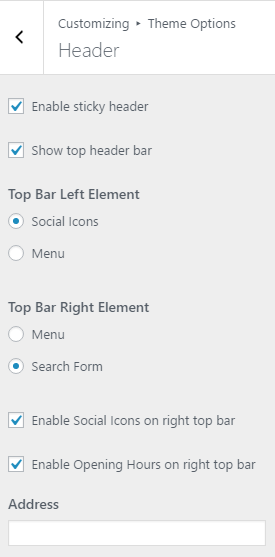
3. In Header Options, you will see:
- Enable Sticky Header: To check or uncheck whether to make header sticky or not.
- Show top header bar: To check or uncheck whether to show or not the top header bar.
- Top bar left element: To display either Social links or Menu in Top bar left part of the site.
- Top bar right element: To display either Search form or Menu in Top bar right part of the site.
- Enable Social Icons on right top bar: To check or uncheck whether to enable Social Icons on right top bar or not.
- Enable Opening Hours on right top bar: To check or uncheck whether to enable opening hours on right top bar or not.
- Address: To enter the Address.
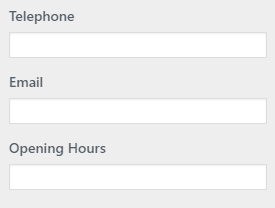
- Telephone: To enter the telephone number.
- Email: To enter the email.
- Opening Hours: To enter the opening hours.
1. From Customize section, go to Theme Options.
2. From Theme Options, you will see Slider.
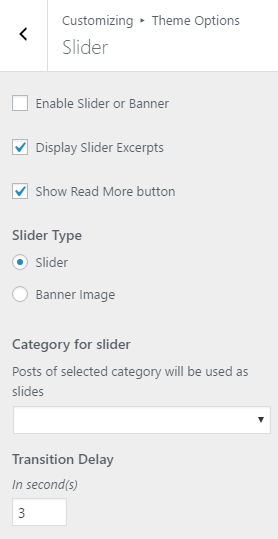
3. In Slider Options, you will see:
- Enable Slider or Banner: To check or uncheck whether to display slider or not.
- Display Slider Excerpts: To check or uncheck whether to display the slider excerpts or not.
- Show Read More button: To check or uncheck whether to display Read more button or not .
- Slider Type: To choose slider type either slider or banner image.
- Category for Slider: To choose which category to display in the slider.
- Transition Delay: To set transition delay.
- Transition Duration: To set transition duration.

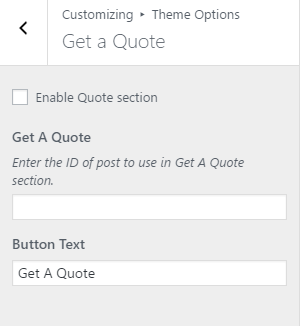
1. From Customize section, go to Theme Options.
2. From Theme Options, you will see Get a Quote.
3. In Get a Quote Option, you will see:
- Enable Quote Section: To check or uncheck whether to enable quote section or not.
- Get a Quote: To enter the ID of post to use in Get a Quote section..
- Button Text: To enter the text to display in button.
1. From Customize section, go to Theme Options.
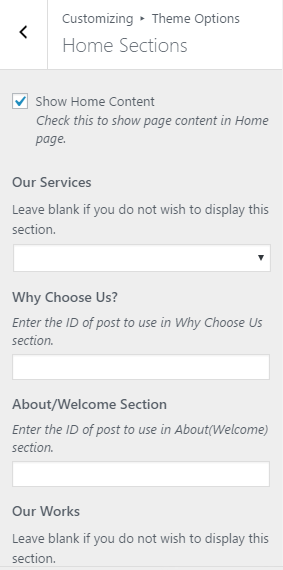
2. From Theme Options, you will see Home Sections.
3. In Home Sections, you will see:
- Show Home content: To check or uncheck whether to display Home content or not.
- Our Services: To select any category from the drop down to display in this section.
- Why Choose Us:To enter the Id of any post to display in this section.
- About/Welcome Section: To enter the Id of any post to display in this section.
- Our Works: To select any category from the drop down to display in this section.
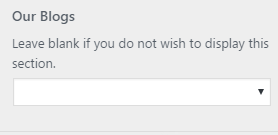
- Our Blogs: To select any category from the drop down to display in this section.
1. From Customize section, go to Theme Options.
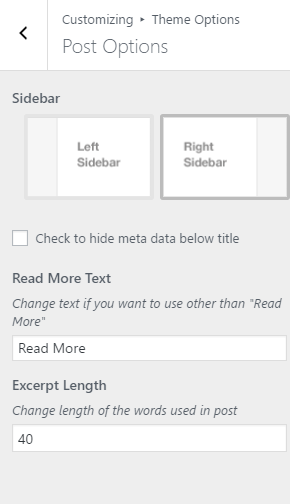
2. From Theme Options, you will see Post Sections.
3. In Post Sections, you will see:
- Sidebar: To choose between left sidebar and right sidebar.
- Check to hide meta data below title: To check or uncheck whether to hide meta data below title or not.
- Read More Text:To enter the text to display in Read More Text.
- Excerpt Length: To choose the length of words.
1. From Customize section, go to Theme Options.
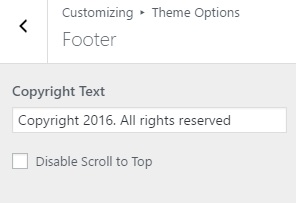
2. From Theme Options, you will see Copyright Text.
3. In Copyright Text, you will see:
- Copyright Text: To enter the copyright text.
- Disable Scroll to top: To check or uncheck whether to disble scroll to top or not.
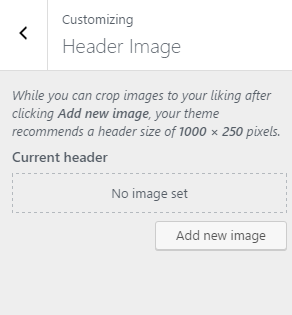
1. From Customize section, go to Header Image.
2. Select the image for Header section available on media library or upload from the other location.
3. If the preview is fine, click on “Save and Publish to apply recently uploaded logo.
Note:The theme recommends a Header Size of 1000px X 250px.
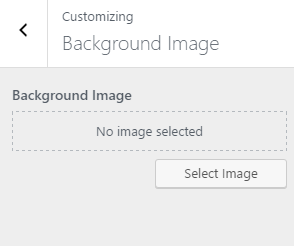
1. From Customize section, go to Background Image.
2. Select the image for Backgroud available on media library or upload from the other location.
3. If the preview is fine, click on “Save and Publish to apply recently selected/uploaded image as Background Image.
After you select any specified image,you will see Preset section.
In Preset section, you will see various options for adjusting the image size.
- Default
- Fill Screen
- Fit to Screen
- Custom
- Repeat
-
- Overall, These Options help to maintatin below features of
Background Image.
- Image Postion: You can adjust the image position according to the arrow.
- Image Size: You will be able to choose various options from the dropdown. (Fit to screen , original , Fill Screen) you can chose any as your requirement .
- Repeat Background Image: You can check this to repeat the background image .
- Scroll with Page: You can check this option to scroll the image with the page .
- Background Color: You will also see different color options for Background Image. Now change the color as per your need.
.
1. From Customize section, go to Menus.
2. From Menus, click “Add a Menu” button and you will be able to create a menu.
3. Now, click Add Items while adding pages and Remove to remove pages according to your requirement to the specified Menu.
4.You can create more menus in a similar way.After creating and adding pages to the Menu, you need to set location to that menu.
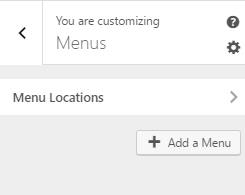
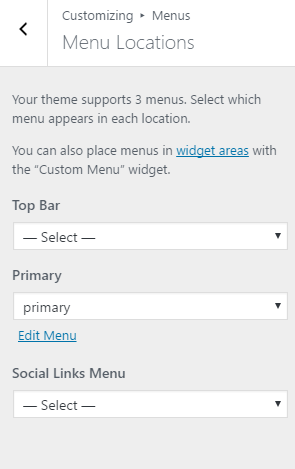
1. From Customize section, go to Menus and inside it you will find Menu Locations.
2. In those Menu Locations, You can add Menus.Here, you will see those before created Menu in the drop down of each Menu Location .
3.If the preview looks fine, save the changes by clicking on Save and publish button.
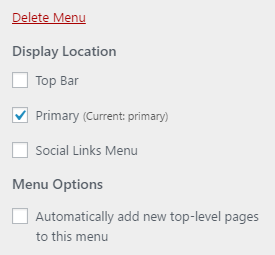
You can also see different display locations inside each specified Menus.You can check or uncheck it as per requirement.
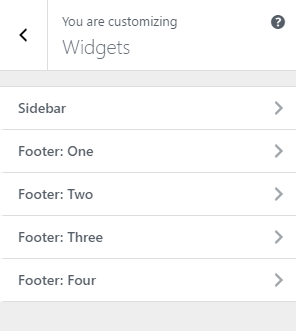
1. From Customize section, go to Widgets.
2. From Widgets, you will see different sections to add widget where you will be able to Add a Widget or Remove widgets by going to particular widget section.
3. And the added widget will be displayed in particular section that you have added.
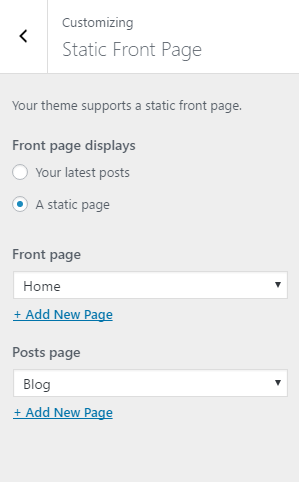
1.From Customize section, go to Static Front Page .
2.From Static Front Page, You will be able to set any page as A Static page and you will find Your Latest Posts page option as well.
