
Themes Instructions
Select a Theme from the drop down menu
Table of Contents
- 1.Theme Installation
- 2.How to setup front page as shown in the demo?
- 3.How to manage Site Title, Logo, Tagline and Site Icon?
- 4.How to manage Colors ?
- 5.How to manage Header Image?
- 6.How to manage Background Image?
- 7.How to manage Theme Options?
- 8.How to manage Featured Slider?
- 9.How to manage Menus?
- 10.How to add Widgets?
- 11.How to manage Static Front Page?
- 12.How to manage Additional CSS?
Corpo Eye
After you download this theme , you can choose either of the approaches given below to install your theme.
- Log in to the WordPress Administration Panels.
- Select the Appearance panel, then Themes.
- Select Add New.
- Then select Upload Theme.
- Click Browse Locate corpo-eye.zip Theme in your computer.
- Select corpo-eye.zip and click Install Now.
You can use FTP client like FileZilla to connect your web server.
- Unzip corpo-eye.zip to your Desktop.
- Using an FTP client to access your host web server, go to /wp-content/themes/ and upload your new copy of Corpo Eye Theme.
- Now, log into the WordPress Dashboard with your login details.
- Select the Appearance panel, then Themes.
- You will see the theme in the list.
- Then click Activate button.
- Now the theme will be activated and go through the following options to set up the theme step wise.
The demo is divided into different sections as shown in the image below:
The different sections are described below:
1. Site Identity and Primary Menu Section: The Site Identity section is setup from Admin Panel / Appearance / Customize / Site Identity and for Primary Menu section you need to setup from Admin Panel / Appearance / Customize / Menu. Refer below How to manage Site Identity ? and How to manage Menu ? for more details.
2. Featured Slider Section: This section is setup from Admin Panel / Appearance / Customize / Featured Slider. Refer below How to manage Featured Slider ? for more details.
3. Our Services Section: This section is setup from Admin Panel / Appearance / Customize / Widgets. Refer below How to manage Widgets ? for more details.
4. Latest News Section: This section is setup from Admin Panel / Appearance / Customize / Widgets. Refer below How to manage Widgets ? for more details.
5. Call to Action Section: This section is setup from Admin Panel / Appearance / Customize / Widgets. Refer below How to manage Widgets ? for more details.
6. Services Section: This section is setup from Admin Panel / Appearance / Customize / Widgets. Refer below How to manage Widgets ? for more details.
7. Primary Widget Section: This section is setup from Admin Panel / Appearance / Customize / Widgets. Refer below How to manage Widgets? for more details.
8. Footer Contact Section: This section is setup from Admin Panel / Appearance / Theme Options / Footer Contact Options. Refer below How to manage Footer Contact Options ? for more details.
9. Footer Copyright Section: This section is setup from Admin Panel / Appearance / Customize / Footer Options. Refer below How to manage Footer options ? for more details.
1. From Customize section, go to Site Identity.
2. From Site Identity, you will be able to add various options related to site identity like:
- Logo: It changes the main logo of the site.
- Site Title: It changes the main site title of the site.
- Tagline: It changes the tagline (i.e:Description) of the site.Just below site title.
- Site Icon: The Site Icon is used as a browser and app icon for your site.Icon must be square, and at least 512px wide and tall.
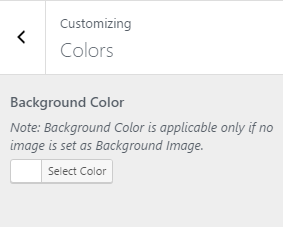
1. From Customize section, go to Colors.
2. Select the Background color .
3. If the preview is fine, click on “Save and Publish to apply recently selected color.
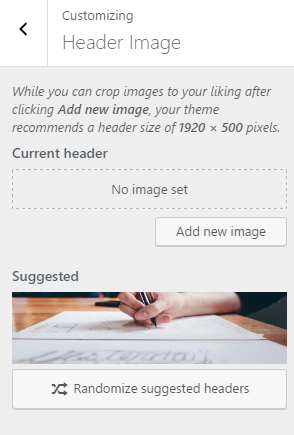
1. From Customize section, go to Header Image.
2. Select the image for Header available on media library or upload from the other location.
3. If the preview is fine, click on Save and Publish to apply recently selected/uploaded image as Header Image.
1. From Customize section, go to Background Image.
2. Select the image for Background available on media library or upload from the other location.
3. If the preview is fine, click on Save and Publish to apply recently selected/uploaded image as Background Image.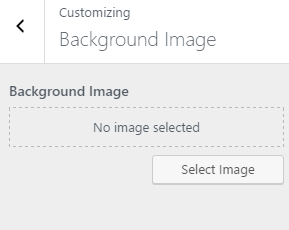
1. From Customize section, go to Theme Options.
2. From Theme Options, you will see different sections. They are:
1. From Customize section, go to Theme Options.
2. From Theme Options, you will see Header.
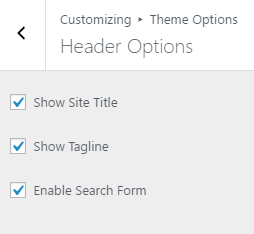
3. In Header Options, you will see:
- Show Site Title: To check or uncheck whether to show or not the site title.
- Show Tagline: To check or uncheck whether to show or not the tagline.
- Enable Search Form: To check or uncheck whether to enable or not the search form.
1. From Customize section, go to Theme Options.
2. From Theme Options, you will see Header.
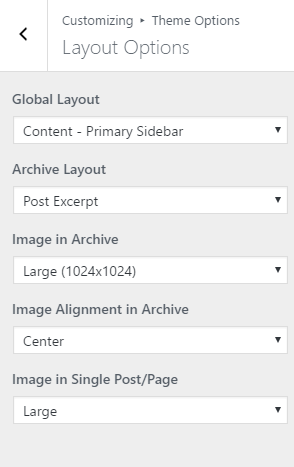
3. In Header Options, you will see:
- Global Layout: To choose the global layout and the options are: Content-Primary sidebar, Primary sidebar-Content, Three Columns and No Sidebar.
- Archive Layout: To choose the archive layout and the options are: Post Excerpt and Full Post.
- Image in Archive: To choose the image size in archive.
- Image Alignment in Archive: To choose the image alignment in archive and the options are:Left, Right, Center and None.
- Image in Single Post/Page: To choose the image in single post/page and the options are:Large and No Image.
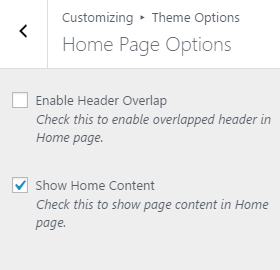
1. From Customize section, go to Theme Options.
2. From Theme Options, you will see Home Page Options.
3. In Home Page Options, you will see:
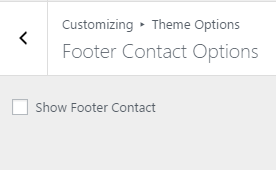
1. From Customize section, go to Theme Options.
2. From Theme Options, you will see Footer Contact Options.
3. In Footer Contact Options, you will see:
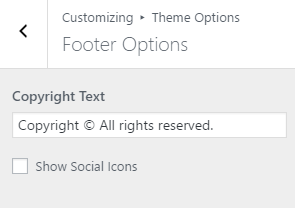
1. From Customize section, go to Theme Options.
2. From Theme Options, you will see Footer Options.
3. In Footer Options, you will see:
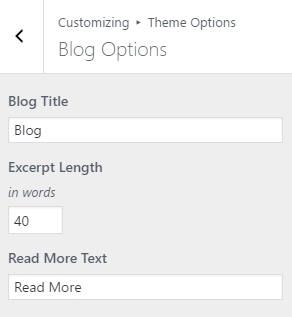
1. From Customize section, go to Theme Options.
2. From Theme Options, you will see Blog Options.
3. In Blog Options, you will see:
1. From Customize section, go to Featured Slider.
3. In Featured Slider , you will see:
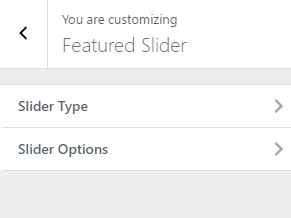
- Slider Type : Here, you will see the drop down options to Disabled and Static Front Page only.
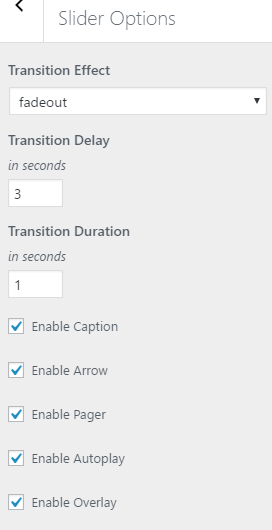
- Slider Options: Here, you will see the following options.
1. From Customize section, go to Menus.
2. From Menus, click “Add a Menu” button and you will be able to create a menu.
3. Now, click Add Items while adding pages and Remove to remove pages according to your requirement to the specified Menu.
4.You can create more menus in a similar way.After creating and adding pages to the Menu, you need to set location to that menu.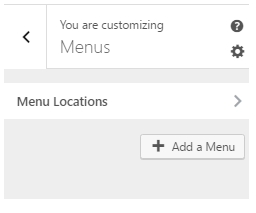
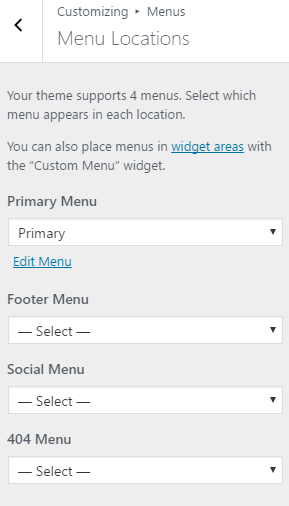
1. From Customize section, go to Menus and inside it you will find Menu Locations.
2. In those Menu Locations, You can add Menus.Here, you will see those before created Menu in the drop down of each Menu Location .
3.If the preview looks fine, save the changes by clicking on Save and publish button.
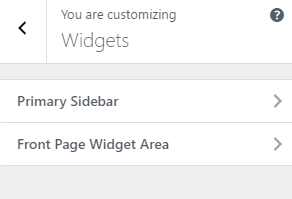
1. From Customize section, go to Widgets.
2. From Widgets, you will see different sections to add widget where you will be able to Add a Widget or Remove widgets by going to particular widget section.
3. And the added widget will be displayed in particular section that you have added.
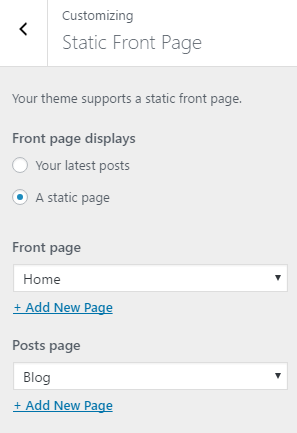
1.From Customize section, go to Static Front Page .
2.From Static Front Page, You will be able to set any page as A Static page and you will find Your Latest Posts page option as well.


