
Themes Instructions
Select a Theme from the drop down menu
Table of Contents
- 1.Introduction
- 2.Theme Installation
- 3.How to manage Site Title, Logo, Tagline and Site Icon?
- 4.How to manage Colors?
- 5.How to manage Header Image?
- 6.How to manage Background Image?
- 7.How to manage Menu Options?
- 8.How to Add widgets?
- 9.How to set Static Front Page?
- 10.How to manage Featured Slider Options?
- 11.How to manage Promotion Headline?
- 12.WooCommerce Plugin
- 13.How to manage Bottom Section?
- 14.How to manage Theme Options?
- 14.1.How to manage Custom CSS Options?
- 14.2.How to manage Excerpt Options?
- 14.3.How to manage Font Family Options?
- 14.4.How to manage Footer Editor Options?
- 14.5.How to manage Homepage / Frontpage Options?
- 14.6.How to manage Layout Options?
- 14.7.How to manage Pagination Options?
- 14.8.How to manage Scrollup Options?
- 14.9.How to manage Single Post Navigation?
- 14.10.How to manage Update Notifier?
- 14.11.How to manage Breadcrumb Options?
- 14.12.How to manage Social Links?
- 14.13.How to manage Reset all settings?
- 15.Updating Theme Using FTP
Flat Commerce Pro
Flat Commerce Pro is a clean & fresh flat style designed WordPress Theme. Aided with responsive and retina-ready design, your store’s product catalog would have an upmarket look and feel across all modern devices. Create an exquisite shop for your online store showcasing brand and products, company website, personal portfolio or even a blog to start with.
Thank you for purchasing the theme. After you purchase and download your theme from Theme Palace you can choose either of the approaches given below to install your theme.
- Log in to the WordPress Administration Panels.
- Select the Appearance panel, then Themes.
- Select Add New.
- Then select Upload Theme.
- Click Browse Locate flat-commerce-pro.zip Theme in your computer.
- Select flat-commerce-pro.zip and click Install Now.
To update Theme though FTP, follow these basic steps:
- Download the latest version of Flat Commerce Pro from your Theme Palace member My-Account to your Desktop
- Unzip flat-commerce-pro.zip to your Desktop
- Using an FTP client to access your host web server, go to /wp-content/themes/ and upload your new copy of Flat Commerce Pro Theme which shall replace the old files.
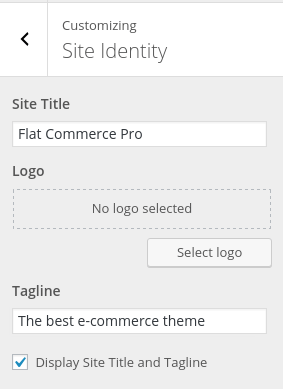
1. From Customize section, go to Site Identity.
2. From Site Identity, you will be able to add various options related to site identity like:
- Site Title: It changes the main site title of the site.
- Logo: ( Only available in WordPress version greater than or equal to 4.5 ) It changes the main logo of the site.
- Tagline: It changes the tagline (i.e. Description) of the site. Just below site title.
- Display Site Title and Tagline: This enables/disables the site title and tagline from the site
- Site Icon: The Site Icon is used as a browser and app icon for your site. Icon must be square, and at least 512 px wide and tall.
- Check to move Site Title Tagline before logo: Checking this check-box moves the site title and tagline before the logo.
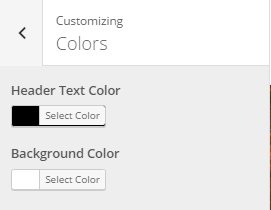
1. From Customize section, go to Colors.
2. From Colors, you will be able to add various options like:
- Header Text Color: This changes the header text color of the site.
- Background Color: This changes the background color of the site.
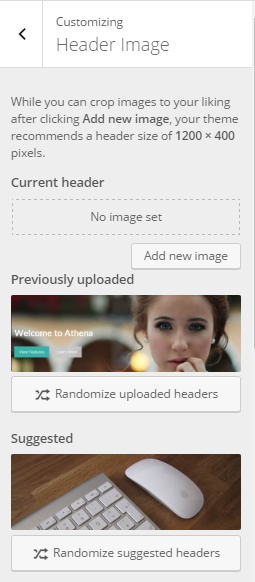
1. From Customize section, go to Header Image.
2. From Header Image, you will be able to add various options like:
- Current header: The header image that you have currently set. Click on Add new image to select new from media gallery.
- Previously uploaded: The header image that you have previously uploaded.
- Suggested: This is just suggested header image for you. You can keep suggested image as well.
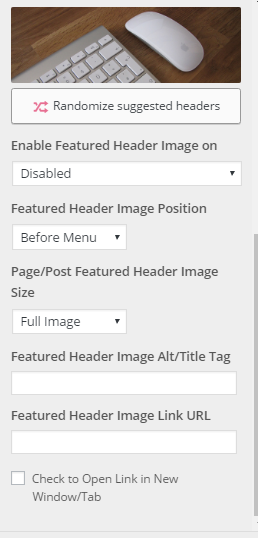
- Enable Featured Header Image on: You will have following different option here:
- Homepage/Frontpage: This enables the header image on Homepage/Frontpage.
- Excluding Homepage: This enables header image on the site excluding Homepage.
- Excluding Homepage, Page/Post Featured Image: This enables header image on the site excluding Homepage with Page/Post’s Featured Image as header image.
- Entire Site: This enables the header image on the entire site.
- Entire Site, Page/Post Featured Image: This enables the header image on entire site with particular Page/Post Featured Image as header image.
- Pages and Posts: This enables header image on Pages and Posts.
- Disabled: This disables header image on entire site.
- Featured Header Image Position: You will see following choices under this option:
- Before Menu: This keeps the header image before the main menu.
- After Menu: This keeps the header image after the main menu.
- After Slider: This keeps the header image after the slider.
- Page/Post Featured Header Image Size: You will see following choices under this option:
- Full Image: This will set the full image size of header image in Page/Post Featured Header Image.
- Large Image: This will set the large image size of header image in Page/Post Featured Header Image.
- Slider Image: This will set the slider image size of header image in Page/Post Featured Header Image.
- Featured Header Image Alt/Title Tag: This is alternative text for header image.
- Featured Header Image Link URL: This is for the header image link.
- Check to Open Link in New Window/Tab: If you have set URL for header image then checking this check-box will open the header image link in New Window/Tab.
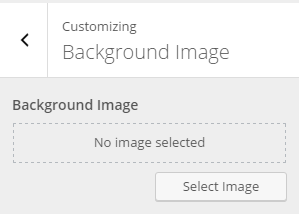
1. From Customize section, go to Background Image.
2. From Background Image, you will see:
Background Image: This will change the background image for the entire site.
1. From Customize section, go to Menus.
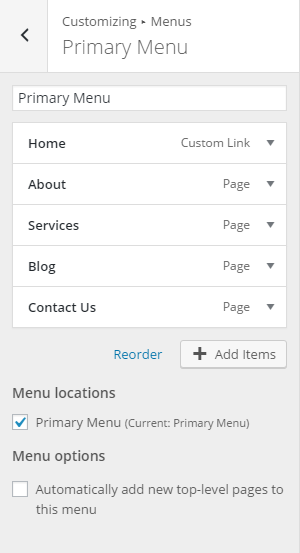
2. From Menus, click “Add a menu” button and you will be able to create a menu. For e.g: below image shows Primary Menu.
3. Now you need to add items to this created menu.
1. From Customize section, go to Menus.
2. From Menus, click on particular menu you want to edit and you will be able to see the created menu, options to reorder menu and add menu items.
1. From Customize section, go to Menus.
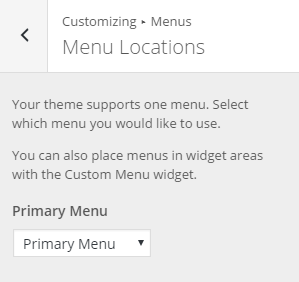
2. From Menus, you will see Menu Location.
3. Now you can choose menu for Primary Menu which will be displayed in top header section as main menu.
1. From Customize section, go to Menus.
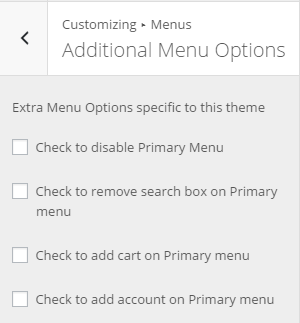
2. From Menus, you will see Additional Menu Options.
3. In Additional Menu Options you will see:
- Check to disable Primary Menu: This will disable Primary Menu from the site in top header section.
- Check to remove search box on Primary menu: This will remove search box on Primary menu.
- Check to add cart on Primary menu: This will add cart Icon on Primary menu.
- Check to add account on Primary menu: This will add account on Primary menu.
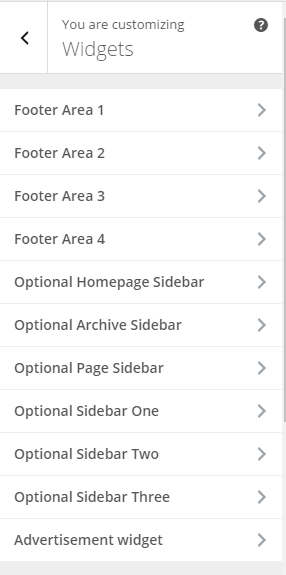
1. From Customize section, go to Widgets.
2. From Widgets, you will be able to Add and Remove widgets.
1. For setting up Sidebar for particular Page/Post you need to go to particular page/post edit screen.
2. Now you will see Flatcommerce Options at the bottom of page/post editor screen.
3. Before you select sidebar for particular page/post you need to add widget to particular Optional Sidebar by going to Appearance / Widgets.
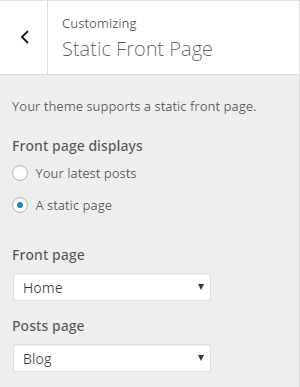
1. From Customize section, go to Static Front Page.
2. From Static Front Page, you will be able to set a page as Static Front Page and you will find post page option as well.
1. From Customize section, go to Featured Slider.
2. From Featured Slider, you will be able to see following two sections:
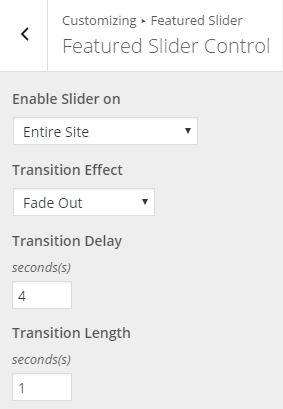
Featured Slider Control: Under this you will see following options:
- Enable Slider on: In this option you will find Homepage/Frontpage, Entire site and Disabled.
- Transition Effect: In this option you will find different choices, select one that suits your need.
- Transition Delay: This is transition delay put the value in seconds.
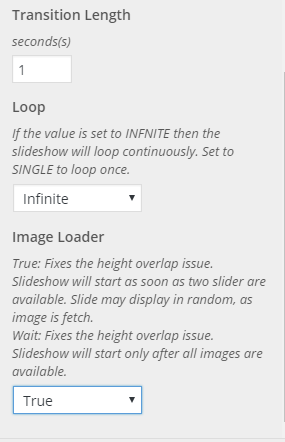
- Transition Length: This is transition length put the value in seconds.
- Loop: This is for the looping of the slider images. Here you will have Infinite or Single choices.
- Image Loader: This is for the loading of the images. Select one from the available choices that suits you need.
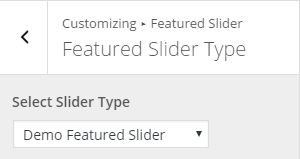
Featured Slider Type: In this section you will see
Select Slider Type: with following options:
- Demo Featured Slider: This displays the demo slider of the theme.
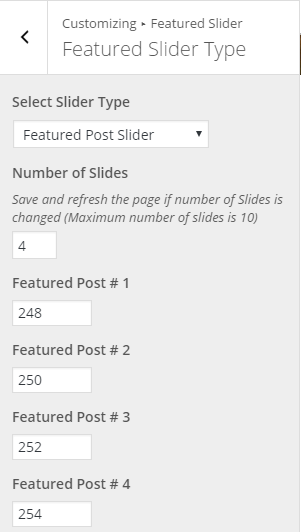
- Featured Post Slider: By selecting this choice you will additional setting as follows:
- Note: The boxes for writing post id changes as the Number of Slides option is change. You need to refresh the page to see the changes.
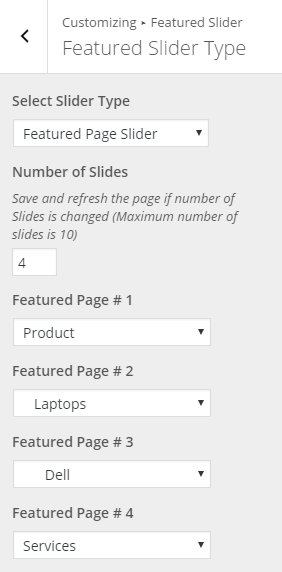
- Featured Page Slider: By selecting this choice you will additional setting as follows:
- Note: The boxes for selecting page changes as the Number of Slides option is change. You need to refresh the page to see the changes.
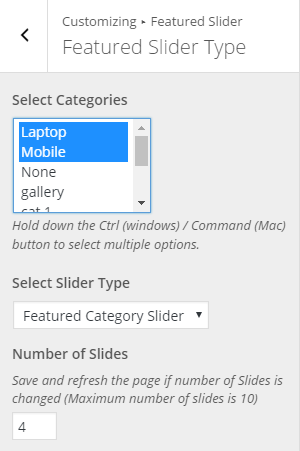
- Featured Category Slider: By selecting this choice you will additional setting as follows:
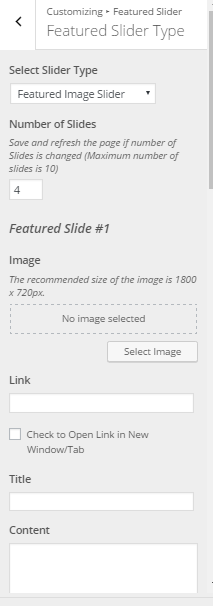
- Featured Image Slider: By selecting this choice you will additional setting as follows:
- Number of Slides: This controls the number of slider to be displayed in the site.
- Featured Slide #Id: Under each Featured Slide #Id section you will see:
- Image: Choose image from media gallery or you can upload new image. Note:Please see recommended size before you upload image.
- Link: This is the link for the particular image.
- Check to Open Link in New Window/Tab: This will open the link in New Window/Tab.
- Title: You can write slider caption title here.
- Content: You can write slider caption content here.
- Note: The section of Featured Slide #Id changes as the Number of Slides option is changed. You need to refresh the page to see the changes.
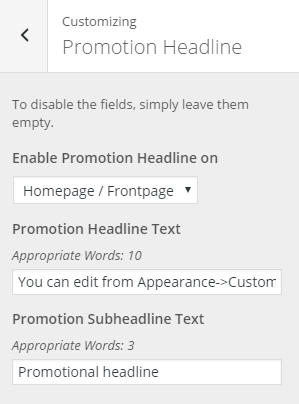
1. From Customize section, go to Promotion Headline.
2. From Promotion Headline, you will see:
- Enable Promotion Headline on: You will see different choices to enable promotion headline on. Select the choice that suits your need.
- Promotion Headline Text: This is for Promotion Headline Text.
- Promotion Subheadline Text: This is for Promotion Subheadline Text.
How to manage section added after activation of WooCommerce Plugin?
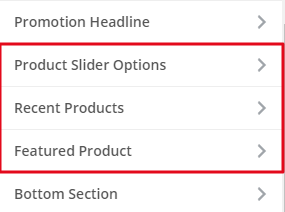
Following section will be added in customizer section after activation of WooCommerce Plugin.
The above section are described below:
1. From Customize section, go to Product Slider Options.
2. From Product Slider Options, you will see:
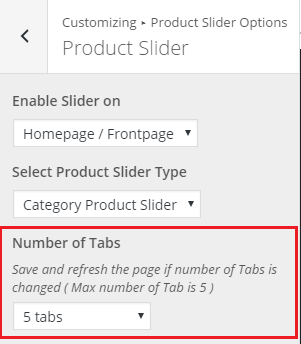
Product Slider: Under this section you will see following settings:
- Enable Slider on: You will see different options as drop-down. Select one of your need.
Select Product Slider Type: Here you will have two options as:
- Demo Product Slider: This options displays the theme’s demo product slider.
- Category Product Slider: If you select Category Product Slider, the you will see additional option to select Number of Tabs, where you need to enter number of tabs to appear in product slider.
The above sections are define below:
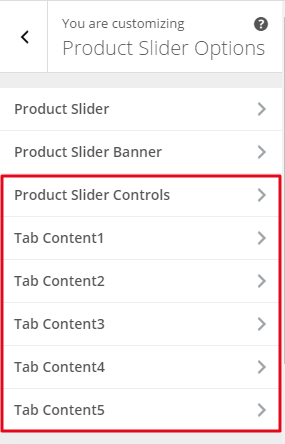
Note: Selecting Category Product Slider and Number of Tabs will result in addition section in Customize / Product Slider Options, which are Product Slider Controls and Tab Content#ID(Related to Number of Tabs ) sections.
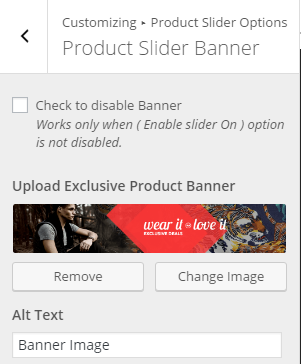
Product Slider Banner: In this section you will see:
- Check to disable Banner: This options enables/disables the banner picture.
- Upload Exclusive Product Banner: You can select banner image from here.
- Alt Text: This is alternative text for the image.
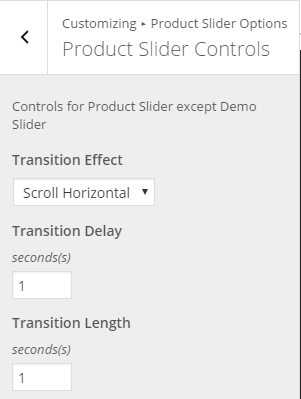
Product Slider Controls: Under this section you will see:
- Transition Effect: You will see multiple transition effect for product slider. Choose on that you like.
- Transition Delay: You can enter transition delay in seconds here.
- Transition Length: You can enter transition length.
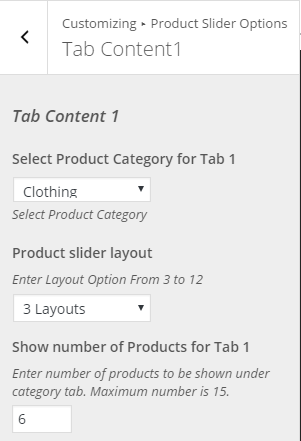
Tab Content#ID: The number of this section changes as the Number of Tabs changes.(You need to refresh the page to see the changes.)
Here you will see following settings:
- Select Product Category for Tab 1: Select Product Category from here for Tab 1.
- Product slider layout: Select product slider layout.
- Show number of Products for Tab 1: Select number of product for tab 1 from here.
Note:The setting for other tabs are similar as above.
1. From Customize section, go to Recent Products.
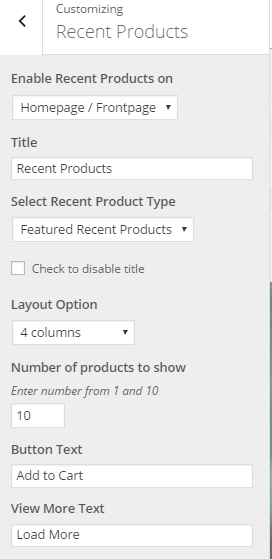
2. From Recent Products, you will see:
- Enable Recent Products on: Select option that you want to enable recent products on.
- Title: Edit title of recent product from here.
- Select Recent Product Type: This is described below:
Select Recent Product Type: You will see two options here:
- Demo Recent Products: This displays the demo recent product.
- Featured Recent Products: If Featured Recent Products is selected following settings will show up:
- Check to disable title: This disables the title of this section.
- Layout Option: You can select the number of columns as a layot from here.
- Number of product to show: You can select the number of products to be displayed in this section.
- Button Text: You can write the text for button from here.
- View More Text: You can change the text for View More from here.
1. From Customize section, go to Featured Products.
2. From Featured Products, you will see:
- Enable Featured Product Content on: You can select option to enable featured product on from here.
- Check to Move above Footer: You need to check this check-box to move this section above footer.
- Featured Product Background Image: You can choose background image of featured product from here.
- Headline for Featured Product Content: This is for the headline for featured product content.
- Sub-headline for Featured Product Content: This is for the sub-headline for featured product content. You can select either Text or Image. If you select Text, then you will see a box to write your text and if Image is selected then, you will see an image upload box, where you can select image.
- Select Content Type: This is described below:
Select Content Type: Here you will see following options:
- Demo Featured Content: This displays the demo featured content.
- Featured Product Content: If this option is selected you will see following additional settings.
- Number of columns: You can select the number of columns as a layout for displaying.
- Check to disable link on the featured products: Checking this check-box disables the link on featured products.
- Number of Featured Product Content: Here you can select the number of featured product content as a result Featured Product #ID changes (You need to refresh page to see the changes.)
- Featured Product #ID: You need to enter ID of featured product here. (Note: The number of Featured Product #ID section changes as the Number of Featured Product Content changes. )
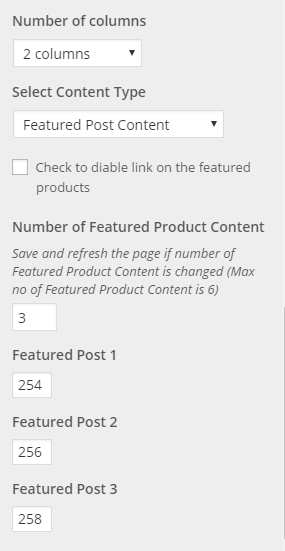
- Featured Post Content: If this option is selected you will see following additional settings.
- Number of columns: You can select the number of columns as a layout for displaying.
- Check to disable link on the featured products: Checking this check-box disables the link on featured products.
- Number of Featured Product Content: Here you can select the number of featured product content as a result Featured Post #ID changes (You need to refresh page to see the changes.)
- Featured Post #ID: You need to enter ID of featured post here. (Note: The number of Featured Post #ID section changes as the Number of Featured Product Content changes. )
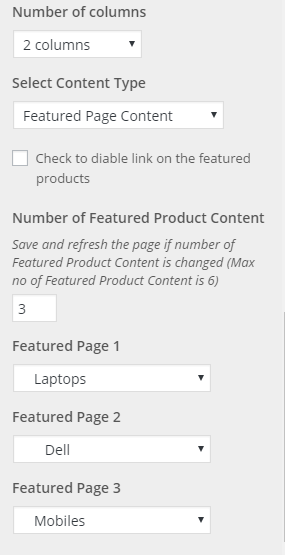
- Featured Page Content: If this option is selected you will see following additional settings.
- Number of columns: You can select the number of columns as a layout for displaying.
- Check to disable link on the featured products: Checking this check-box disables the link on featured products.
- Number of Featured Product Content: Here you can select the number of featured product content as a result Featured Page #ID changes (You need to refresh page to see the changes.)
- Featured Page #ID: You need to enter ID of featured page here.(Note: The number of Featured Page #ID section changes as the Number of Featured Product Content changes. )
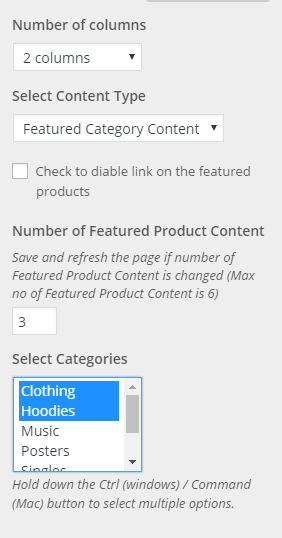
- Featured Category Content: If this option is selected you will see following additional settings.
- Number of columns: You can select the number of columns as a layout for displaying.
- Check to disable link on the featured products: Checking this check-box disables the link on featured products.
- Number of Featured Product Content: Here you can select the number of featured product content to be displayed.
- Select Categories: Here you can select single/multiple categories of whose posts will be displayed as featured product content.
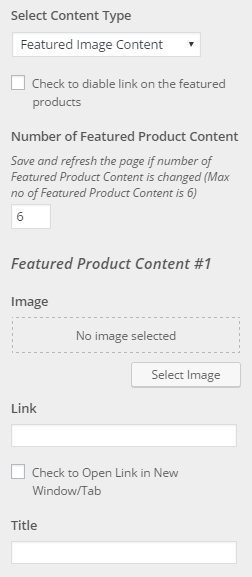
- Featured Image Content: If this option is selected you will see following additional settings.
- Number of columns: You can select the number of columns as a layout for displaying.
- Check to disable link on the featured products: Checking this check-box disables the link on featured products.
- Number of Featured Product Content: Here you can select the number of featured product content as a result Featured Page #ID changes (You need to refresh page to see the changes.)
- Featured Product Content #ID: ( Image ) Here you need to Select an image which will displayed as featured product #ID.
- Link: Here you need to write link for that featured product.
- Check to Open Link in New Window/Tab: You need to check this check-box if you want the link to open in New Window/Tab.
- Title: You need to write title for featured product content here.
Similarly you can setup next Featured Product Content #ID.
1. From Customize section, go to Bottom Section.
2. From Bottom Section, you will see:
- Enable Bottom Section on: You will see different choices to enable bottom section on. Select the choice that suits your need.
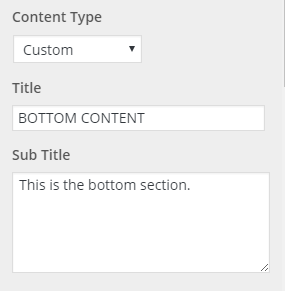
- Content Type: This section is described below:
Content Type: Here you will see following options:
- Custom: If this option is selected you will see Title(For title text) and Sub Title(For sub-title text).
- Page: If this option is selected then you will see Select Page option and you need to select page for content.
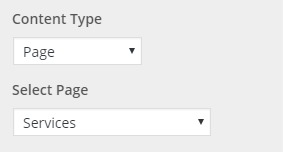 Further you will see below more options:
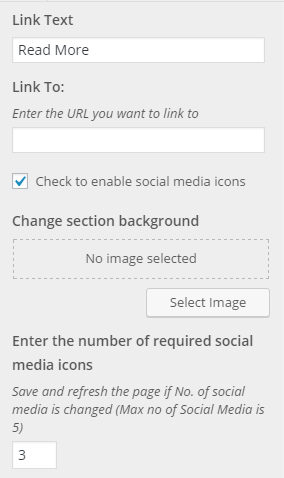
- Check to display “Read More” link: This enables/disables Read More link in this section.
- Link Text: This is for Read More text. Change your text for Read More here.
- Link To: This is for Read More link.
- Check to enable social media icons: This enables/disable social media icons in this section.
- Change section background: This changes the background image of this section.
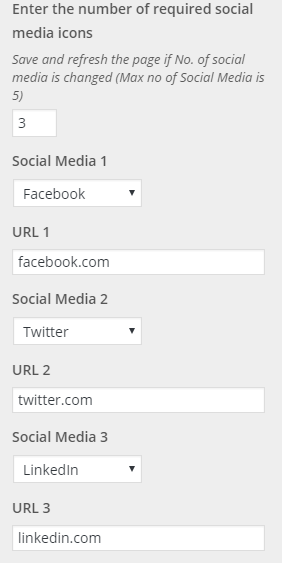
- Enter the number of required social media icons: Choose the number of social media icon to be displayed. Note: Refresh the page to see the number has changed.
- Social Media #: Enter the social media icon here.
- URL #: Enter the social media URL from here.
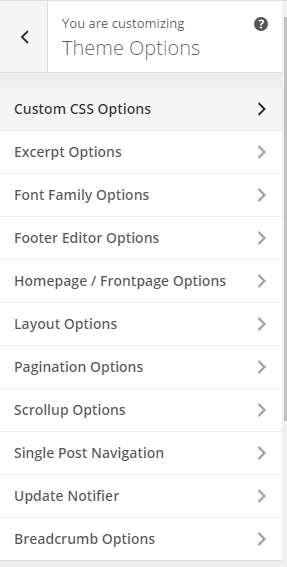
You will see following sections under Theme Options:
- Custom CSS Options
- Excerpt Options
- Font Family Options
- Footer Editor Options
- Homepage / Frontpage Options
- Layout Options
- Pagination Options
- Scrollup Options
- Single Post Navigation
- Update Notifier
- Breadcrumb Options
1. From Customize section, go to Theme Options.
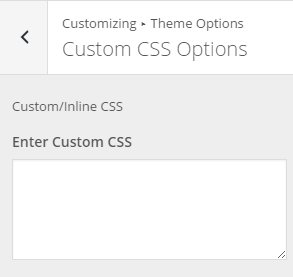
2. From Theme Options, you will see Custom CSS Options.
3. Here you can write Custom CSS for the site.
1. From Customize section, go to Theme Options.
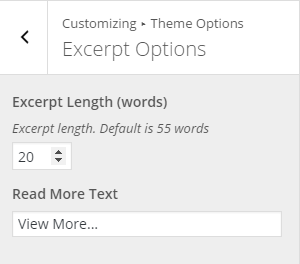
2. From Theme Options, you will see Excerpt Options.
3. In Excerpt Options you will see:
- Excerpt Length (words): This option is for excerpt length in words. Select the number according to your site.
- Read More Text: You can change the text of Read More from here.
1. From Customize section, go to Theme Options.
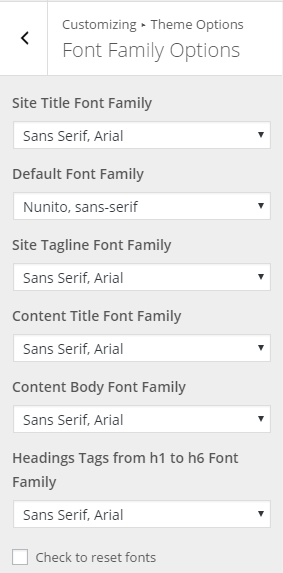
2. From Theme Options, you will see Font Family Options.
3. In Font Family Options you will see:
- Site Title Font Family: This changes the site tilte font family.
- Default Font Family: This is the default font for the theme.
- Site Tagline Font Family: This changes the site tagline font family.
- Content Title Font Family: This changes the content title font family.
- Content Body Font Family: This changes the content body font familly.
- Headings Tags from h1 to h6 Font Family: This changes the font of headings tags from h1 to h6.
- Check to reset fonts: This option is for resetting the above all values to default.
1. From Customize section, go to Theme Options.
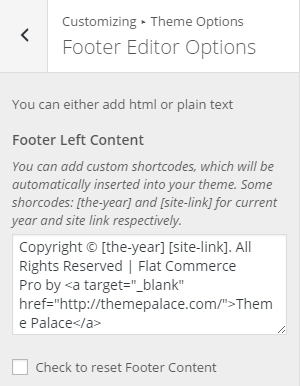
2. From Theme Options, you will see Footer Editor Options.
3. In Footer Editor Options you will see:
- Footer left Content: Here you can edit the content to be displayed in left of the footer section.
- Check to reset Footer Content: This is to reset footer content to default value/text.
1. From Customize section, go to Theme Options.
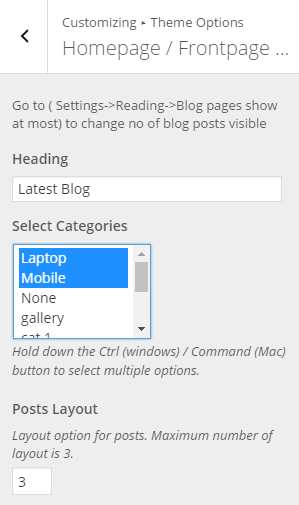
2. From Theme Options, you will see Homepage / Frontpage Options.
3. In Homepage / Frontpage Options you will see: ( You need to select Latest Post in Front page displays for this option to work. )
- Heading: This is for blog listing heading text.
- Select Categories: You can select single or multiple categories here, by selecting which the particular category post’s will be displayed.
- Posts Layout: This options is number of columns layout for the post to be displayed. You will have 1, 2 or 3 columns layout available. Select the number of columns that suits your site.
1. From Customize section, go to Theme Options.
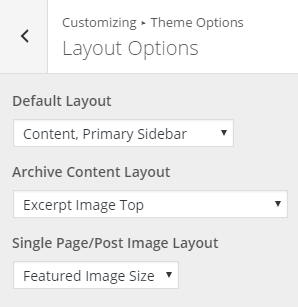
2. From Theme Options, you will see Layout Options.
3. In Layout Options you will see:
- Default Layout: This is for the default theme layout. You will see different options here select one that you would prefer.
- Archive Content Layout: This options is for archive content layout. Select option that suits your site.
- Single Page/Post Image Layout: This option is for single page/post image layout. Select option that you like.
1. From Customize section, go to Theme Options.
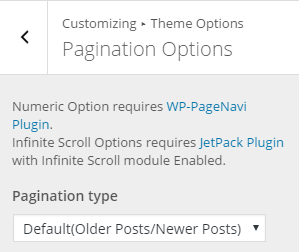
2. From Theme Options, you will see Pagination Options.
3. In Pagination Options you will see:
Pagination type: You will see following options:
- Default (Older Posts/Newer Posts): This is default pagination option.
- Numeric: This is for numeric pagination option for which you require WP-PageNavi Plugin installed to function.
- Infinite Scroll (Click): This option is for infinite scroll on click which require JetPack Plugin with Infinite Scroll module Enabled.
- Infinite Scroll (Scroll): This option is for infinite scroll on scroll which require JetPack Plugin with Infinite Scroll module Enabled.
1. From Customize section, go to Theme Options.
2. From Theme Options, you will see Scrollup Options.
3. In Scrollup Options you will see:
- Check to disable Scroll Up: This option is to enable/disable scroll up button in the site. If you want to disable scroll up button then you need to check this check-box or else vice-versa.
1. From Customize section, go to Theme Options.
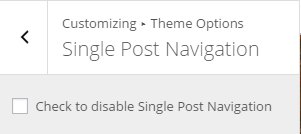
2. From Theme Options, you will see Single Post Navigation.
3. In Single Post Navigation you will see:
- Check to disable Single Post Navigation: This option is to enable/disable single post navigation. If you want to disable single post navigation then you need to check this check-box or else vice-versa. This option works when you are on particular single post.
1. From Customize section, go to Theme Options.
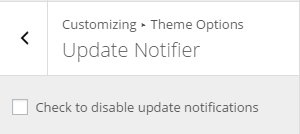
2. From Theme Options, you will see Update Notifier.
3. In Update Notifier you will see:
- Check to disable update notifications: Checking this check-box will disable update notifications.
1. From Customize section, go to Theme Options.
2. From Theme Options, you will see Breadcrumb Options.
3. In Breadcrumb Options you will see:
- Check to enable Breadcrumb: This enables the breadcrumb on the site.
- Check to enable Breadcrumb on Homepage: This enables breadcrumb option on homepage.
- Separator between Breadcrumbs: This is the separator between Breadcrumbs.
1. From Customize section, go to Social Links.
2. In Social Links, you will see:
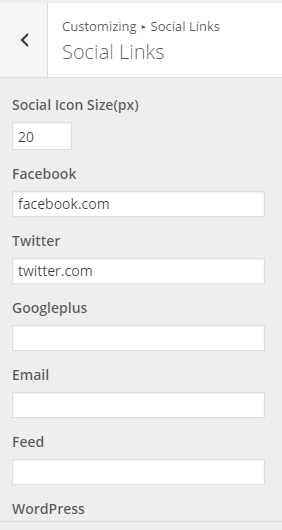
Social Links: Inside social links you will see:
- Social Icon Size(px): Select you icon size in px.
- Social Icon’s link: Now here you will see different box for social icon’s URL. You need to write the URL of each icon if you want to display else leave it empty.
- This option is related with TP: Social Icons widget.
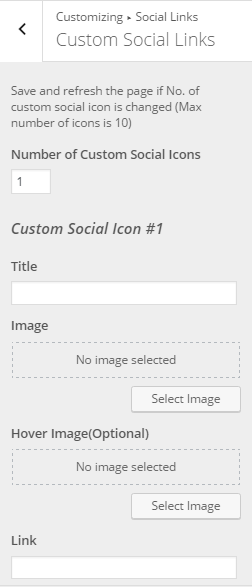
Custom Social Links: Here you will see:
- Number of Custom Social Icons: Enter number of custom social icons you want and refresh the page to see the changes.
- Custom Social Icon #ID: Under this section you will see:
- Title: This is for custom social icon title.
- Image: This is for the image of custom social icon.
- Hover Image(Optional): This is for hover image of custom social icon.
- Link: This is for the link of custom social link.
1. From Customize section, go to Reset all settings..
2. In Reset all settings you will see:
- Check to reset all settings to default: Checking this check-box and refreshing the page will reset all theme settings to default.
To update Theme though FTP, follow these basic steps:
- Download the latest version of Mediclean Pro from your Theme Palace member My-Account to your Desktop
- Unzip flat-commerce-pro.zip to your Desktop
- Using an FTP client to access your host web server, go to /wp-content/themes/ and upload your new copy of
Flat Commerce Pro Theme which shall replace the old files.
