
Themes Instructions
Select a Theme from the drop down menu
Table of Contents
- 1.Introduction
- 2.Theme Installation
- 3.Theme Options
- 3.1.How to change site title and tagline?
- 3.2.How to customize background?
- 3.3.To customize background image ?
- 3.4.How to change site layout?
- 3.5.How to show social icons in Header?
- 3.6.How to show tagline Header?
- 3.7.How to show search Box in Header?
- 3.8.How to show social icons in header?
- 3.9.How to change logo and icons?
- 3.10.How to change search placeholder?
- 3.11.How to change the site layout?
- 3.12.How to change pagination?
- 3.13.How to change copyright text?
- 3.14.How to change excerpt length and read more text?
- 3.15.How to change Breadcrumb type?
- 3.16.How to manage social icons ?
- 3.17.Advanced Setting?
- 3.18.How to change featured slider setting?
- 4.Widgets
WEN Associate
WEN Associate is an ode to own affiliation with esteemed Associates. Simplicity – as we practice – is upheld with this general-purpose responsive theme with amass of pluggable sections.
Thank you for using WEN Associate. The below steps will guide you to install and use this theme.
- Log in to the WordPress Administration Panels.
- Select the Appearance panel, then Themes.
- Select Add New.
- Then select Upload Theme.
- Click Browse Locate wen-associate.zip Theme in your computer.
- Select wen-associate.zip and click Install Now.
- Unzip wen-associate.zip to your Desktop.
- Using an FTP client to access your host web server, go to /wp-content/themes/ and upload your new copy of WEN Associate Theme.
- Now, log into the WordPress Dashboard with your login details.
- Select the Appearance panel, then Themes.
- You will see the theme in the list.
- Then click Activate button.
- Now the theme will be activate and go through the following options to set up the theme step wise.
A simplified theme options that give you more customization options. These are general guidelines to perform some of the basic yet useful features of WEN Associate Theme. ( Hint: We assume we are in “Customize” section for whole theme customization part i.e. Appearance > Customize.)
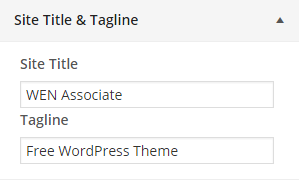
- From “Customize” section, go to Theme Options > Site title and tagline
- From the Site title section, enter the site title
- From the tagline section, enter the site slogan
- If the preview is fine, click on “Save & Publish” to apply on site.
To customize background color
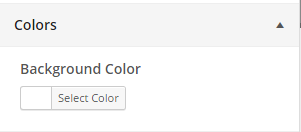
- From “Customize” section, go to Theme Options > Colors
- Select the background color palette
- If the preview is fine, click on “Save & Publish” to apply on site.
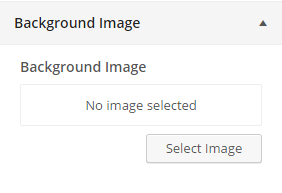
- From “Customize” section, go to “Background Image”, click on “Select Image” and upload image either from your System or Media files.
- Set additional options include “Background Repeat”, “Tile”, “Tile Horizontally” and “Tile Vertically”.
- Click on “Save & Publish” to save the changes.
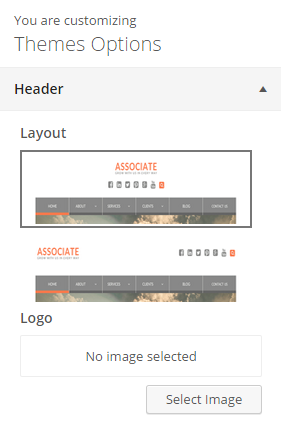
- From “Customize” section, go to Theme Options > Header.
- From the “Layout” section, click the available layout and look the preview.
- If preview is fine, click on “Save & publish” to apply it.
- From “Customize” section, go to “Theme Options > Header” section.
- Turn on “Show Social Icons” check box to show social icons. (You need to create social menu and assign it to “Social”)
- Click on “Save & Publish” to save the changes.
- From “Customize” section, go to “Theme Options > Header” section.
- Turn on “Show tagline” check box to show slogans.
- Click on “Save & Publish” to save the changes.
- From “Customize” section, go to “Theme Options > Header” section.
- Turn on “Show Search Box” check box to show search icon.
- Click on “Save & Publish” to save the changes.
- From “Customize” section, go to “Theme Options > Header” section.
- Enable “Show Social Icons” check box to show social icon.
- Click on “Save & Publish” to save the changes.
- From “Customize” section, go to Theme Options > Icons.
- To change favicon, click on “Select Image” from “Favicon” section and upload image.
- To change Web Clip Icon ,click on “Select Image” from “Web Clip Icon” section and upload image
- If the preview is fine, click on “Save & Publish” to apply recently uploaded logo.
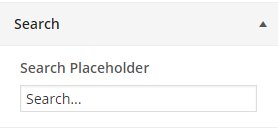
- From “Customize” section, go to Theme Options > Search
- Change the text of the placeholder.
- If the preview is fine, click on “Save & Publish” to apply the placeholder text.
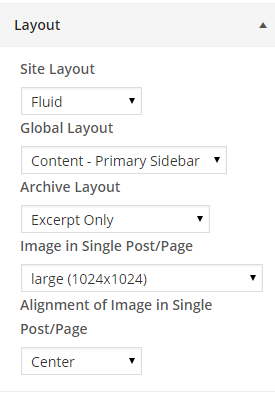
Form “Customize” section go to Theme Options>Layout.
- To change site layout choose Site layout, Fluid or Boxed.
- To change global layout, choose the available options form drop down arrow. Primary sidebar-content, Content-primary sidebar, Three columns and No sidebar are available options.
- To change archive layout, choose the available options from drop down arrow. Excerpt Only, Excerpt and thumbnail, Full post are available options.
- To change Image in single post/page, choose the available options form drop down arrow.
- To change image in single post page, choose the available options from drop down arrow. The available options are None, Left, Center and Right.
- If preview is fine, click on “Save and Publish” to save the above changes.
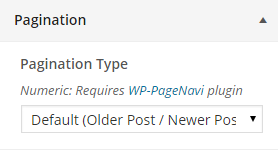
- From “Customize” section, go to Theme Options > Pagination.
- Select Default Older post/Newer post or Numeric.
- If preview is fine, click on “Save and Publish” to save the above changes.
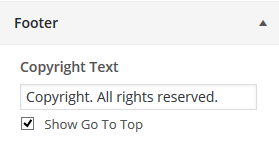
- From “Customize” section, go to “Theme Options > Footer” section.
- Modify “Copyright Text”.
- Check “Show Go To Top”, if “Go To Top” is needed on footer.
- Click on “Save & Publish” to save the changes.
- From “Customize” section, go to “Theme Options > Blog” section.
- Change the excerpt length and read more text form here. Default excerpt text length is 40 words and Read more text default is “Read more…”
- Exclude categories in blog, Enter category ID to exclude in Blog Page. Separate with comma (,) if more than one
- Check if “Author bio” to show.
- Click on “Save & Publish” to save the changes.
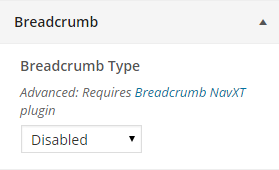
- From “Customize” section, go to “Theme Options > Breadcrumb” section.
- Choose the breadcrumb type.
- If the preview is fine click on “Save and Publish” button.
- From “Customize” section, go to “Theme Options > Social Icons” section.
- Turn on “Show Social Icons” checkbox to show social icons. (You need to create social menu and assign it to “Social”)
- Click on “Save & Publish” to save the changes.
- Add Custom CSS here and find the changes.
- If preview is fine click on “Save and Publish” button to save the changes.
Change Slider type:
- From “Customize” section, go to “Featured slider > slider type” section.
- Enable slider on setting > choose the options “Disable” or “Entire site” or “Home page/Front page”.
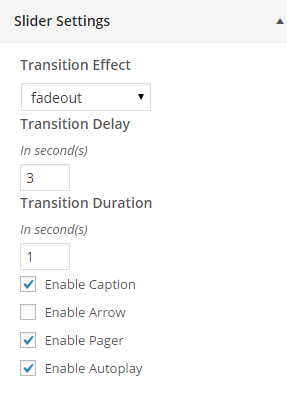
- Select slider setting > choose the available option.
- Select the available option for “Transition effect”.
- Enter the Transition delay in seconds.
- Enter the translation duration in seconds.
- Check for enable caption.
- Check for enable arrow.
- Check for enable pager.
- Check for enable auto play.
- If the preview is fine click on “Save and publish” to save the changes.
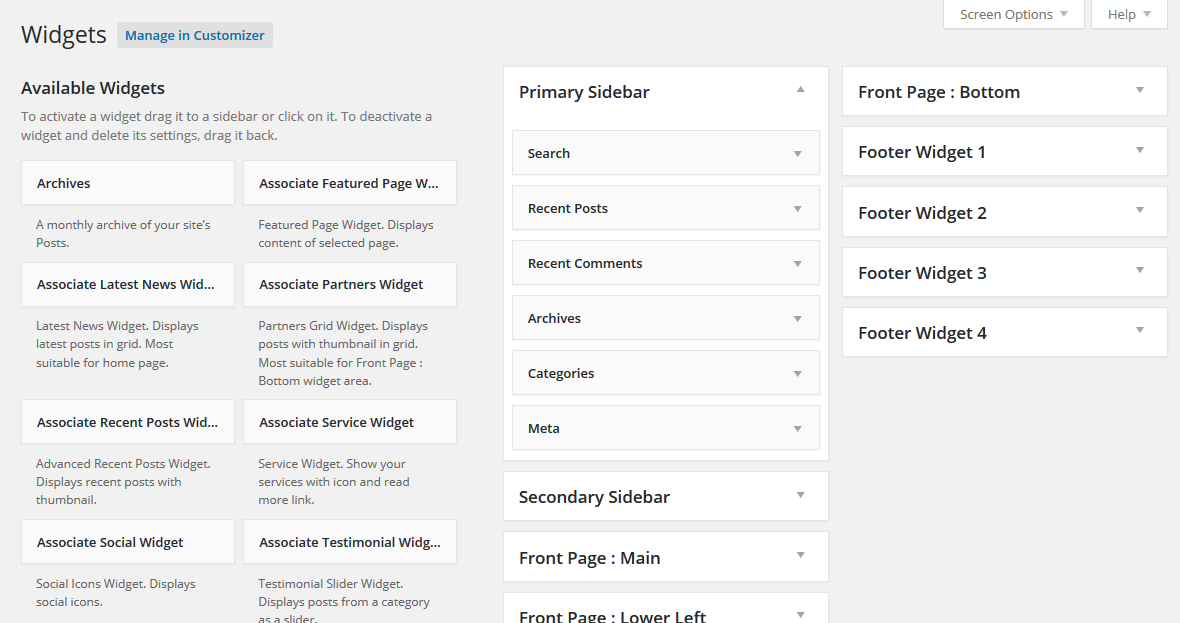
Several widgets are available in the theme. All the available widgets are easy to operate. Set the value or select the available options as needed. Operating method of every widgets are described below.
The available widgets in this theme are: Associate Featured page widget, Associate latest news widget, Associate partner widget, Associate recent posts widgets, Associate Service widgets, Associate Social Widget, Associate Testimonials widget. All the above widgets are added widgets on this theme. All the widgets have their own features and functions.
Featured Page Widget. Displays content of selected page.
Widget Parameters:
- Title: Title for this widget. Unchecked “Use Page Name as Widget Title” to use your own title. Otherwise widget use the title of page name.
- Select Page: Select the page to display.
- Show page Content: Select the full or short option as needed.
- Select image size: Select image size or can select no image also.
- Custom class: Add the custom class here.
Used to display the latest news.
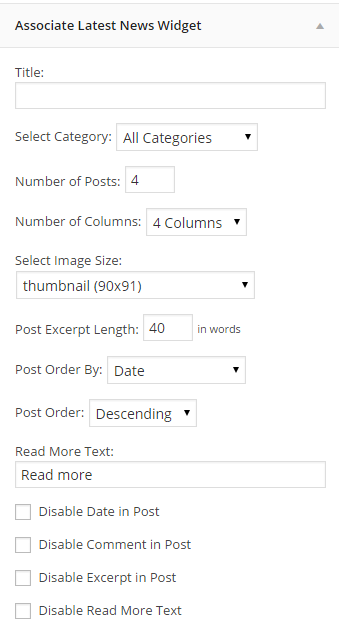
Widget Parameters:
- Title: Title of the widget.
- Select Category: Select the category to display on.
- Number of posts: Enter the value of post to display as latest news from above mentioned category.
- Number of Columns: Select the number of column from list.
- Select image size: Select the available size of image.
- Post Excerpt Length: Set the value of word length to display as excerpt.
- Post Order By: Order of post to display. Available options are; date, title, comment count, menu order, random.
Set the other available options as necessary.
This Widget is used for showing post of a specific category. The available options help for make the widget as needed.
Widget Parameters:
- Title: The title of widget.
- Select Category: Select the available category for displaying the post from.
- Number of posts: Enter the value to display the post in this widget.
- Number of Columns: Select the number of column available from the list.
- Select image size: Select the image size for displaying on the widget section.
- Excerpt Length: Size of the blog post to display as excerpt.
- Post Order By: Order of post to display. Available options are; date, title, comment count, menu order, random.
Set the other available options as necessary.
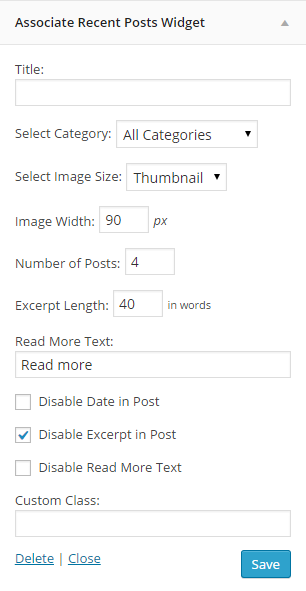
This widget is used for displaying the recent post on the available widgets area.
Widget Parameters:
- Title: Title of the widget.
- Select Category: Select the category to display the recent posts. The recent post will displayed from the selected category.
- Select Image Size: Select the image size to display on.
Set other available options as necessary.
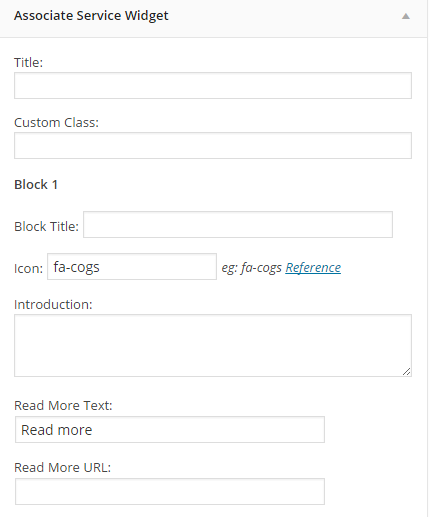
Associate Service widget is used to link the icon with the specific URL. You can add four block with specific URL and can set the available options as needed.
Widget Parameters:
- Title: Title of the widget.
- Custom Class: Add the custom class here.
Block 1:
- Block title: The title of first block.
- Icon: Icon used to identify the block.
- Introduction: Text to add on the block as an introduction. Usually few words are used to introduce the block.
- Read More Text: You can change the read more text as your wish.(Eg: Details)
- Read more URL: The URL after clicking the read more text or title of the block. This URL will open in the same window after clicking the read more or title of the block.
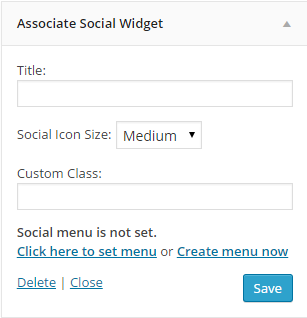
This widget is used to display the social menu in the widget area. First assign the social menu form Appearance > Menu and set the menu from here.
Widget parameters:
- Title: The title of the widget.
- Social icon size: The size of the social icon to display. Small, medium and large are available options.
- Custom Class: Add the Custom class here.
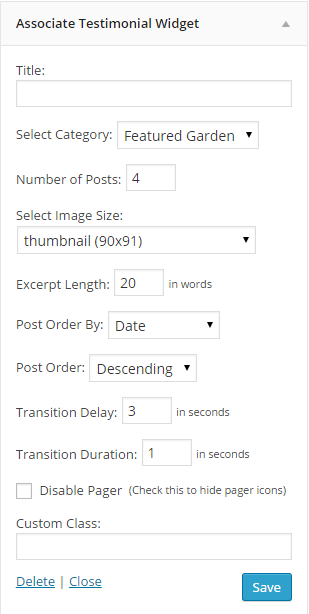
This widget help to display the all or select the number of post from specific category. All the post are displayed in post slider format.
Widget Parameters:
- Title: The title of the widget
- Select category: The post of category to display on.
- Number of Post: Number of post to display in the form of post slider in widget area.
- Select image Size: Select the size of the image form drop down option as required.
Use the available options as needed.
