

Themes Instructions
Select a Theme from the drop down menu
Table of Contents
- 1.Theme Installation
- 2.Approach I : From your admin dashboard.
- 3.Approach II : Upload and install theme through FTP client
- 4.How to set Homepage setting?
- 5.How to manage Site Title, Logo, Tagline and Site Icon?
- 6.How to setup front page as shown in the demo?
- 7.How to manage Theme Options?
- 8.How to manage Reset all settings?
- 9.How to manage Additional CSS?
- 10.Updating Theme Using FTP
Kidspress Pro
After you purchase and download your theme from Theme Palace, you can choose either of the approaches given below to install your theme:
- Log in to the WordPress Administration Panels.
- Select the Appearance panel, then Themes.
- Select Add New.
- Then, select Upload Theme.
- Click Browse. Locate kidspress-pro.zip theme in your computer.
- Select kidspress-pro.zip and click Install Now.
You can use FTP client like FileZilla to connect your web server.
- Unzip kidspress-pro.zip to your Desktop.
- Using an FTP client to access your host web server, go to /wp-content/themes/ and upload your new copy of Kidspress Pro theme.
- Now, log into the WordPress Dashboard with your login details.
- Select the Appearance panel, then Themes.
- You will see the theme in the list.
- Then, click Activate button.
- Now, the theme will be activated and go through the following options to set up the theme step wise.
From Customize section, go to Homepage Setting you will see two option.
- Your latest posts: When you choose this option then you will see these options.
- Your Latest Posts Title : This option only works if Static Front Page is set to “Your latest posts.” This option allows to set the title.
- A static page: you will be able to set a page as Front Page and you will find Post Page option as well.
Note: All the custom sections of homepage will only be visible on Homepage setting once you set a page for the Homepage Setting option.
From Homepage : you can set any page as Homepage .
From Posts Page : you can set any page as Blog.
-
- Enable content : Check to display Homepage’s content. If this option is enable then the content of homepage is displayed. For Example “Home” is set as the front page then content of home is displayed at home page design after enable this option.


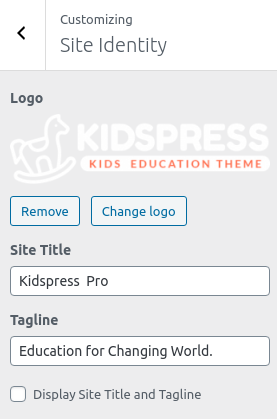
1. From Customize section, go to Site Identity.
2. From Site Identity, you will be able to add various options related to site identity like:
-
- Logo( Only available in WordPress version greater than or equal to 4.5 ): It changes the main logo of the site.
- Site Title : It changes the main site title of the site.
- Tagline : It changes the tagline (i.e:Description) of the site.Just below site title.
- Display Site Title and Tagline: This enables/disables the site title and tagline from the site
-
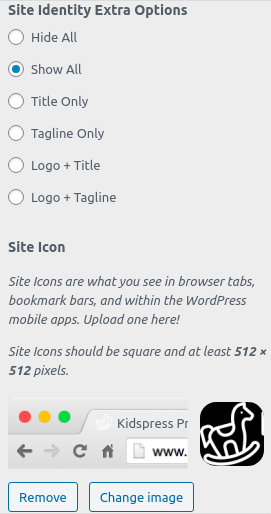
- Site Identity Extra Options
- Hide All: If you don’t want to display anything in header then click this option.
- Show All: If you want to display logo title tagline in header then click this option.
- Title Only: If you want to display only title in header then click this option.
- Tagline Only: If you want to display only tagline in header then click this option.
- Logo + Title: If you want to display logo and title in header then click this option.
- Logo + Tagline: If you want to display logo and tagline in header then click this option.
- Site Icon : The Site Icon is used as a browser and app icon for your site.Icon must be square and at least 512px wide and tall.
- Site Identity Extra Options
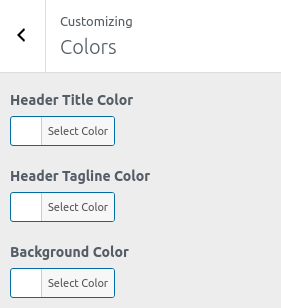
1. From Customize section, go to Colors.
2. From Colors, you will have these options:
-
- Header Title Color: This changes the header text color.
- Header Tagline Color : This changes the header tagline text color.
- Background Color: This changes the background color of the site.
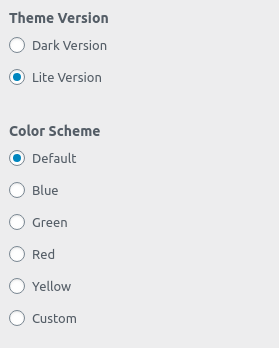
- Theme Version: This changes the theme version of the site.
- Color Scheme: This changes the theme color of the site.
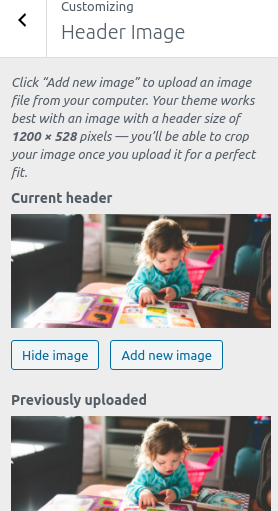
1. From Customize section, go to Header Image
2. From Header Image, you will have these options:
-
- Header Image This changes the header image.
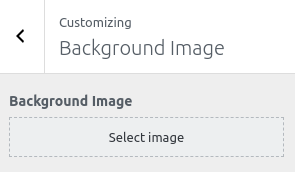
1. From Customize section, go to Background Image.
2. From Background Image, you will see:
Background Image:
-
- This will change the background image for the entire site.
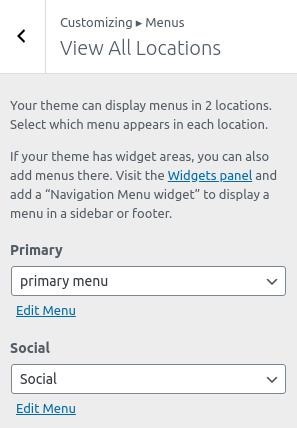
Note: Load free theme has two menu location provided as Primary, Social and Footer Menu.
-
- Menu Options :
To create menu, you need to go to Admin Panel / Appearance / Menu .
OR
You need to create menu from / Customize / Menus / Create Menu .
You can create more menus in similar way. After creating menu, you need to add pages to that menu.
To add pages to the menu, you need to create some pages (For e.g: “About Us” , “Contact”). After creating pages you need to add that pages to the menu.
After you added the pages to the menu set the menu location from / Customize / Menus / Menu Locations /.
Three locations are available.

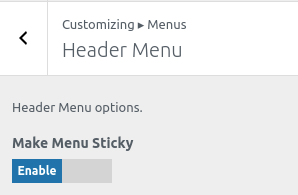
- Header Menu:
-
- Make Menu Sticky : This option is for menu sticky. If menu sticky is enable then the menu is fixed when user scroll.
-
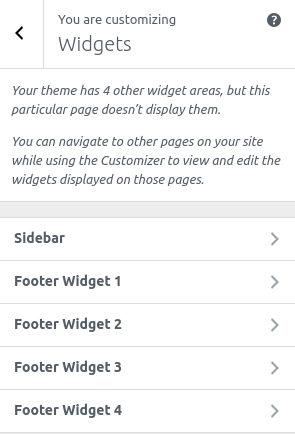
1. From Customize section, go to.
2. From Widgets, you will be able to Add and Remove widgets.
Note:
If you want to add widget area in footer then you must add widgets in Footer Widget 1, Footer Widget 2, Footer Widget 3, Footer Widget 4
Sidebar: This sidebar is default sidebar area. This sidebar area is dispaly at blog page, single blog pages, pages.
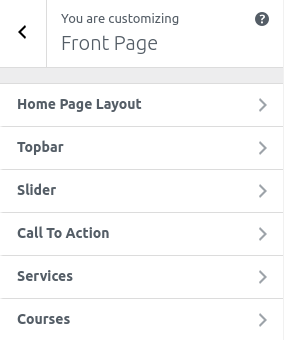
The demo of the front page can be divided into different sections as shown below.
- Home Page Layout
- Topbar
- Slider
- Call To Action
- Services
- Courses
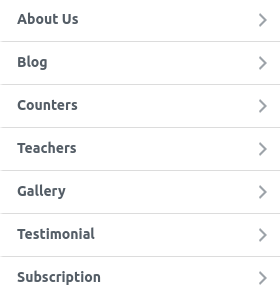
- About Us
- Blog
- Counters
- Teachers
- Gallery
- Testimonial
- Subscription
These section’s content are display when you choose a static page option on Homepage Setting.

Catch Themes Demo Import Plugins are high recommended Plugins in this theme. Catch Themes Demo Import Import is recommended for demo import of this theme. To import the dummy demo data:
- First Install Catch Themes Demo Import Plugin and active this plugin.
- Then go to Dashboard-> Appearance -> Import Demo Data
- Then click Import demo data button.
Note: You need to import demo data in fresh wordpress otherwise existing posts, pages, categories, images, custom post types or any other data will be deleted or modified.
You can see the divided sections in the image below :

The image below shows customizer options for the sections shown above :
To configure Top Bar Nav section, you need to go to Admin Panel / Appearance / Customize / Front Page / Top Bar Nav.
In this panel, you will find these options:
Home Page Layout
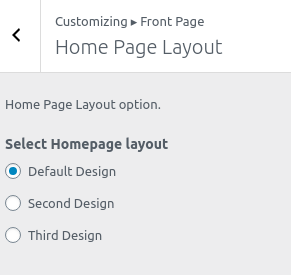
To configure Home Page Layout section, you need to go to Admin Panel / Appearance / Customize / Front Page / Home Page Layout.
In this panel, you will find:
-
-
- Select Homepage layout: This setting allows user to changes the home page layout.
-
-
- Topbar Section Enable : Check to enable on home-page otherwise Uncheck to hide.

After Slider section is enabled, you will see following options
-
-
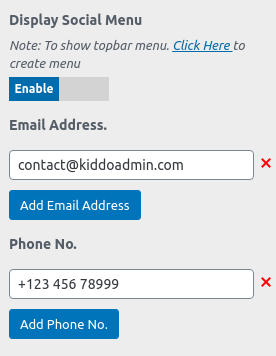
- Display Social Menu : Check to enable on social menu section Uncheck to hide.
- Email Address. : This setting allow user to set email address to show on topbar.
- Phone No. : This setting allow user to set phone no to show on topbar.
-
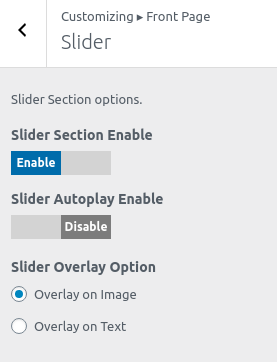
To configure Slider section, you need to go to Admin Panel / Appearance / Customize / Front Page / Slider.
In this panel, you will find these options:
-
- Slider Section Enable: Check to enable on home-page otherwise Uncheck to hide.
- Slider Autoplay Enable: Check to auto slide slider otherwise Uncheck.
- Slider Overlay Option: Choose Overlay on Image to overlay slider Image or Choose Overlay on Text to overlay slider text only.
After Slider section is enabled, you will see following options
-
-
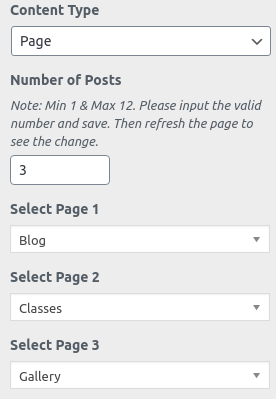
- Content Type : It contains select options ( Pages, Post, Category) which allow user to select title from one of those.
- Pages: Selecting Pages as Content Type allows user to choose Pages from Select Page setting where title of that selected Pages is displayed.
- Content Type : It contains select options ( Pages, Post, Category) which allow user to select title from one of those.
-
Pages Options : It contains following settings
-
-
-
-
- Number of posts : This setting allow user to set number to show posts.
- Select Page: This setting allows user to select page to get featured image and content of that page.
-
-
-
-
-
-
- Posts: Selecting Posts as Content Type allows user to choose Posts from Select Post setting where featured image and content of that selected posts is displayed.
-
-
Posts Options : It contains following settings
-
-
-
-
- Number of posts : This setting allow user to set number to show posts.
- Select Post : This setting allows user to select post to get featured image and content of that post.
-
-
-

-
-
-
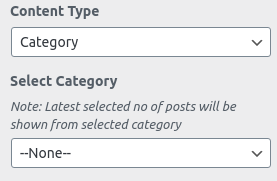
- Category: Selecting Category as Content Type allows user to choose Category from Select category setting where featured image and content of that selected Category is displayed as section content.
-
-
Category Options : It contains following settings
-
-
-
-
- Number of posts : This setting allow user to set number to show posts.
- Select Category : This setting allows user to select category to get the featured image and content of that category.
-
-
-

-
-
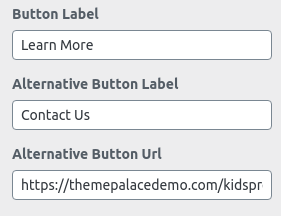
- Button Label : This setting allow user to set button text.
- Alternative Button Label : This setting allow user to set alternative button text.
- Alternative Button Url : This setting allow user to set alternative button url.
-
To configure Call To Action section, you need to go to Admin Panel / Appearance / Customize / Front Page / Call To Action.
In this panel, you will find these options:
-
- Call To Action Section Enable: Check to enable on home-page otherwise Uncheck to hide.
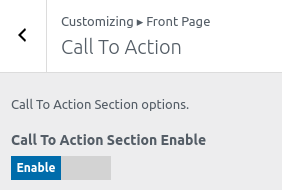
After Call To Action section is enabled, you will see following options
-
-
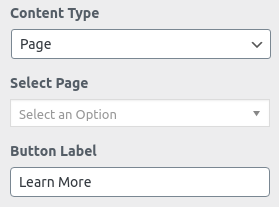
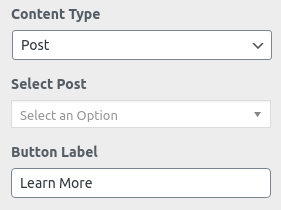
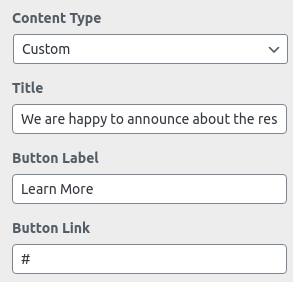
- Content Type : It contains select options ( Pages, Post, Custom) which allow user to select title from one of those.
- Page: Selecting Page as Content Type allows user to choose Page from Select Page setting where title of that selected Page is displayed.
- Content Type : It contains select options ( Pages, Post, Custom) which allow user to select title from one of those.
-
Pages Options : It contains following settings
-
-
-
-
- Select Page: This setting allows user to select page to get content of that page.
- Button Label : This setting allow user to set button text.
-
-
-
-
-
-
- Post: Selecting Post as Content Type allows user to choose Post from Select Post setting where content of that selected post is displayed.
-
-
Posts Options : It contains following settings
-
-
-
-
- Select Post : This setting allows user to select post to get content of that post.
- Button Label : This setting allow user to set button text.
-
-
-
-
-
-
- Custom: Selecting Custom as Content Type allows user to choose Custom from Select custom setting where content of that selected Custom is displayed as section content.
-
-
Custom Options : It contains following settings
-
-
-
-
- Title : This setting allow user to set title.
- Button Label : This setting allow user to set button text.
- Button Link : This setting allow user to set button url.
-
-
-
To configure Services section, you need to go to Admin Panel / Appearance / Customize / Front Page / Services.
In this panel, you will find these options:
-
- Services Section Enable: Check to enable on home-page otherwise Uncheck to hide.

After Services Slider section is enabled, you will see following options
-
-
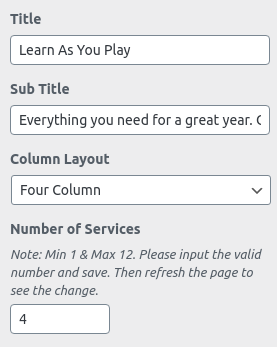
- Title : This setting allow user to set title.
- Sub Title : This setting allow user to set sub title.
- Column Layout : This setting allow user to set column layout.
- Number of Services : This setting allow user to set number to show posts.
- Button Label : This setting allow user to set button text.
- Button Link : This setting allow user to set button url.
-

-
-
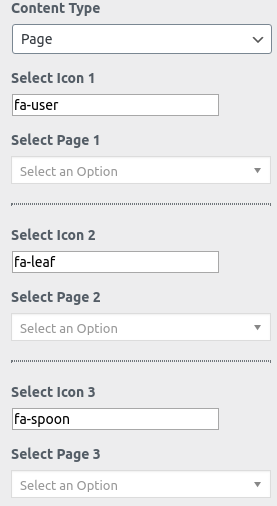
- Content Type : It contains select options ( Pages, Post, Category) which allow user to select title from one of those.
- Pages: Selecting Pages as Content Type allows user to choose Pages from Select Page setting where featured image and content of that selected Pages is displayed.
- Content Type : It contains select options ( Pages, Post, Category) which allow user to select title from one of those.
-
Pages Options : It contains following settings
-
-
-
-
- Select Page: This setting allows user to select page to get featured image and content of that page.
- Select Icon : This setting allow user to set icon.
-
-
-
-
-
-
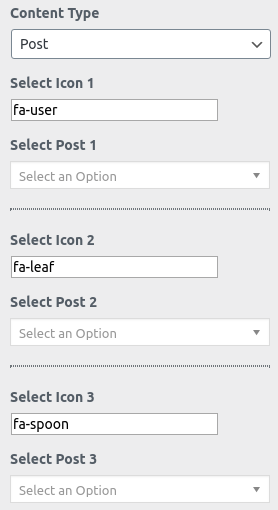
- Posts: Selecting Posts as Content Type allows user to choose Posts from Select Post setting where featured image and content of that selected posts is displayed.
-
-
Posts Options : It contains following settings
-
-
-
-
- Select Post : This setting allows user to select post to get featured image and content of that post.
- Select Icon : This setting allow user to set icon.
-
-
-
-
-
-
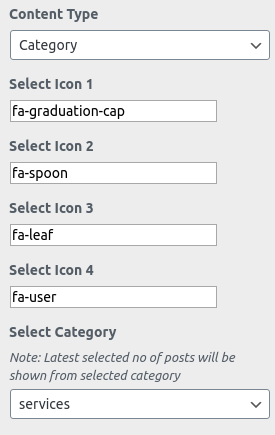
- Category: Selecting Category as Content Type allows user to choose Category from Select category setting where featured image and content of that selected Category is displayed as section content.
-
-
Category Options : It contains following settings
-
-
-
-
- Select Category : This setting allows user to select category to get the featured image and content of that category.
- Select Icon : This setting allow user to set icon.
- Select Category : This setting allows user to select category to get the featured image and content of that category.
-
-
-
To configure Courses section, you need to go to Admin Panel / Appearance / Customize / Front Page / Courses.
In this panel, you will find these options:
-
- Courses Section Enable: Check to enable on home-page otherwise Uncheck to hide.

After Courses Slider section is enabled, you will see following options
-
-
- Title : This setting allow user to set title.
- Sub Title : This setting allow user to set sub title.
- Enable Cloud Border : This setting allow user to set cloud border.
- Column Layout : This setting allow user to set column layout.
- Number of Courses : This setting allow user to set number to show posts.
-

-
-
- Content Type : It contains select options ( Pages, Post, Category, Course, Course Category) which allow user to select title from one of those.
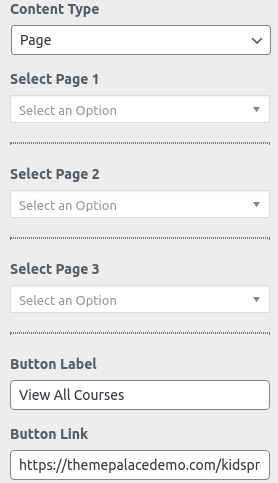
- Pages: Selecting Pages as Content Type allows user to choose Pages from Select Page setting where featured image and content of that selected Pages is displayed.
- Content Type : It contains select options ( Pages, Post, Category, Course, Course Category) which allow user to select title from one of those.
-
Pages Options : It contains following settings
-
-
-
-
- Select Page: This setting allows user to select page to get featured image and content of that page.
- Button Label : This setting allow user to set button text.
- Button Link : This setting allow user to set button url.
-
-
-
-
-
-
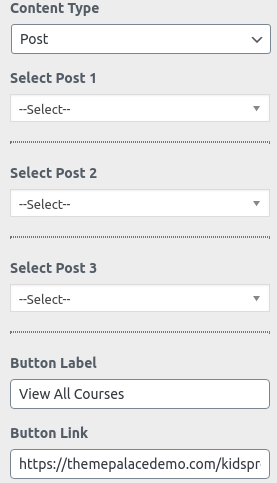
- Posts: Selecting Posts as Content Type allows user to choose Posts from Select Post setting where featured image and content of that selected posts is displayed.
-
-
Posts Options : It contains following settings
-
-
-
-
- Select Post : This setting allows user to select post to get featured image and content of that post.
- Button Label : This setting allow user to set button text.
- Button Link : This setting allow user to set button url.
-
-
-
-
-
-
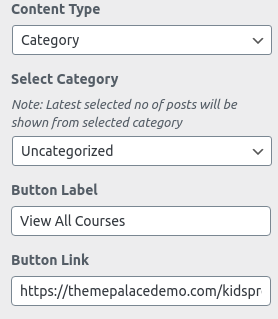
- Category: Selecting Category as Content Type allows user to choose Category from Select category setting where featured image and content of that selected Category is displayed as section content.
-
-
Category Options : It contains following settings
-
-
-
-
- Select Category : This setting allows user to select category to get the featured image and content of that category.
- Button Label : This setting allow user to set button text.
- Button Link : This setting allow user to set button url.
-
-
-
-
-
-
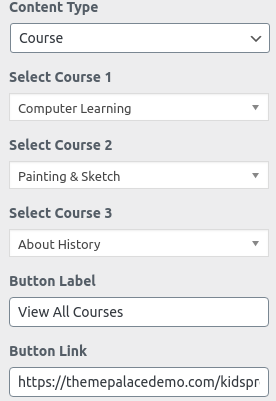
- Course: Selecting Course as Content Type allows user to choose Course from Select course setting where featured image and content of that selected posts is displayed.
-
-
Course Options : It contains following settings
-
-
-
-
- Select course : This setting allows user to select post to get featured image and content of that post.
- Button Label : This setting allow user to set button text.
- Button Link : This setting allow user to set button url.
-
-
-
-
-
-
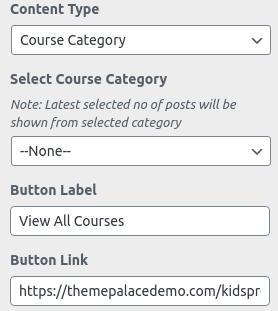
- Course Category: Selecting Course Category as Content Type allows user to choose Course Category from Select Post setting where featured image and content of that selected posts is displayed.
-
-
Course Category Options : It contains following settings
-
-
-
-
- Select Course Category : This setting allows user to select category to get the featured image and content of that category.
- Button Label : This setting allow user to set button text.
- Button Link : This setting allow user to set button url.
-
-
-
To configure About Us section, you need to go to Admin Panel / Appearance / Customize / Front Page / About Us.
In this panel, you will find these options:
-
- About Us Section Enable: Check to enable on home-page otherwise Uncheck to hide.
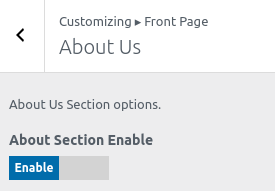
After About Us Slider section is enabled, you will see following options
-
-
- Content Type : It contains select options ( Pages, Post, Custom) which allow user to select title from one of those.
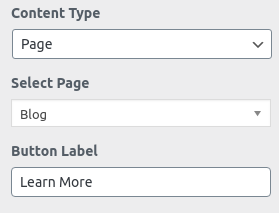
- Pages: Selecting Pages as Content Type allows user to choose Pages from Select Page setting where featured image and content of that selected Pages is displayed.
- Content Type : It contains select options ( Pages, Post, Custom) which allow user to select title from one of those.
-
Pages Options : It contains following settings
-
-
-
-
- Select Page: This setting allows user to select page to get featured image and content of that page.
- Button Label : This setting allow user to set button text.
-
-
-
-
-
-
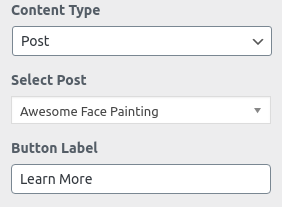
- Posts: Selecting Posts as Content Type allows user to choose Posts from Select Post setting where featured image and content of that selected posts is displayed.
-
-
Posts Options : It contains following settings
-
-
-
-
- Select Post : This setting allows user to select post to get featured image and content of that post.
- Button Label : This setting allow user to set button text.
-
-
-
-
-
-
- Custom: Selecting Custom as Content Type allows user to choose Category from Select category setting where featured image and content of that selected Category is displayed as section content.
-
-
Custom Options : It contains following settings
-
-
-
-
- Title : This setting allow user to set title.
- Description : This setting allow user to set description.
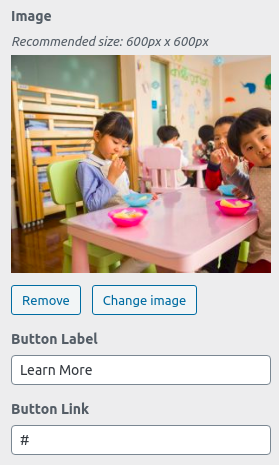
- Image : This setting allow user to set image.
- Button Label : This setting allow user to set button text.
- Button Link : This setting allow user to set button url.
-
-
-

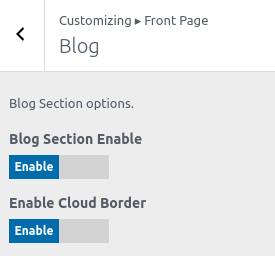
To configure Blog section, you need to go to Admin Panel / Appearance / Customize / Front Page / Blog.
In this panel, you will find these options:
-
- Blog Section Enable: Check to enable on home-page otherwise Uncheck to hide.
- Enable Cloud Border: Check to enable on home-page otherwise Uncheck to hide.
After Blog section is enabled, you will see following options
-
-
- Title : This setting allow user to set title.
- Sub Title : This setting allow user to set sub title.
- Number of Posts : This setting allow user to set number to show posts.
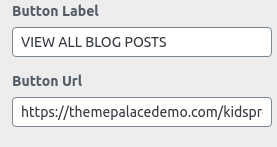
- Button Label : This setting allow user to set button text.
- Button Url : This setting allow user to set button link.
-

-
-
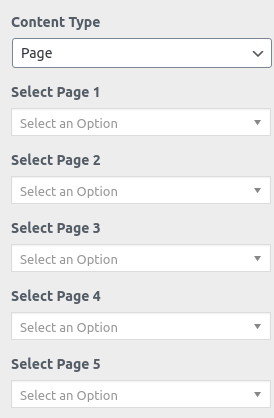
- Content Type : It contains select options ( Pages, Post, Category, Recent) which allow user to select title from one of those.
- Pages: Selecting Pages as Content Type allows user to choose Pages from Select Page setting where featured image and content of that selected Pages is displayed.
- Content Type : It contains select options ( Pages, Post, Category, Recent) which allow user to select title from one of those.
-
Pages Options : It contains following settings
-
-
-
-
- Select Page: This setting allows user to select page to get featured image and content of that page.
-
-
-
-
-
-
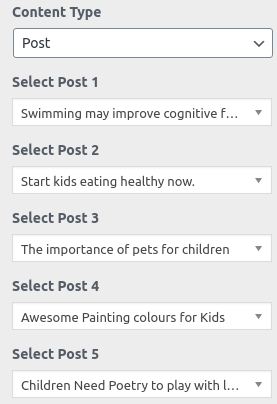
- Posts: Selecting Posts as Content Type allows user to choose Posts from Select Post setting where featured image and content of that selected posts is displayed.
-
-
Posts Options : It contains following settings
-
-
-
-
- Select Post : This setting allows user to select post to get featured image and content of that post.
-
-
-
-
-
-
- Category: Selecting Category as Content Type allows user to choose Category from Select category setting where featured image and content of that selected Category is displayed as section content.
-
-
Category Options : It contains following settings
-
-
-
-
- Select Category : This setting allows user to select category to get the featured image and content of that category.
-
-
-

-
-
-
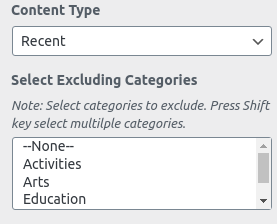
- Recent: Selecting Recent as Content Type allows user to choose multiple category from Select Excluding Categories setting where featured image and content of recent posts of that categories is displayed as section content.
-
-
Recent Options : It contains following settings
-
-
-
-
- Select Excluding Categories : This setting allows user to select multiple categories to get the featured image and content of that categories.
-
-
-
To configure Counters section, you need to go to Admin Panel / Appearance / Customize / Front Page / Counters.
In this panel, you will find these options:
-
- Counters Section Enable: Check to enable on home-page otherwise Uncheck to hide.
After Counters section is enabled, you will see following options
-
-
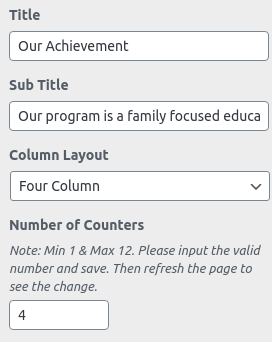
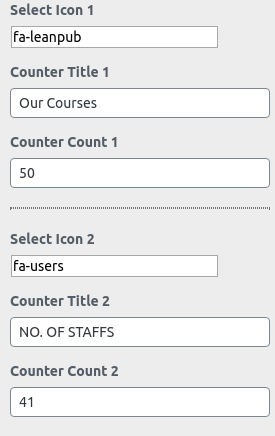
- Title : This setting allow user to set title.
- Sub Title : This setting allow user to set sub title.
- Column Layout : This setting allow user to set column layout.
- Number of Counters : This setting allow user to set number to show posts.
- Select Icon : This setting allow user to set icon.
- Counter Title : This setting allow user to set counter title.
- Counter Count : This setting allow user to set count number.
-
To configure Teachers section, you need to go to Admin Panel / Appearance / Customize / Front Page / Teachers.
In this panel, you will find these options:
-
- Teachers Section Enable: Check to enable on home-page otherwise Uncheck to hide.

After Teachers Slider section is enabled, you will see following options
-
-
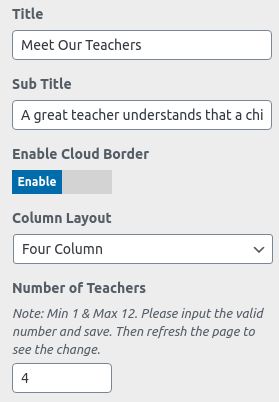
- Title : This setting allow user to set title.
- Sub Title : This setting allow user to set sub title.
- Enable Cloud Border : This setting allow user to set cloud border.
- Column Layout : This setting allow user to set column layout.
- Number of Teachers : This setting allow user to set number to show posts.
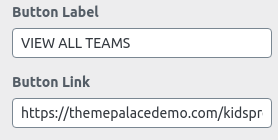
- Button Label : This setting allow user to set button text.
- Button Link : This setting allow user to set button url.
-
-
-
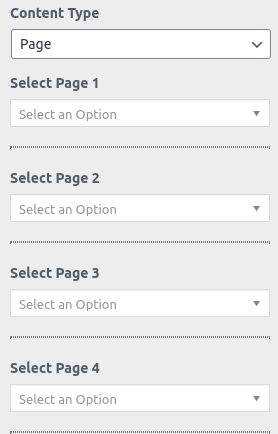
- Content Type : It contains select options ( Pages, Post, Category, Teachers, Teacher Category) which allow user to select title from one of those.
- Pages: Selecting Pages as Content Type allows user to choose Pages from Select Page setting where featured image and content of that selected Pages is displayed.
- Content Type : It contains select options ( Pages, Post, Category, Teachers, Teacher Category) which allow user to select title from one of those.
-
Pages Options : It contains following settings
-
-
-
-
- Select Page: This setting allows user to select page to get featured image and content of that page.
-
-
-
-
-
-
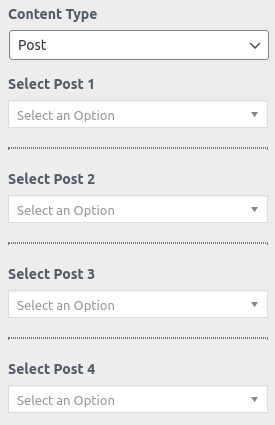
- Posts: Selecting Posts as Content Type allows user to choose Posts from Select Post setting where featured image and content of that selected posts is displayed.
-
-
Posts Options : It contains following settings
-
-
-
-
- Select Post : This setting allows user to select post to get featured image and content of that post.
-
-
-
-
-
-
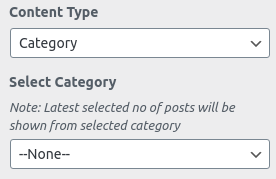
- Category: Selecting Category as Content Type allows user to choose Category from Select category setting where featured image and content of that selected Category is displayed as section content.
-
-
Category Options : It contains following settings
-
-
-
-
- Select Category : This setting allows user to select category to get the featured image and content of that category.
-
-
-
-
-
-
- Teachers: Selecting Teachers as Content Type allows user to choose Teachers from Select teachers setting where featured image and content of that selected posts is displayed.
-
-
Teachers Options : It contains following settings
-
-
-
-
- Select teachers : This setting allows user to select post to get featured image and content of that post.
-
-
-

-
-
-
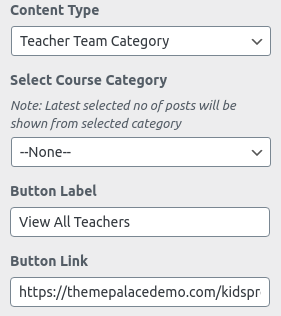
- Teacher Category: Selecting Teacher Category as Content Type allows user to choose Teacher Category from Select Post setting where featured image and content of that selected posts is displayed.
-
-
Teacher Category Options : It contains following settings
-
-
-
-
- Select Teacher Category : This setting allows user to select category to get the featured image and content of that category.
-
-
-
To configure Gallery section, you need to go to Admin Panel / Appearance / Customize / Front Page / Gallery.
In this panel, you will find these options:
-
- Gallery Section Enable: Check to enable on home-page otherwise Uncheck to hide.

After Gallery Slider section is enabled, you will see following options
-
-
- Title : This setting allow user to set title.
- Sub Title : This setting allow user to set sub title.
- Column Layout : This setting allow user to set column layout.
- Number of Gallery : This setting allow user to set number to show posts.
- Button Label : This setting allow user to set button text.
- Button Link : This setting allow user to set button url.
-


-
-
- Content Type : It contains select options ( Pages, Post, Category) which allow user to select title from one of those.
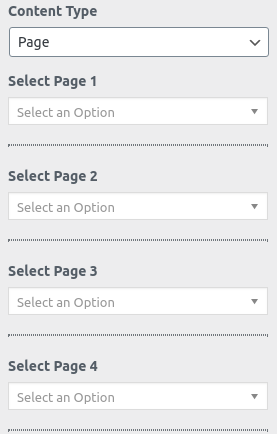
- Pages: Selecting Pages as Content Type allows user to choose Pages from Select Page setting where featured image and content of that selected Pages is displayed.
- Content Type : It contains select options ( Pages, Post, Category) which allow user to select title from one of those.
-
Pages Options : It contains following settings
-
-
-
-
- Select Page: This setting allows user to select page to get featured image and content of that page.
-
-
-
-
-
-
- Posts: Selecting Posts as Content Type allows user to choose Posts from Select Post setting where featured image and content of that selected posts is displayed.
-
-
Posts Options : It contains following settings
-
-
-
-
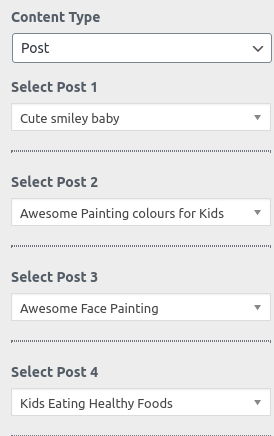
- Select Post : This setting allows user to select post to get featured image and content of that post.
-
-
-
-
-
-
- Category: Selecting Category as Content Type allows user to choose Category from Select category setting where featured image and content of that selected Category is displayed as section content.
-
-
Category Options : It contains following settings
-
-
-
-
- Select Category : This setting allows user to select category to get the featured image and content of that category.
-
-
-

To configure Testimonial section, you need to go to Admin Panel / Appearance / Customize / Front Page / Testimonial.
In this panel, you will find these options:
-
- Testimonial Section Enable: Check to enable on home-page otherwise Uncheck to hide.
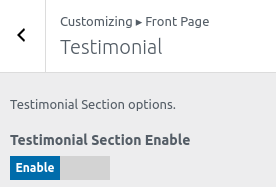
After Testimonial Slider section is enabled, you will see following options
-
-
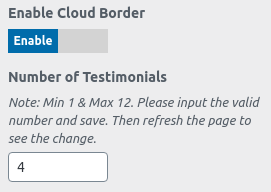
- Enable Cloud Border : This setting allow user to set cloud border.
- Number of Testimonial : This setting allow user to set number to show posts.
-
-
-
- Content Type : It contains select options ( Pages, Post, Custom, Category, Testimonial) which allow user to select title from one of those.
- Pages: Selecting Pages as Content Type allows user to choose Pages from Select Page setting where featured image and content of that selected Pages is displayed.
- Content Type : It contains select options ( Pages, Post, Custom, Category, Testimonial) which allow user to select title from one of those.
-
Pages Options : It contains following settings
-
-
-
-
- Select Testimonial: This setting allows user to select page to get featured image and content of that page.
- Position : This setting allow user to set position.
-
-
-

-
-
-
- Posts: Selecting Posts as Content Type allows user to choose Posts from Select Post setting where featured image and content of that selected posts is displayed.
-
-
Posts Options : It contains following settings
-
-
-
-
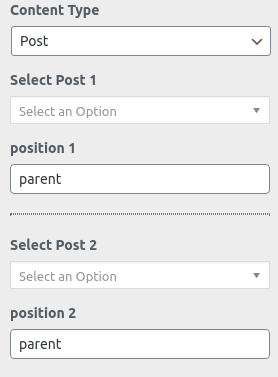
- Select Post : This setting allows user to select post to get featured image and content of that post.
- Position : This setting allow user to set position.
-
-
-
-
-
-
- Custom: Selecting Custom as Content Type allows user to choose Custom from Select Custom setting where featured image and content of that selected posts is displayed.
-
-
Custom Options : It contains following settings
-
-
-
-
- Title : This setting allow user to set title.
- Position : This setting allow user to set position.
- Description : This setting allow user to set description.
- Image : This setting allow user to set image
- URL Link : This setting allow user to set url.
-
-
-

-
-
-
- Category: Selecting Category as Content Type allows user to choose Category from Select category setting where featured image and content of that selected Category is displayed as section content.
-
-
Category Options : It contains following settings
-
-
-
-
- Select Category : This setting allows user to select category to get the featured image and content of that category.
-
-
-
-
-
-
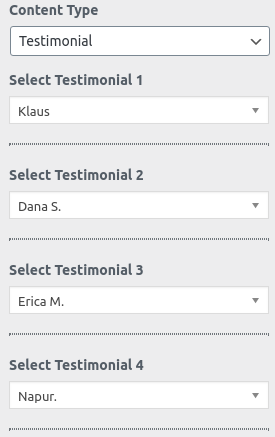
- Testimonial: Selecting Testimonial as Content Type allows user to choose Testimonial from Select testimonial setting where featured image and content of that selected posts is displayed.
-
-
Testimonial Options : It contains following settings
-
-
-
-
- Select testimonial : This setting allows user to select post to get featured image and content of that post.
-
-
-
To configure Subscription section, you need to go to Admin Panel / Appearance / Customize / Front Page / Subscription.
In this panel, you will find these options:
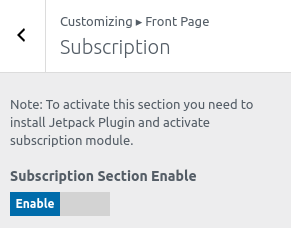
Note: For Subscription section enable first you need to install Jetpack Plugin and activate subscription module.
-
- Subscription Section Enable: Check to enable on home-page otherwise Uncheck to hide.
After Subscription section is enabled, you will see following options
-
-
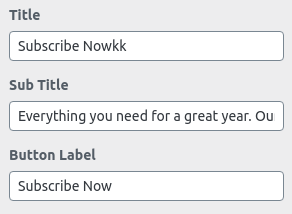
- Title : This setting allow user to set title.
- Sub Title : This setting allow user to set sub title.
- Button Label : This setting allow user to set button text.
-
You will see following sections under Theme Options:
- Loader
- Breadcrumb
- Layout
- Excerpt
- Blog/Archive
- Single Post
- Pagination
- Typography
- Footer Option
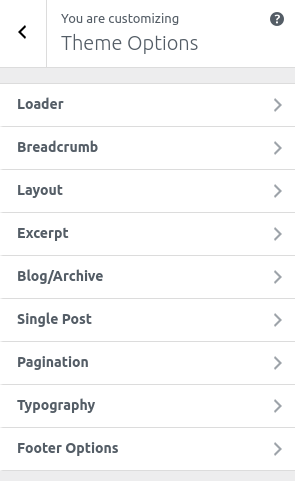 The above sections are described below.
This option is used to enable/disable loader.
1. From Customize section, go to Theme Options.
2. From Theme Options, you will see Loader.
3. In Loader you will see:
-
- Enable Loader : This enables the loader image when the page is fully not loaded.
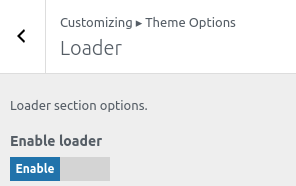
After enable Loader You will see following option
-
-
- Icon: This setting allow user to select loading icon.
-

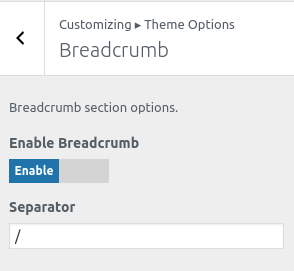
This option allows user to enable/disable breadcrumb on the home-page.
1. From Customize section, go to Theme Options.
2. From Theme Options, you will see Breadcrumb.
3. Click on Breadcrumb you will see.
-
- Enable Breadcrumb : This option enable/disable breadcrumb.
- Separator: Set the Separator symbol.
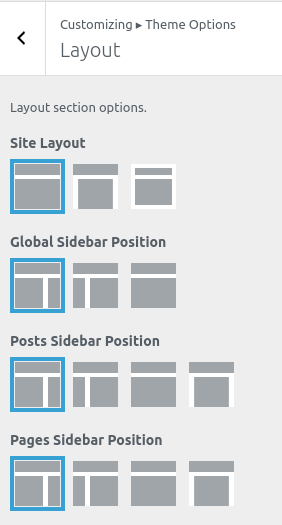
This option is used to change the layout option of site also allows to change the Width of the body part.Available site layout is Wide& Boxed.
1. From Customize section, go to Theme Options.
2. From Theme Options, you will see Layout.
3. In Layout Options you will see:
- Site Layout : This option is for Site Layout. You can change the layout of site
- Global Sidebar Position : This option is for Global Sidebar Position. You can choose either Right sidebar or Left sidebar or No Sidebar .
- Posts Sidebar Position : This option is for Posts Sidebar Position. You can choose either Right sidebar or Left sidebar or No Sidebar or No Sidebar Content Width.
- Pages Sidebar Position : This option is for Pages Sidebar Position. You can choose either Right sidebar or Left sidebar or No Sidebar or No Sidebar Content Width.
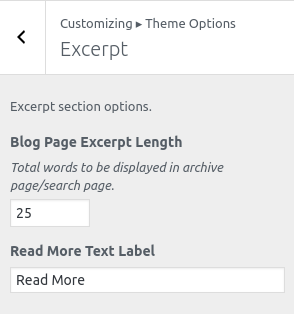
This option allows user to set the excerpt length on the archive, blog and search.
1. From Customize section, go to Theme Options.
2. From Theme Options, you will see Excerpt.
3. In Excerpt Options you will see:
-
- Blog Page Excerpt Length: This option allows user to set the excerpt length.
- Read More Text Label: This option allows user to set read more text.
1. From Customize section, go to Theme Options.
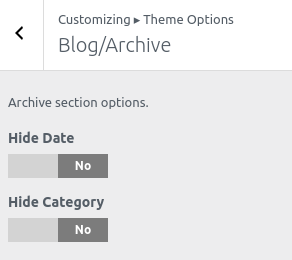
2. From Theme Options, you will see Blog/Archive.
3. In Blog Page you will see:
-
- Hide Date: This option allows user to enable/disable date assigned in blog post.
- Hide Category:This option allows user to enable/disable category assigned in blog post.
1. From Customize section, go to Theme Options.
2. From Theme Options, you will see Blog/Archive.
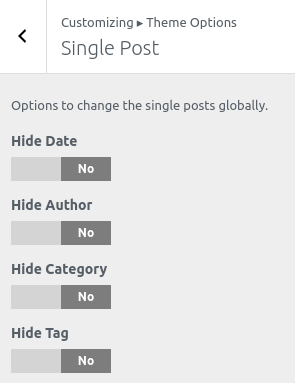
3. In Single post you will see:
-
- Hide Date: This option allows user to enable/disable date assigned in single post.
- Hide Author : You can hide the author image on single post.
- Hide Category: This option allows user to enable/disable category assigned in single post.
- Hide Tag: This option allows user to enable/disable views of tag in single post.
1. From Customize section, go to Theme Options.
2. From Theme Options, you will see Pagination.
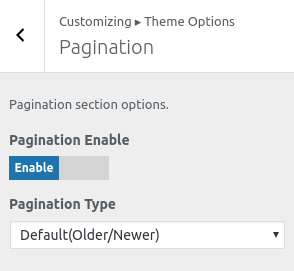
3. In Pagination you will see:
-
- Pagination Enable: This option enables the pagination on the site.
- Pagination type : You will see following options:
- Numeric : This is for numeric pagination option.
- Older Posts/Newer Posts : Default pagination option.
- Infinite Scroll : This options allow to show infinite number of posts on scroll.
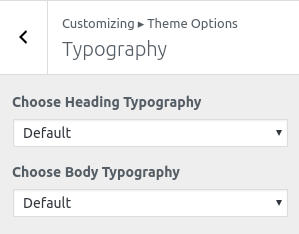
1. From Customize section, go to Theme Options.
2. From Theme Options, you will see Typography.
3. In Typography you will see:
-
- Choose Heading Typography : Here you can easily choose different types of typography for header section.
- Choose Body Typography : Here you can easily choose different types of typography for body section.
1. From Customize section, go to Theme Options.
2. From Theme Options, you will see Footer Options.
3. In Footer Options you will see:
To configure footer widget, you need to go to Admin Panel / Appearance / widgets / Footer widget.
-
- You can add 4 Footer Widget fields.
- Copyright text : This changes the copyright text of Copyright content.
- Display Scroll Top Button: You can easily hide or display scroll buttons.

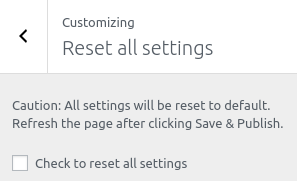
1. From Customize section, go to Reset all settings..
2. In Reset all settings you will see:
-
- Check to reset all settings: Check the Check to reset all settings and refresh the page to reset all theme settings to default.
1. From Customize section, go to Additional CSS..
2. Additional CSS you will see:
-
- You can add your own CSS here.

To update Theme though FTP, follow these basic steps:
- Download the latest version of Kidspress Pro theme from your Theme Palace member My Account to your Desktop
- Unzip kidspress-pro.zip to your Desktop
- Using an FTP client to access your host web server, go to /wp-content/themes/ and upload your new copy of Kidspress Pro theme which shall replace the old files.


