
Themes Instructions
Select a Theme from the drop down menu
Table of Contents
- 1.Introduction
- 2.Installation
- 3.Manage Your Theme
- 4.Installation
- 5.Installing Required and Recommended Plugins
- 6.Bulk Install Required and Recommended Plugins
- 7.How to setup front page as shown in the demo?
- 8.How to customize contact options?
- 9.How to set typography for the site?
- 10.Instagram Options
- 11.Manage Site title, logo, tagline and site icon
- 12.How to add header image for inner pages?
- 13.How to manage Background Images
- 14.Menu setup
- 15.How to change theme’s color?
- 16.How to setup Sidebar?
- 17.Purplous pro widgets
- 18.How to manage Additional CSS?
- 19.Short Codes
Purplous
Welcome to Purplous WordPress theme! We would like to thank you for purchasing the theme for your website. Before you get started, please invest some time to go through the documentation. Purplous can only be used with WordPress and we assume that you already have WordPress installed and ready to go.
To install this theme you must have a working version of WordPress already installed. For information in regard to installing the WordPress platform, please see the WordPress Codex article on installation.
The theme files can be uploaded in two ways:
- FTP Upload: Using your FTP program, upload the unzipped theme folder into the /wp-content/themes/ folder on your server.
- WordPress Upload: Navigate to Appearance > Add New Themes > Upload. Go to browse, and select the zipped theme folder. Hit “Install Now” and the theme will be uploaded and installed.
Once the theme is uploaded, you need to activate it. Go to Appearance> Themes and activate your chosen theme.
It is very important you upload only the theme files, not the entire package of Purplous. After downloading the Theme Files, please make sure you unpackage/unzip the full download to reveal the compressed directory of just theme files.
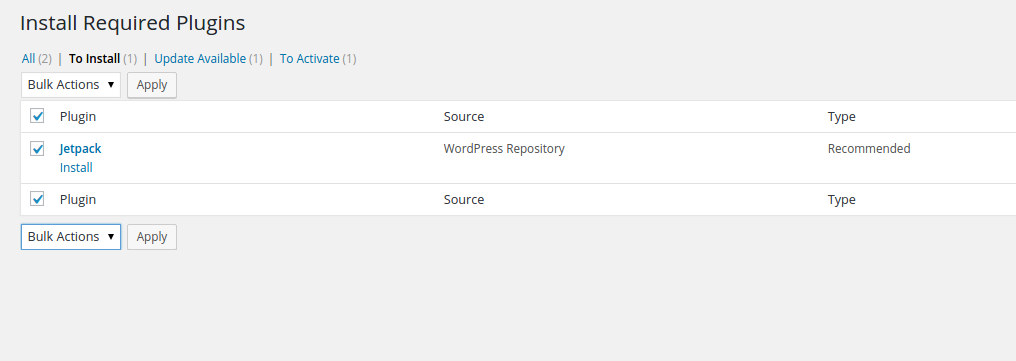
Purplous comes with the ability to bulk install all* required and recommended plugins. Once you have activated the theme you will be prompted to install and activate the required and recommended plugins. Simply click Install “Begin installing plugins” and the process will begin.
PURPLOUS ESSENTIALS:
Purplous Essentials is utterly mandatory plugin for Purplous theme. It registers custom post types, custom fields, and short codes for banner, blog, client, portfolio, product, service, team, testimonial and call to action sections. Next to these components, Instagram widget is also added in the widget area. Along with these features, it also provides short codes for each post types so that one can add it anywhere in the page/post as per necessary.
JETPACK:
Jetpack is a single plugin that gives you the most powerful WordPress.com features, hooking your self-hosted WordPress site to WordPress.com’s infrastructure to take advantage of robust stats, easy social sharing, and a whole lot.
MAILCHIMP:
MailChimp plugin helps you add subscribers to your MailChimp lists using various methods. You can create good looking opt-in forms or integrate with any other form on your site, like your comment or checkout form.
To make your site’s homepage look like exactly like our demo, you should first create a page, say, “homepage” and assign it to the “Homepage – Template” template and follow the step by step instructions below.
The demo of the front page can be further divided into following sections. You should navigate into Appearance > Customizer > Theme Options and find the similar settings for the sections listed below.
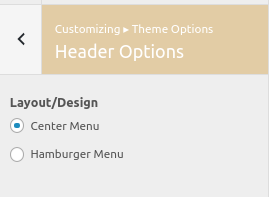
This option lets you choose the type of menu you want for your website, either center menu or slider (hamburger) menu.
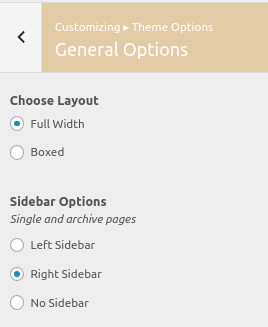
This option lets you choose the layout of your site be it full width or boxed. Furthermore, you can also change sidebar position in other pages like single, archive, author, blog etc.
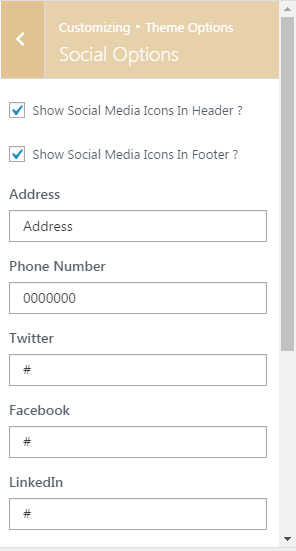
This option is used in the top header .Inside this option you can add Phone number, Email id, links for Facebook, Twitter, LinkedIn ,Google plus, YouTube, Instagram, Tumblr and Pinterest
There are three main options in banner option.
- ‘Slider Image Banner’ is the default banner for. The fields required to display the image, title, description, button text and button link is seen after selecting single image banner in customizer.
- For the ‘Slider Banner’ custom post Slider is used to add the images and required fields for the slider.
- For the ‘Banner with video on background’ is same as single image only instead of image field we must add video file.
This option allows you to choose a page which gets featured below the slider in homepage. Gallery images or video or image will get featured in this section.
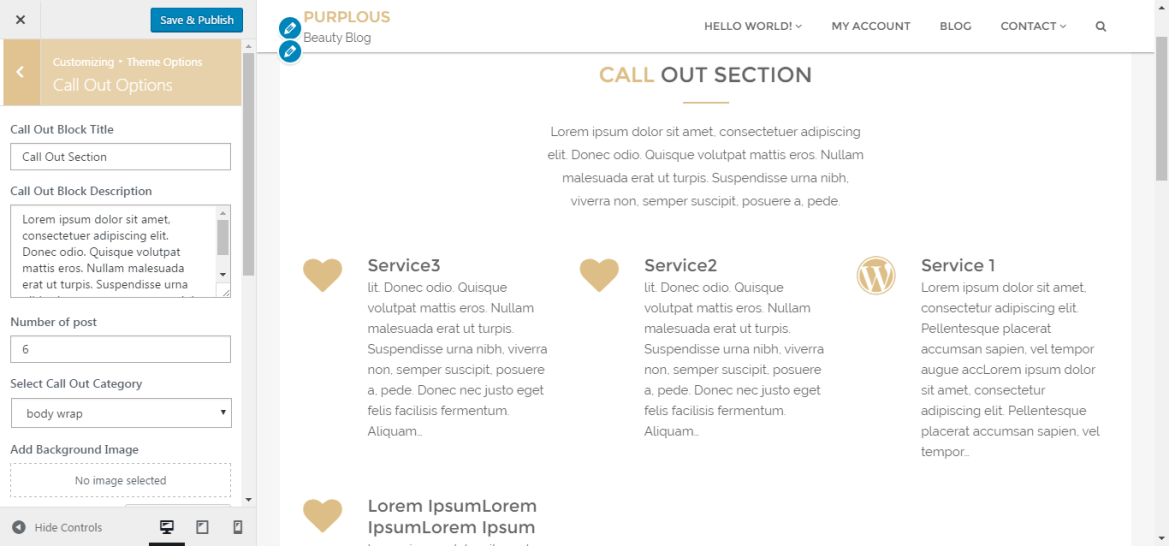
The title can be changed by adding text to ‘Block title for homepage’ text box.
- The number of posts to be viewed must be added in Callout post type.
- The number of posts shown can be changed by adding the number you want to be shown,-1 shows all the posts.
- Background image and color of the callout section can be changed by selectingthe desired image and color.
- Parallax check box gives parallax effect to the background image on scroll.
- The ‘Tabbed’ option consists of two option if ‘yes’ is selected then tabbed layout is selected but if no is selected than four additional layouts can be selected with the option to choose three or four columns.
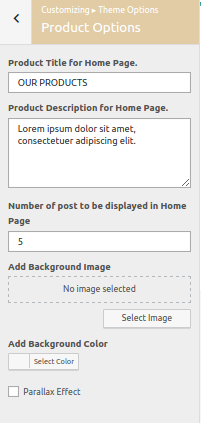
This option lets you add title, description, number of products to be shown, background image, background color and parallax effect of this section in homepage.
Basically we have two layouts for call to action,
- Button on bottom with full width text and
- Button on right with text on the left side.
- We can either add an image or a video by choosing the background.
- The title, description, button text and button link are same for all layouts.
- If we choose image as background then we can use parallax effect option in the image.
- The background color can be changed by selecting the background color.
- If background image is selected then the color won’t be seen. For both the color and the image to be seen you can use the transparency bar in the color picker.
- The title can be changed by adding text to ‘Block title for homepage’ textbox.
- The number of posts shown can be changed by adding the number you want to be shown,-1 shows all the posts.
- Background image and color of the callout section can be changed by selecting the desired image and color.
- Parallax check box gives parallax effect to the background image on scroll.
- Selecting ‘yes’ in the add padding option adds space in between the portfolio posts and selecting ‘no’ removes the space between the post.
- The posts can be viewed in two, three or four columns as selected from the column option.
- In the filter option choosing ‘filtered’ gives us the filtered layout in which we can filter the output.
- Choosing ‘without filter’ gives us more 6 layouts which is not filterable.
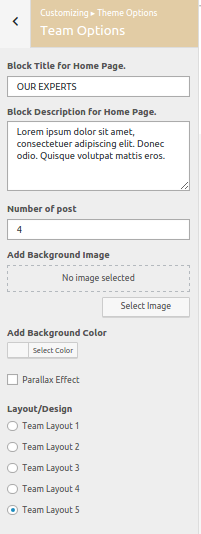
- The Team Options title can be changed by adding text to ‘Block title for homepage’ textbox.
- The posts to be viewed must be added in Team post type.
- The number of posts shown can be changed by adding the number you want to be shown,-1 shows all the posts.
- Background image and color of the team section can be changed by selecting the desired image and color.
- Parallax check box gives parallax effect to the background image on scroll.
- There are five different layouts in team, all the layouts have four column.
- The title can be changed by adding text to ‘Block title’ textbox.
- The number posts to be shown in front end must be added in Testimonial post type.
- The number of posts shown can be changed by adding the number you want to be shown,-1 shows all the posts.
- Background image and color of the callout section can be changed by selecting the desired image and color.
- Parallax check box gives parallax effect to the background image on scroll.
- The number of items to be displayed in the slider can be changed from column section. It consists of two options 2 or 3.
- There are three layouts which can be used in testimonial.
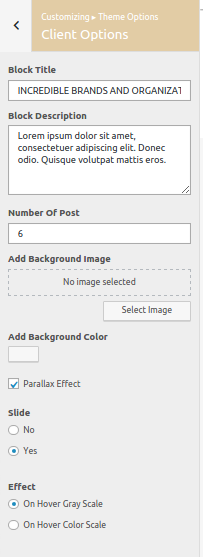
Client option uses client custom post to display the client’s image.
- The block title can be changed from block title textbox
- The number of posts to be displayed can be added in the number of post textbox.
- Background image and color of the callout section can be changed by selecting the desired image and color.
- Parallax check box gives parallax effect to the background image on scroll.
- The posts can be displayed in slider or the slider can be deactivated from slide option.
- There are two effects for this section ‘On Hover Gray Scale’ and ‘On Hover Color Scale’, the first one changes the color to grey on hover in the image and the latter option changes grey to colorful on hover in the image.
Pre-footer Options
- Show/hide pre-footer by checking/unchecking ‘Show Pre-footer’ checkbox option
- Choose number of widget columns to be displayed in pre-footer. This option applies only if ‘Show Pre-footer’ is checked.
Footer Options
- Only text options shows Footer text, Developed by text and Developed by link on center of footer
- Only menu option shows footer menu on center of menu
- Both text and menu options shows texts on left hand side and footer menu on right hand side of footer
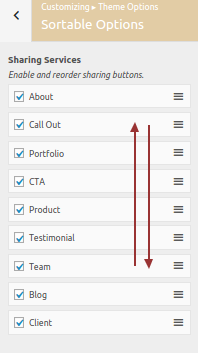
- This option consists of all the movable section with show/hide option on checking the checkbox.
- Unselecting the checkbox hides the related section and selecting shows the related section/fields inside ‘Sorting option’ can be dragged by dragging the right side handle to top or bottom.
- This will only be applicable for home page.
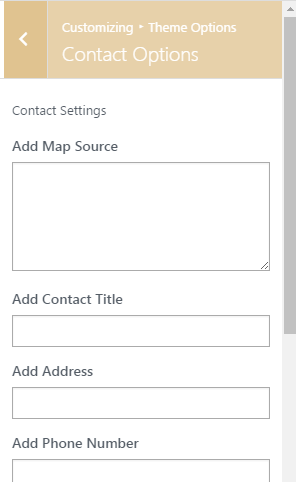
This options lets you add contact details of you or your company like Google map, address, phone number, email address, website URL etc. The fields you fill in this section will be displayed in contact widget in the front end.
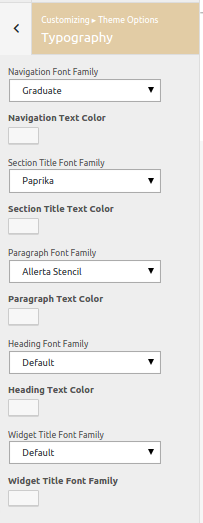
This option lets you choose your favorite font style and font color to titles, headings, paragraph, navigation and widget title.
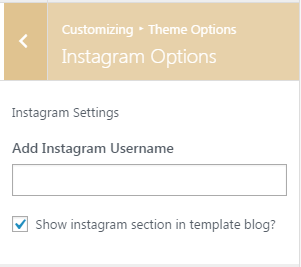
Add your Instagram username to appear the images in the site. You can also control show/hide of Instagram section in the template blog from here.
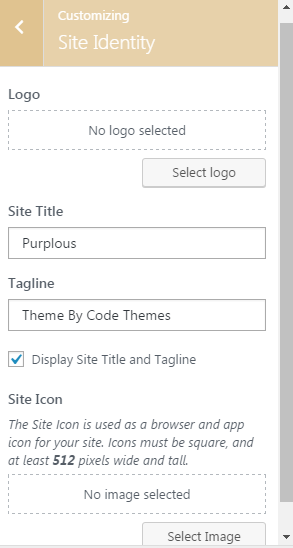
Set your site’s title, description and add logo by navigating to Customizer > Site Identity.
Logo: It changes the main logo of the site.
Site Title: It changes the main site title of the site.
Tagline: It changes the tagline (i.e. Description) of the site.Just below site title.
Site Icon: The Site Icon is used as a browser and app icon for your site.Icon must be square, and at least 512px wide and tall.
This section allows you to add different header images for other pages.
Navigate to Customize > Header Image
In Header Image Options you can add new image in the Header section by clicking Add new image.
This section allows you to add background images for website.
- Navigate to Customize > Background Image
- Select the image for Background available on media library or upload from the other location.
- Click Save & Publish
In admin menu’s Appearance > Menu page there are two predefined theme menu locations in,
- Primary and
- Footer menu.
- Go to Appearance > Customize >Menus.
2. From Menus, click “Add a Menu” button and you will be able to create a menu.
3. Now, click Add Items and you will be able to Add or Remove Menu Items according to your requirement.
4. Select the Menu locations.
5. Click Save and publish button.
- Go to Appearance > Customize> Menus > Menu Locations
- Select the menu for Primary Menu. Primary menu appears as a main menu in header section.
- Select the menu forFooter Menu. Footer menu appears on the footer section.
- Click Save and publish
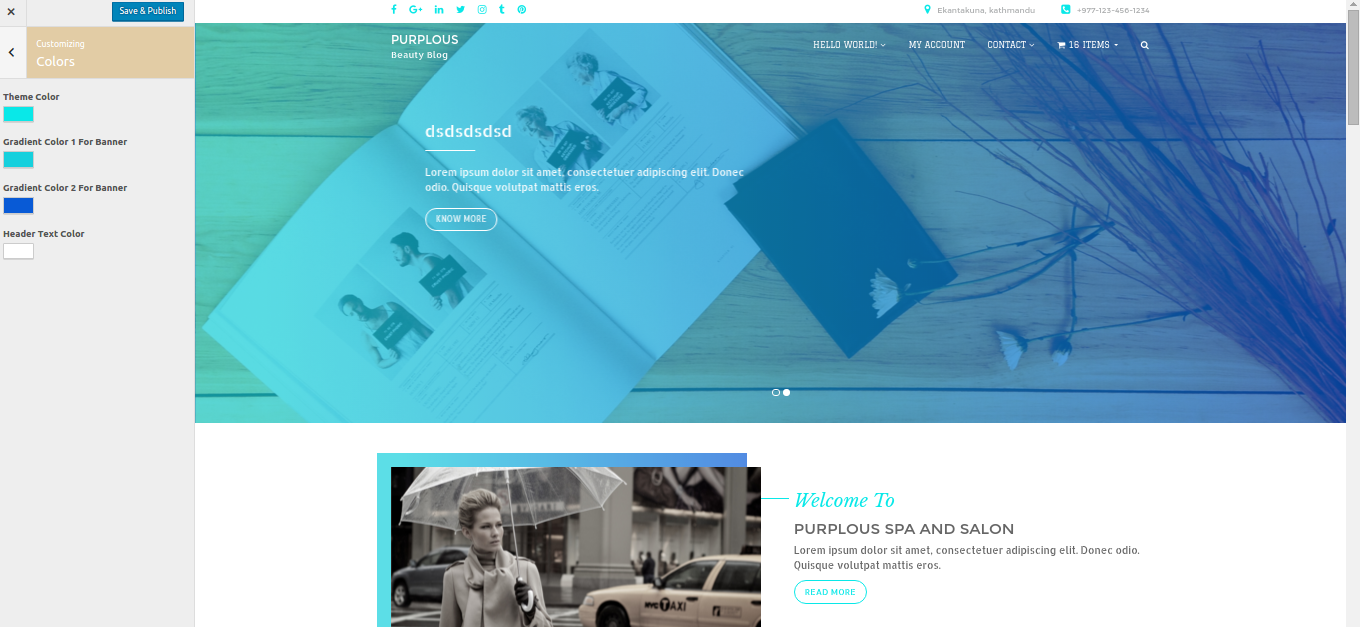
Colors option lets you choose theme color, gradients color and header text color.
- Theme color changes color of the theme.
- Gradients color change gradients of banner section, home about section and call to action section.
- Header text color changes color of site title.
Navigate widget under Appearance in the dashboard to add widgets.
Purplous has four Sidebar Widgets
- Pre-footer area
- Woocommerce sidebar for Woocommerce pages
- Contact sidebar for contact page
- Sidebar (default) for other pages.
Purplous facilitates with three personal widgets, Purplous author block, Purplous Instagram and Purplous recent posts.
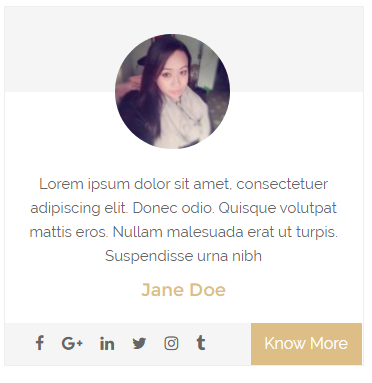
- Purplous Author Block
This widget lets you choose authors (administrator or author) and title of the widget and shows in the front end like the following screenshot.
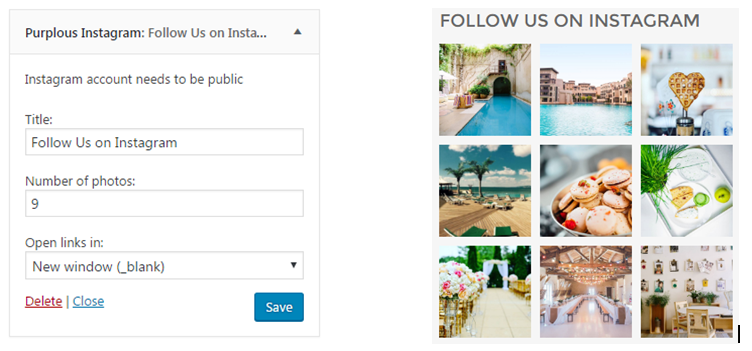
This widget shows user’s image gallery of Instagram. You can limit number of images to be shown, open link in new window or the same and title of the widget. Instagram account needs to be public.
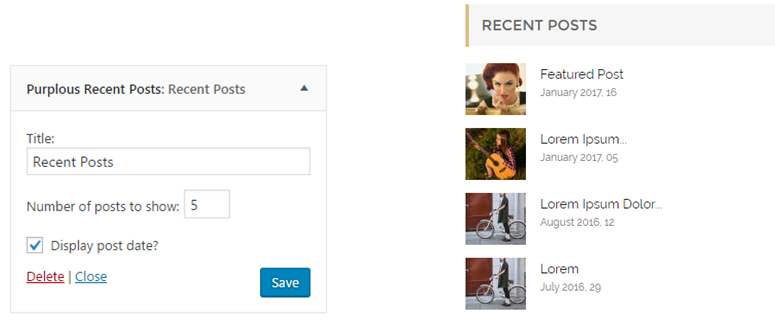
This widget shows recent posts along with the featured images of the posts.
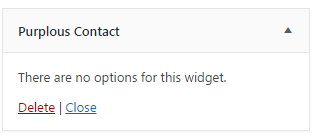
Widget specially designed for Contact Page Templates. This widget shows contact data you fill in the Contact Options of customizer.
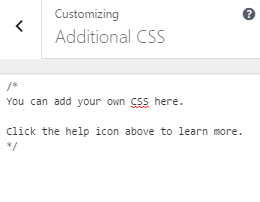
- Go to Appearance > Customize >Additional CSS, you will see:
- You can add your own CSS here.
- Banner Short codes
Default Banner(Single Image Banner)
[single_image_banner]
Attributes
‘title’ = ”
‘sub_title’ = ”
‘description’ = ”
‘button_text’ = ”
‘button_link’ = ”
‘image_url’ = ”
2. Slider Banner
[slider_default]
Attributes
number_posts= ”
Video Banner
[video_banner]
Attributes
‘title’ = ”
‘sub_title’ = ”
‘description’ = ”
‘button_text’ = ”
‘button_link’ = ”
‘video_url’ = ”
3. Blog short code
[blog title=”New Blog” number_posts=”2″ ]
Attributes
title=”New Blog”
number_posts=”2″
4. Client Short code
[client title=”wat” description=”” number_post=1 slide=”” effect=””]
Attributes
‘title’ = ”,
‘number_post’ = ”,
‘slide’ = ‘no/with’,
‘effect’ = ‘hover-bw/hover-colored’,
5. Call To action short code:
- [cta_right_button_video]
- [cta_right_button_image]
- [cta_center_button_video]
- cta_center_button_image]
Attributes
content=”
button_text=”
button_link”
6. Product Short code:
[product_list]
Attributes
‘title’ = ”
‘description’= ”
‘number_post’ => ”
7. Team Short code
[team]
Attributes
‘block_title’ = ”
‘Block_description’ =”
‘number_post’ =”
‘layout’ = ‘team-layout1/team-layout2/team-layout3/team-layout4/team-layout5’
8. Testimonial Short code
[testimonial]
Attributes
‘number_post’ = ”
‘item’ = ‘single-item-testimonial/double-item-testimonial’,
‘layout’ = ‘testimonial-layout1/testimonial-layout2/testimonial-layout3/testimonial-layout4’,
9. For Portfolio:
[portfolio]
Attributes
type=’without-filter/filtered’
title=”
number_posts=”
description=”
padding=’padbot/pad0′
column=’2col/3col/4col’
layout=’portfolio-layout1/portfolio-layout2/portfolio-layout3/portfolio-layout4/portfolio-layout5/portfolio-layout6′
- If Filtered is selected then layout option is not available for filtered type
10. For Call Out
[service]
Attributes
type=’tabbed/not-tabbed’
service_title=”
service_description=”
number_post=”
column=’3col/4col’
effects=’mul-row-ser/block-hover/single-row-icon-big/single-row-icon-side’
category=”
11. Wrapper Short code
[purplous_wrap_shortcode][/purplous_wrap_shortcode]

