
Themes Instructions
Select a Theme from the drop down menu
Table of Contents
- 1.Introduction
- 2.Theme Installation
- 3.Additional Custom Post Types after installing recommended plugin.
- 4.How to manage Theme Options?
- 4.1.How to manage Service Options?
- 4.2.How to manage Portfolio Options?
- 4.3.How to manage Team Options?
- 4.4.How to manage Home Blog Options?
- 4.5.How to manage Social Options?
- 4.6.How to manage Call-to-Action Options?
- 4.7.How to manage Contact Page Options?
- 4.8.How to manage Footer Options?
- 4.9.How to manage Testimonial Options?
- 4.10.How to manage Typography Options?
- 4.11.How to manage Custom CSS?
- 4.12.How to manage Sort Sections?
- 5.How to manage Logo, Site Title, Tagline and Site Icon?
- 6.How to manage Colors?
- 7.How to change Background Image?
- 8.How to change Menus?
- 9.How to manage Widgets?
- 10.How to set Static Front Page?
- 11.Updating Theme Using FTP
Bhumi Pro
Bhumi Pro is an incredibly superfine multi-purpose responsive theme with WPML Compatible & designed with a lot of care and love. The Theme has support of “WOOCOMMERCE” You can use it for your business, portfolio, blogging or any type of site. Bhumi-pro is Responsive and flexible based on BOOTSTRAP CSS framework that adapts your website to mobile devices and the desktop or any other viewing environment.
We would like to thank you for purchasing and using Bhumi Pro. This quick tutorial will show you how to install and use some of the basic yet useful features of Bhumi Pro WordPress theme.
- Log in to the WordPress Administration Panels.
- Select the Appearance panel, then Themes.
- Select Add New.
- Then select Upload Theme.
- Click Browse Locate bhumi-pro.zip Theme in your computer.
- Select bhumi-pro.zip and click Install Now.
After first setup on theme activation you will get notice for recommended plugin download as shown in the image below.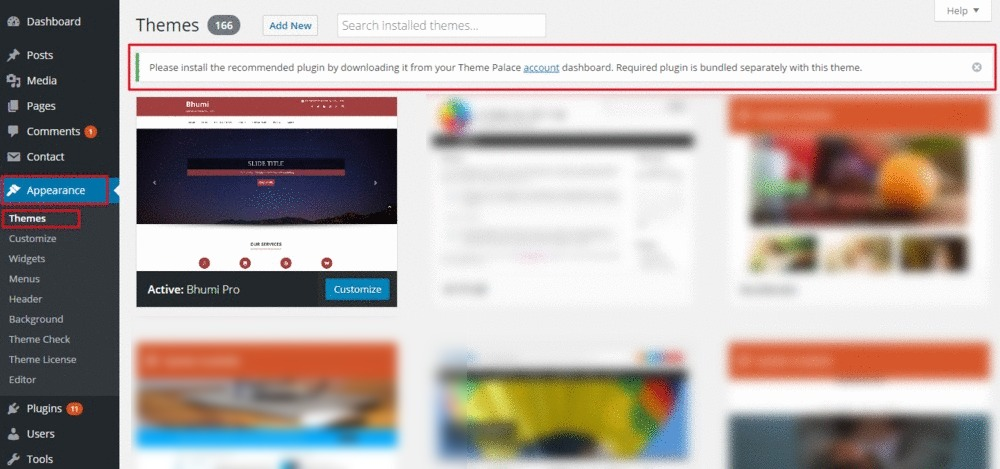 Now you need to go the link and download the recommended plugin and activate it. After the plugin is activated the notice disappears.
You can use FTP client like FileZilla to connect your web server.
1. Unzip bhumi-pro.zip to your Desktop.
2. Using an FTP client to access your host web server, go to /wp-content/themes/ and upload your new copy of Bhumi Pro Theme.
3. Now, log into the WordPress Dashboard with your login details.
4. Select the Appearance panel, then Themes.
5. You will see the theme in the list.
6. Then click Activate button.
7. Now the theme will be activate and go through the following options to set up the theme step wise.
( Hint: We assume we are in “Customize” section for whole theme customization part i.e. Appearance > Customize.)
You will see additional custom post types in your Admin Panel as shown in the image below:
The setup for additional post types are described below:
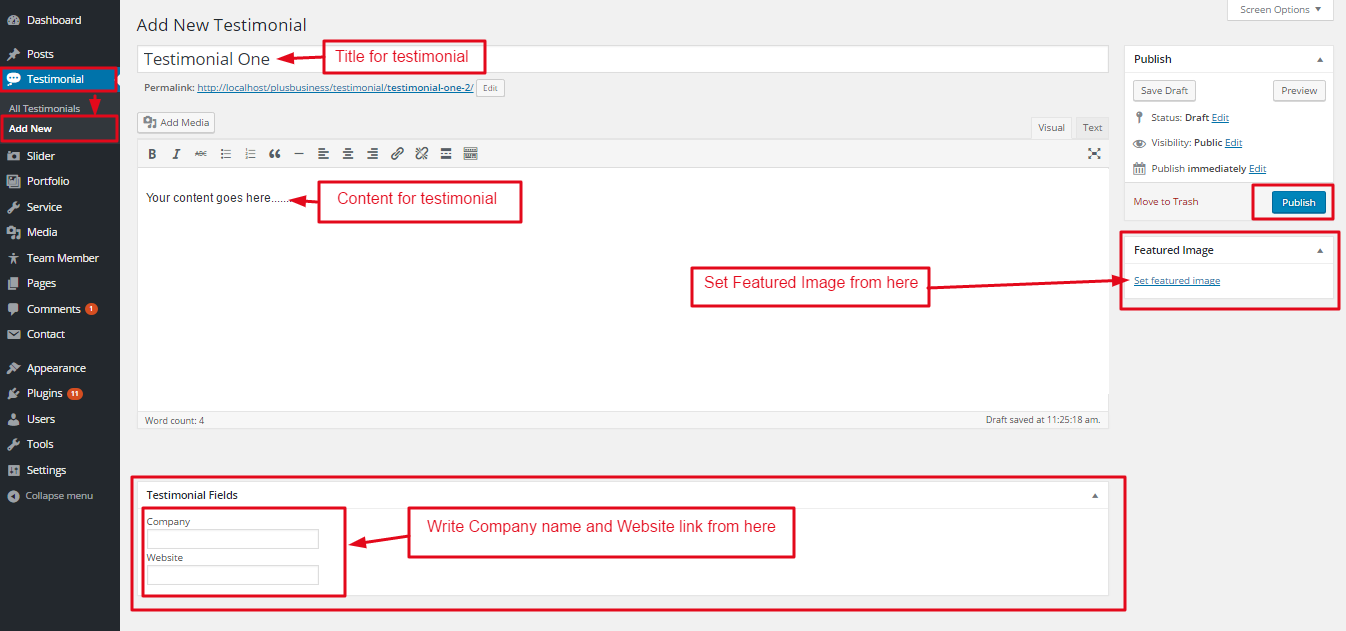
To setup testimonial custom post type see the image below:
Note: Similarly you can add more testimonial.
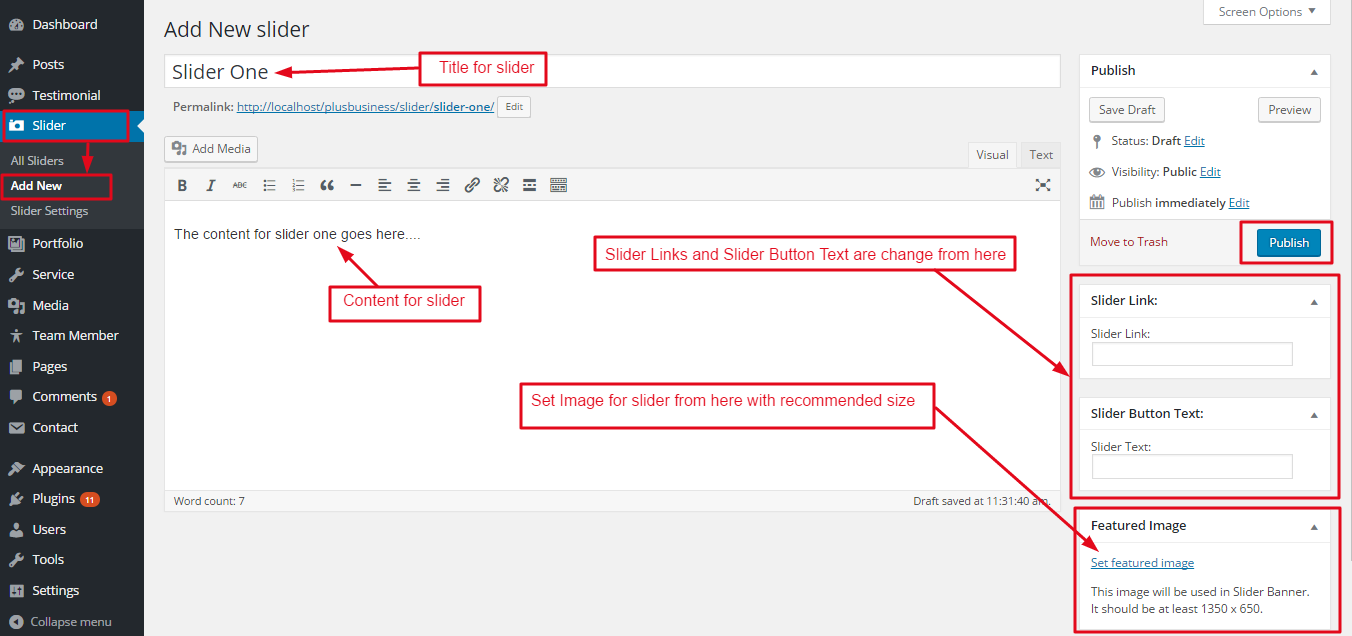
To setup slider custom post type see the image below:
Note: Similarly you can add more slider.
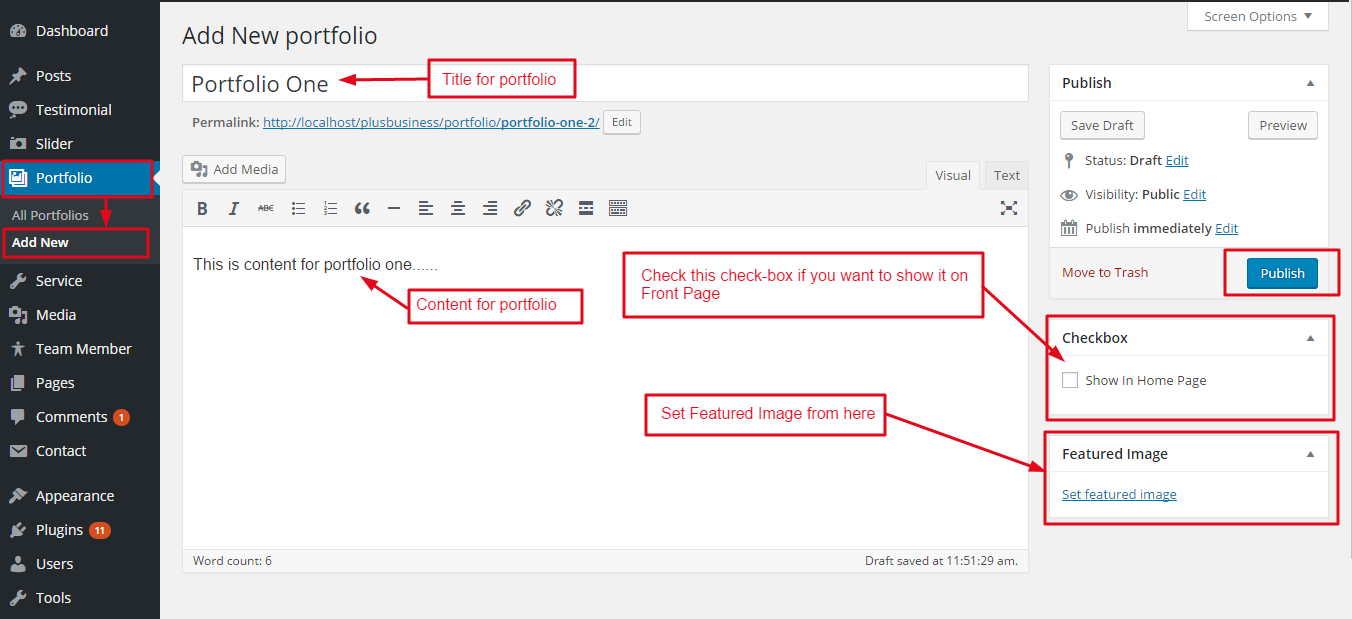
To manage portfolio see the image below:
Note: Similarly you can add more portfolio.
To manage Service see the image below:
Note: Similarly you can add more service.
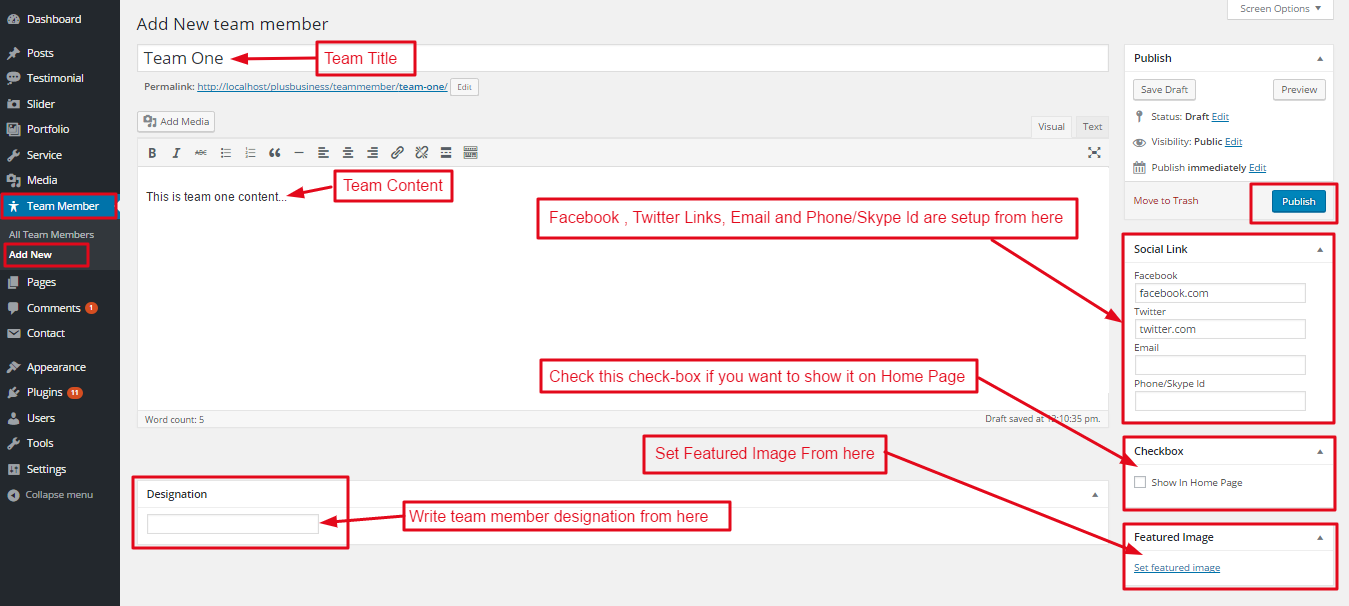
To manage Team see the image below:
Note: Similarly you can add more team.
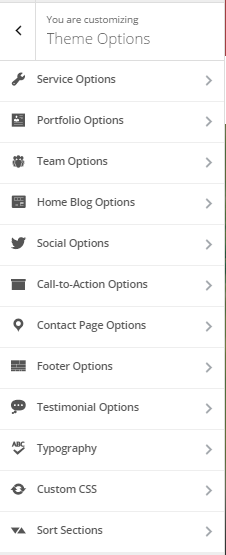
1. From Customize section, go to Theme Options.
2. Now, here you have different sections and settings for:
- Service Options (Recommended Plugin must be activated)
- Portfolio Options (Recommended Plugin must be activated)
- Team Options (Recommended Plugin must be activated)
- Home Blog Options
- Social Options
- Call-to-Action Options
- Contact Page Options
- Footer Options
- Testimonial Options (Recommended Plugin must be activated)
- Typography
- Custom CSS
- Sort Sections
The above mentioned section are described below.
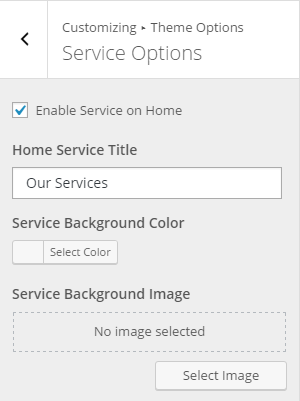
1. From Customize section, go to Theme Options and inside it there is Service Options.
2. In this section you will following settings.
- Enable Service on Home: This enables service section on home page.
- Home Service Title: This changes the service section title.
- Service Background Color: This changes the background color of service section.
- Service Background Image: This changes the service section background color.
Note: Recommended plugin should be installed for this section to work.
1. From Customize section, go to Theme Options and inside it there is Portfolio Options.
2. In this section you will following settings.
- Enable Portfolio on Home: This enables Portfolio section on home page.
- Portfolio Background Color: This changes the background color of portfolio section.
- Portfolio Background Image: This changes the portfolio section background color.
Note: Recommended plugin should be installed for this section to work.
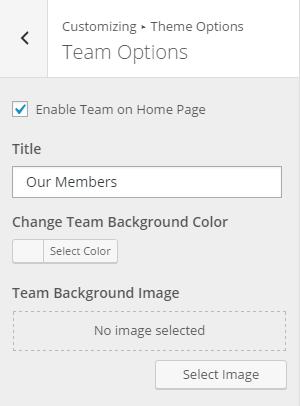
1. From Customize section, go to Theme Options and inside it there is Team Options.
2. In this section you will following settings.
- Enable Team on Home: This enables team section on home page.
- Title: This changes the title of the team section.
- Change Team Background Color: This changes the background color of team section.
- Team Background Image: This changes the team section background color.
Note: Recommended plugin should be installed for this section to work.
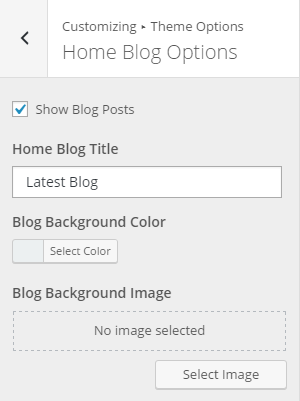
1. From Customize section, go to Theme Options and inside it there is Home Blog Options.
2. In this section you will following settings.
- Show Blog Posts: Checking this check-box enables blog posts in front page.
- Home Blog Title: This changes the title of the blog listing section above.
- Blog Background Color: This changes the background color of the blog listing section.
- Blog Background Image: This changes the background image of the blog listing section.
1. From Customize section, go to Theme Options and inside it there is Social Options.
2. In this section you will following settings.
- Enable Social Media Icon in Header: Checking this check-box enables social media icon as well as Email ID and Phone Number/Skype Id in header.
- Enable Social Media Icons in Footer: This enables social media icons in footer section.
- Email ID: Write your Email ID here, which will be displayed in top header section.
- Phone Number / Skype Id: You can write phone number or skype id here which will be displayed in top header section.
- Twitter: Write your twitter link here.
- Facebook: Write your facebook link here.
- LinkedIn: Write your linkedin link here.
- Google+: Write your google-plus link here.
- Youtube: Write your youtube link here.
- Instagram: Write your instagram link here.
Note: You can leave the social icon link field empty if you don’t want that icon to be displayed in header or footer. Social Icons for header as well as footer are setup from here.
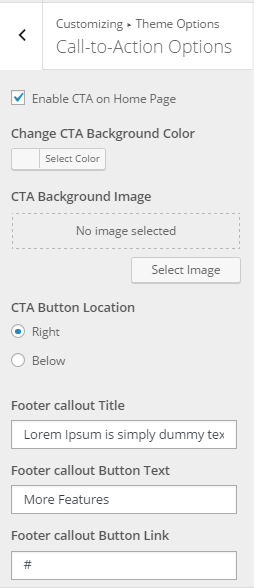
1. From Customize section, go to Theme Options and inside it there is Call-to-Action Options.
2. In this section you will following settings.
- Enable CTA on Home Page: Checking this check-box enables the CTA section in front page.
- Change CTA Background Color: This changes the background color of CTA.
- CTA Background Image: This changes the background image of CTA section.
- CTA Button Location: You will two option here:
- Right: This will move the CTA Button to right side.
- Below: This will move the CTA Button to below.
- Footer callout Title: This will change the title of CTA section.
- Footer callout Button Text: This change the button text in CTA section.
- Footer callout Button Link: You can write link for button here.
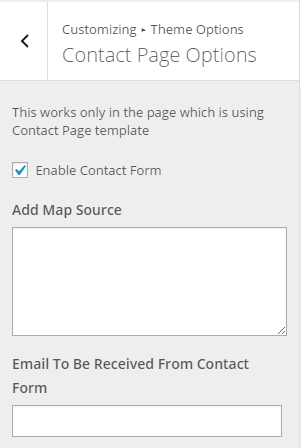
1. From Customize section, go to Theme Options and inside it there is Contact Page Options.
2. In this section you will following settings.
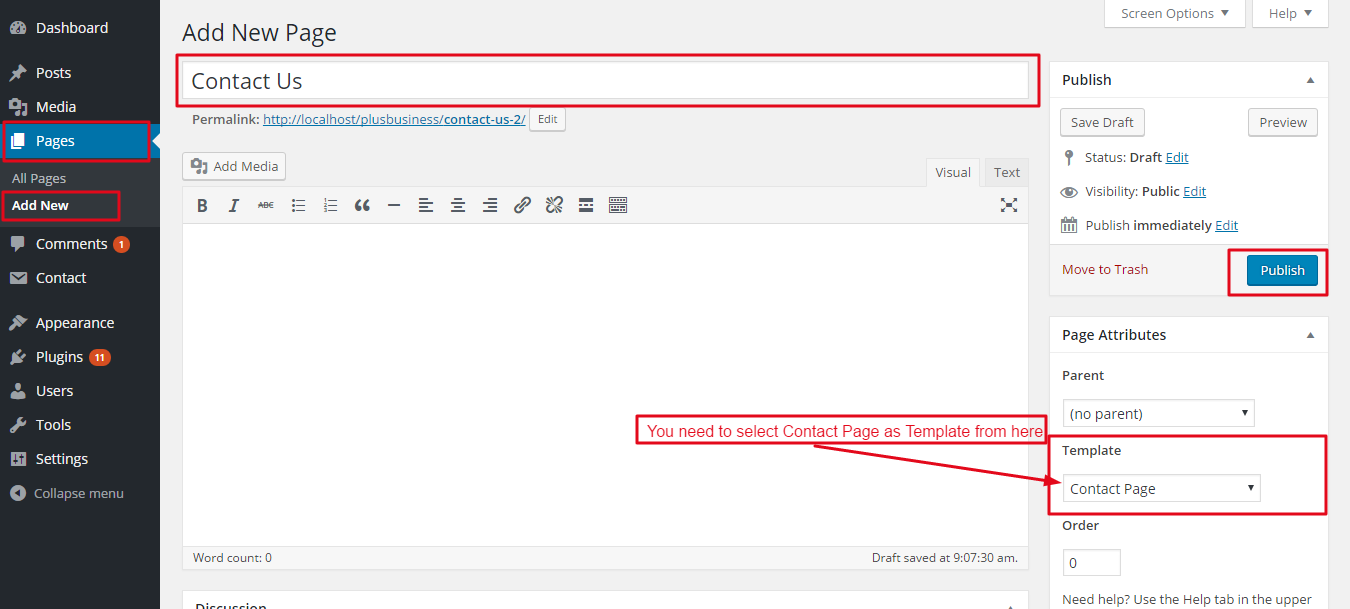
- Enable Contact Form: Checking this check-box enables the contact form if you have selected Template as Contact Page as shown in below image. And you need to add this page to the menu that you have selected as Primary Menu.
- Add Map Source: You can embed google map here.
- Email To Be Received From Contact Form: Write Email to be received from contact form here.
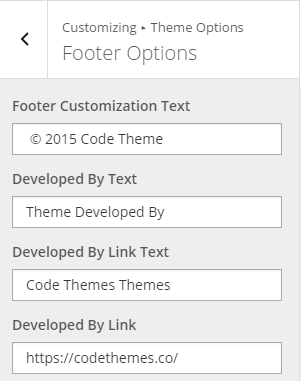
1. From Customize section, go to Theme Options and inside it there is Footer Options.
2. In this section you will following settings.
- Footer Customization Text: This changes the footer text.
- Developed By Text: This changes the developed by text in the footer.
- Developed By Link Text: This is developed by link text.
- Developed By Link: You can write developed by link here.
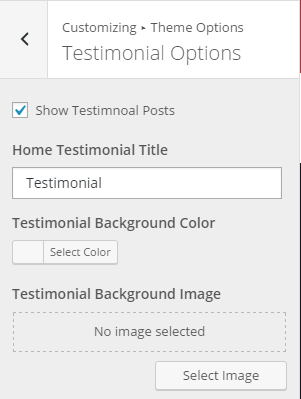
1. From Customize section, go to Theme Options and inside it there is Testimonial Options.
2. In this section you will following settings.
- Show Testimonial Posts: This enables testimonial posts on home page.
- Home Testimonial Title: This changes the title of the testimonial section.
- Testimonial Background Color: This changes the background color of testimonial section.
- Testimonial Background Image: This changes the testimonial section’s background color.
Note: Recommended plugin should be installed for this section to work.
1. From Customize section, go to Theme Options and inside it there is Typography.
2. In this section you will following settings.
- Section Title Font Family: This change the site title font family.
- Section Title Text Color: This changes the section title text color.
- Paragraph Font Family: This changes the paragraph font family.
- Paragraph Text Color: This changes the color of paragraph text.
- Heading Font Family: This changes the headings font family.
- Heading Text Color: This changes the color of heading text.
- Widget Title Font Family: This changes the font family of widget title.
- Widget Title Text Color: This changes the color of widget title text.
- Navigation Font Family: This changes the navigation font family.
- Navigation Text Color: This changes the text color of navigation.
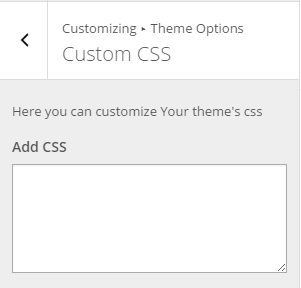
1. From Customize section, go to Theme Options and inside it there is Custom CSS.
2. In this section you will see a box to write custom CSS. You can write your custom CSs here.
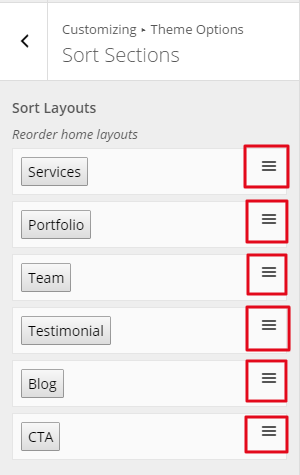
1. From Customize section, go to Theme Options and inside it there is Sort Sections.
2. In this section you will see front page sections. You can easily change the order of the section to be shown in front page by simple drag and drop technique.
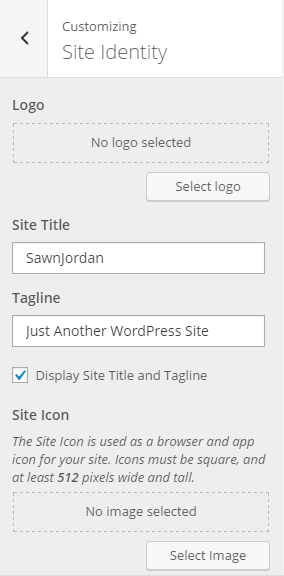
1. From Customize section, go to Site Identity.
2. From Site Identity, you will be able to add various options related to site identity like:
- Logo (Only available in WordPress version greater than or equal to 4.5): You can change the logo for your site from here.
- Note: In WordPress version below 4.5, you will see this option for Logo as Website Logo under Site Identity section.
- Site Title :It changes the main site title of the site.
- Tagline :It changes the tagline (i.e. Description) of the site. Just below site title.
- Display Site Title and Tagline: This option enables/disables the site title and tagline.
- Site Icon :The Site Icon is used as a browser and app icon for your site. Icon must be square, and at least 512px wide and tall.
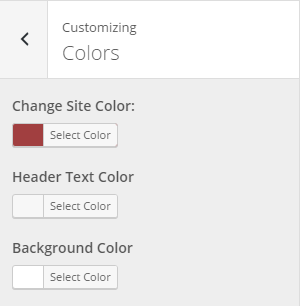
1. From Customize section, go to Colors.
2. From Colors, you will be able to add various options related to colors like:
- Change Site Color: This changes the site’s color.
- Header Text Color: This changes the color of header text.
- Background Color: This change the background color of the site.
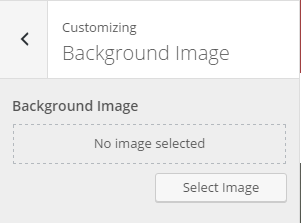
1. From Customize section, go to Background Image.
2. From Background Image, you will be able to change the background image.
3. If preview is fine, click on “Save and Publish” button to save the changes.
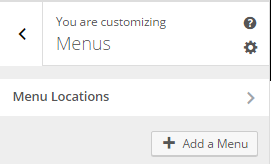
1. From Customize section, go to Menus.
2. From Menus, click “Add a Menu” button and you will be able to create a menu.
3. Now, click Add Items and you will be able to Add or Remove Menu Items according to your requirement.
4. Select the Menu locations.
5. If the preview looks fine, save the changes by clicking on Save and publish button.
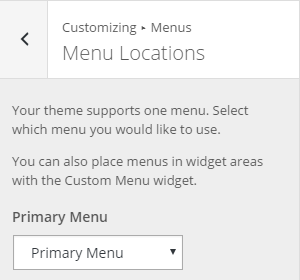
1. From Customize section, go to Menus and inside it you will find Menu Locations.
2. Here you can see:
- Primary Menu: Select the menu for Primary menu. Primary menu appears as a main menu in header section.
3.If the preview looks fine, save the changes by clicking on Save and publish button.
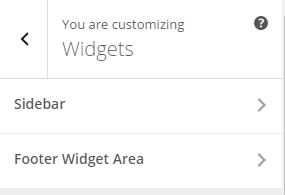
1. From Customize section, go to Widgets.
2. From Widgets, you will be able to manage Sidebar and Footer Widget Area.
3. Here, you will be able to Add/Remove/Reorder Widgets in Sidebar and Footer Widget Area. according to your requirement.
4. You can simply click on Add a Widget button and select various available options according to your requirement.
5. Added widgets will appear in your Sidebar and Footer Widget Area. respectively.
6. If the preview is fine, you can click on Save & Publish button.
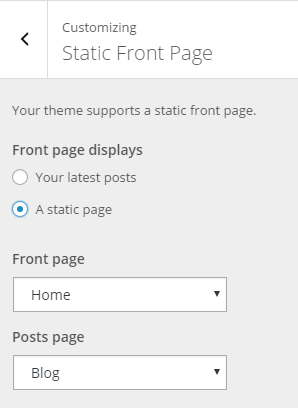
1. From Customize section, go to Static Front Page.
2. From Static Front Page, you will be able to set any page as A Static Page and you will find your latest posts page option as well.
To update Theme though FTP, follow these basic steps:
- Download the latest version of Bhumi Pro from your Theme Palace member My-Account to your Desktop
- Unzip bhumi-pro.zip to your Desktop
- Using an FTP client to access your host web server, go to /wp-content/themes/ and upload your new copy of Bhumi Pro Theme which shall replace the old files

