Themes Instructions
Select a Theme from the drop down menu
eMag Pro
eMag pro is a Magazine WordPress theme with a responsive and robust design, built specially for online publishing businesses and news agencies. This dynamic theme is excellent for blogs, newspapers, magazines and is great for anything a media company would want to put up. The widget-based front page setting makes eMag very flexible to accommodate and organize high-volume contents. And with custom widgets, you can build your site as per the functionalities. It’s also great for you if advertisement is one of your sources of revenue as this theme has a space built for the ad in the top section. The different layouts and sections make it easy for the site visitors to navigate within. If you are looking for a mold able theme yet with no clutter, eMag is exactly the one for you.
- Log in to the WordPress Administration Panels.
- Go to Appearance > Themes.
- Select ‘Add New’.
- Then select ‘Upload Theme’.
- Click ‘Browse’ and Locate ‘emag-pro.zip’ Theme in your computer.
- Select ‘emag-pro.zip’ and click ‘Install Now’.
You can use FTP client like FileZilla to connect your web server.
- Unzip emag-pro.zip to your Desktop.
- Using an FTP client to access your host web server, go to wp-content > themes and upload your new copy of your eMag-pro theme.
- Now, log into the WordPress Dashboard with your login details.
- Select the Appearance panel, then Themes.
- You will see the theme in the list.
- Then click Activate button.
The theme will now be activated.
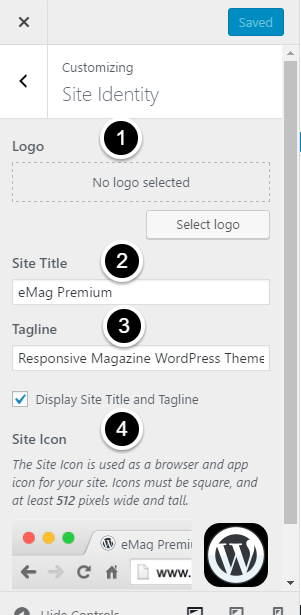
Navigate Customize > Site Identity
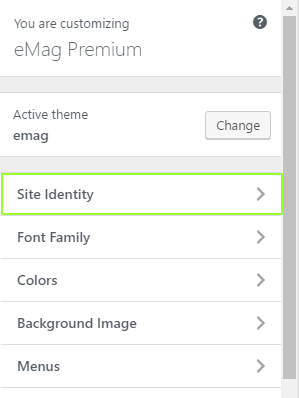
From there you can manage the following:
Logo
Site title
Tagline
Site Icon
You can set up the front page in two different formats: – a blog page or a static front page. A static front page is recommended because a blog page is a usual inner page, while a static front page has special display options.
Setting up Static Front Page
First, create and publish a page with suitable title for the home page. (E.g. Home)
Then, go to Customize > Static Front Page > A static page
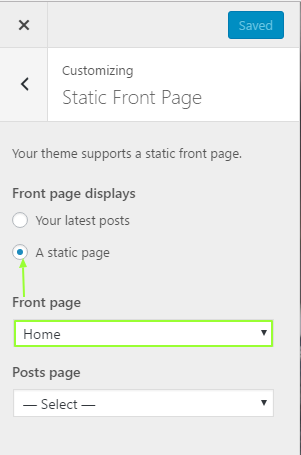
Select the page required for the static front page. Now, enable the sections from the customizer.
Once you have the static front page set up, a number of sections appear on the front page, all of which can be modified from the Customizer.
- Header Section Settings
- Home Main Slider
- Home Blog Options
The general customizer includes various options. They do bring changes in the front page as well.
- Colors
- Font Setting
- Background Image
- Menus
- Widgets
- Theme Options
- Reset All Options
Firstly,
Go to Customize > Header Section Settings
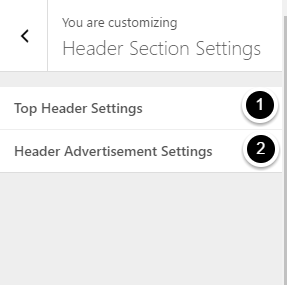
1.Top Header Settings
The settings in this section will affect a few things on the top section of the homepage.
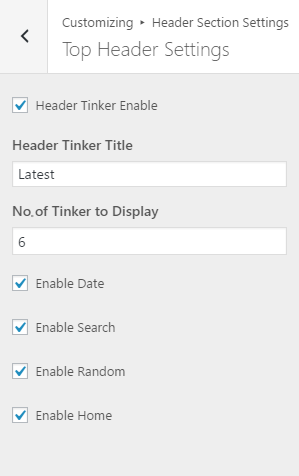
- Tinker:
On checking “Header Tinker Enable” the tinker will be enabled. It’s title and the number of tinkers to be displayed can be modified from the 2nd and 3rd options in the customizer box. - Date:
On checking “Enable Date” date will be displayed in the right corner of the top-most section. - Search:
On checking “Enable Search” search icon will be displayed in the right corner of the top ribbon and it will help site-visitor navigate within the page. - Random:
On checking “Enable Random” random icon will be displayed in the right corner of the top ribbon. This option will let site visitors see news or published articles in a random manner. - Home:
On checking “Enable Home” home icon will be displayed in the right corner of the top ribbon. It is linked to the front page of the site.
2.Header Advertisement Setting
Header Banner Advertise
Go to Header Section Settings > Header Banner Advertise and upload the required banner.
Redirect Advertisement URL
Go to Header Section Settings > Redirect Advertisement URL
In the box, enter the URL where the banner has to redirect.
Firstly,
Go to Customize > Home Main Slider
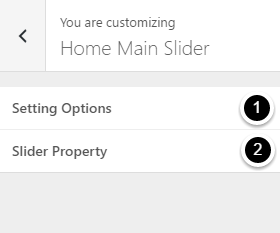
1. Settings Options (Main Slider)
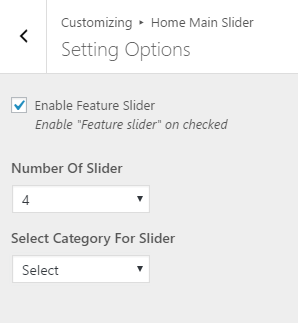
Enabling/ Hiding the main slider.
Go to Setting Options. On checking the option ‘Enable Feature Slider’ the slider will appear on the front page. When the option is not checked, it means that the slider will be hidden.
Selecting number of sliders for main slider
Go to, Setting > Options > Number of slider
Now you can select the number of sliders you want.
Selecting category for slider
Go to,Setting Options > Select Category for Slider
Now select the category you want to display. Make sure that the posts to be displayed are listed under the selected category.
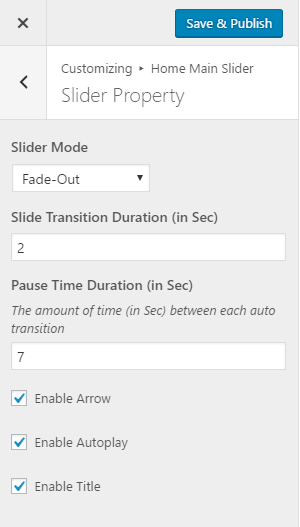
2. Slider Properties
To select, slider mode, slider transition and pause duration or to enable/disable arrow, auto play and title, Go to Slider Property and select within.
The blog section will be updated automatically as you publish new posts. You can still edit various settings.
Go to Customize > Home Blog Options
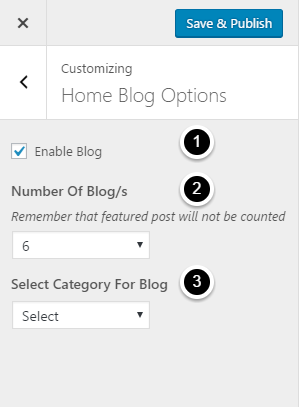
- Enabling the Blog Section
On checking the option ‘ Enable Blog‘ the section will appear on the front page. When the option is not checked, it means that the section will be hidden. - Determining number of blogs appearing on the front page
To specify the number of blogs you want to display on the front page, go to, Home Blog Options > Number of Blog’s - Selecting category for blog
You can display posts in the blog section from a single category only. For this, Go to Home Blog Options > Select Category For Blog.
And, select the category you wish to display. Make sure the posts you want to display is listed under the category you’ve chosen
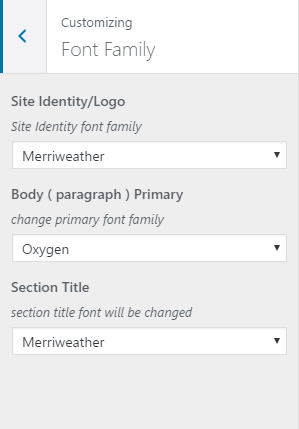
To edit the fonts, Go to Customize > Font Family
Now choose the specific font family for each of the given sections. Once, the preview is fine, save it.
Editing basic colors.
A number of color options are available for texts in different sections, background, menus etc. To edit the colors:
Go to Customize > Colors.
Now, you will be able to change the color options. Once, the preview is fine you can save and publish it.
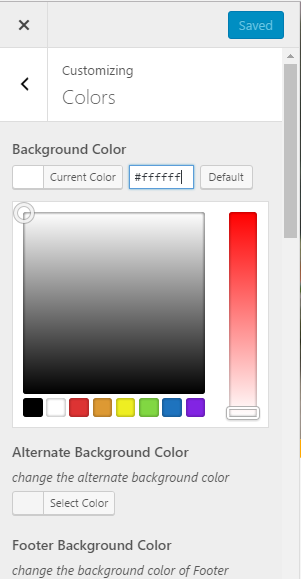
2. Resetting the colors.
Go to Customize > Colors Reset
On checking the ‘Reset’ option and saving it the color options will change to default colors of the theme.
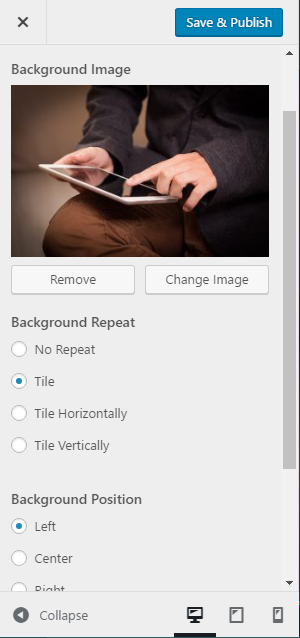
To set or edit the Background Image,
Go to Customize > Background image.
You can upload a picture there. Once, you have the picture selected you can make various changes regarding how it is displayed. Save the changes once you are fine with the preview.
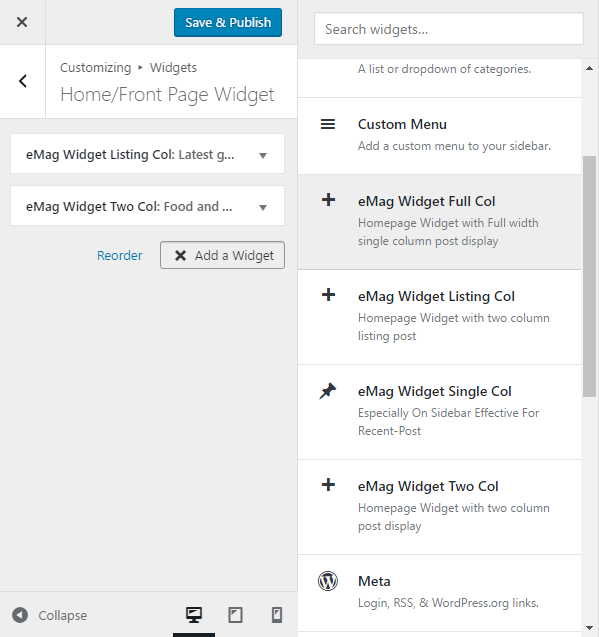
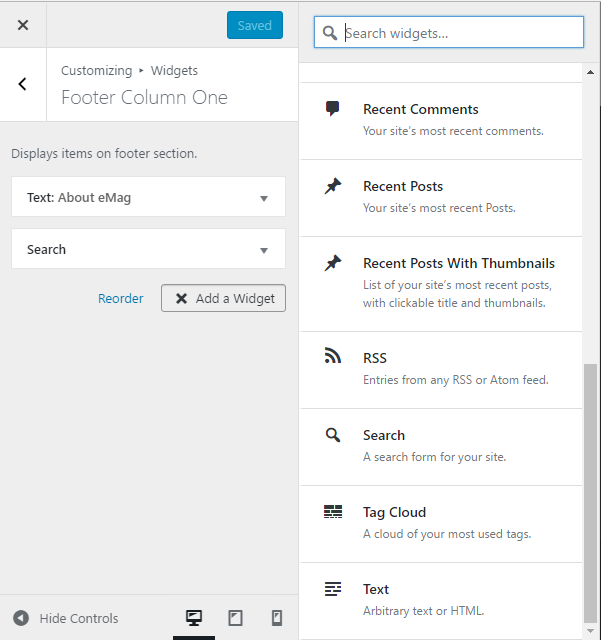
Widgets are one of the most important aspects of this theme. Three special widgets are specially built for the front page so that most of your content can be categorized easily and be accommodated to feature in the front page.
To add or customize the widget, navigate to Customize > Widgets
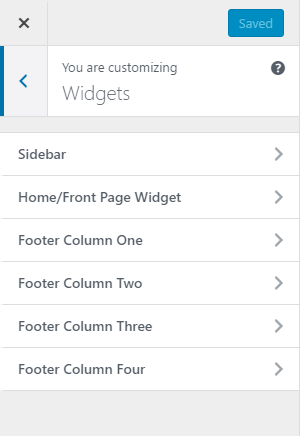
Now, select the required section and customize accordingly.
Home/Front Page Widget
Footer
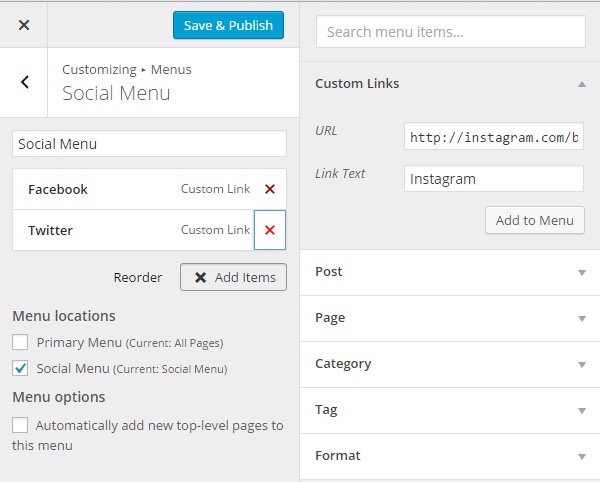
Go to Customize > Menus
Here, you can create and manage the menus
1. Creating a Menu
From Menus, click ‘Add a menu ‘ button, you will be able to create a menu here. Once, you have created the menu, you can further add items to the menu.
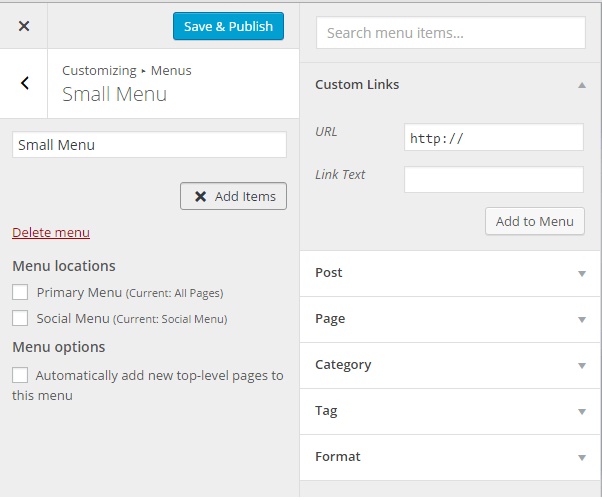
2. Creating a Social Menu.
From, Menus create a menu (E.g. “Social menu”) and assign its location to Social Menu. Now, once you add custom links and social media URLs in each of the links, you will get the social icon in the Social Menu.
To update Theme though FTP, follow these basic steps:
- Download the latest version of eMag Pro Theme from your Theme Palace member My-Account to your Desktop
- Unzip emag-pro.zip to your Desktop
- Using an FTP client to access your host web server, go to /wp-content/themes/ and upload your new copy of eMag Pro Theme which shall replace the old files.