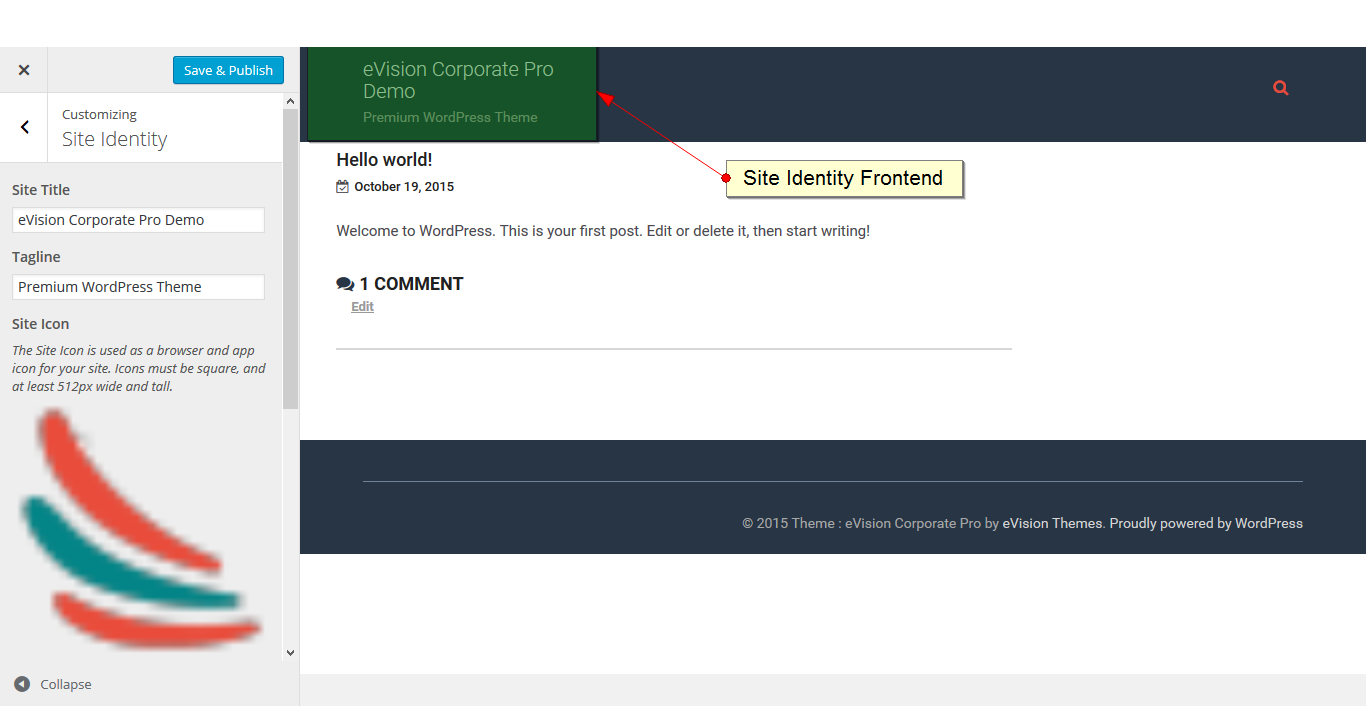
2. From Site Identity, you will be able to add various options related to site identity.



Select a Theme from the drop down menu
eVision Corporate Pro is a strong and attractive business theme. It has been introduced after a long research and analysis. It is suitable for any type of business organizations exhibiting the features such as services, portfolios, testimonials, skill, team, blog, contact etc with enable/disable option. Its also supports for one page site.
The free version of themes only allow to add limited number of those sections but eVision Corporate Pro theme allows you to add unlimited number of sections, posts, reorder theme and customize theme efficiently.
eVision Corporate Pro comes with the bundle plugin eVision Themes Dashboard which is specially created for eVision Corporate Pro theme, that allows you to add any section form the widget.
eVision Corporate Pro is widgeted theme, with simple click, drag and drop you can make your site very unique and beautiful.
Its competencies include responsive, bootstrap, HTML5, CSS3, retina ready, font awesome, google font, cross-browser compatibility, color control, layout control, logo upload, translation-ready, custom CSS field, etc.
This documentation consists of several parts and shows you the entire process of setting up WordPress and eVision Corporate Pro theme from scratch.
Thank you for purchasing the theme. After you purchase and download your theme from Theme Palace you can choose either of the approaches given below to install your theme.
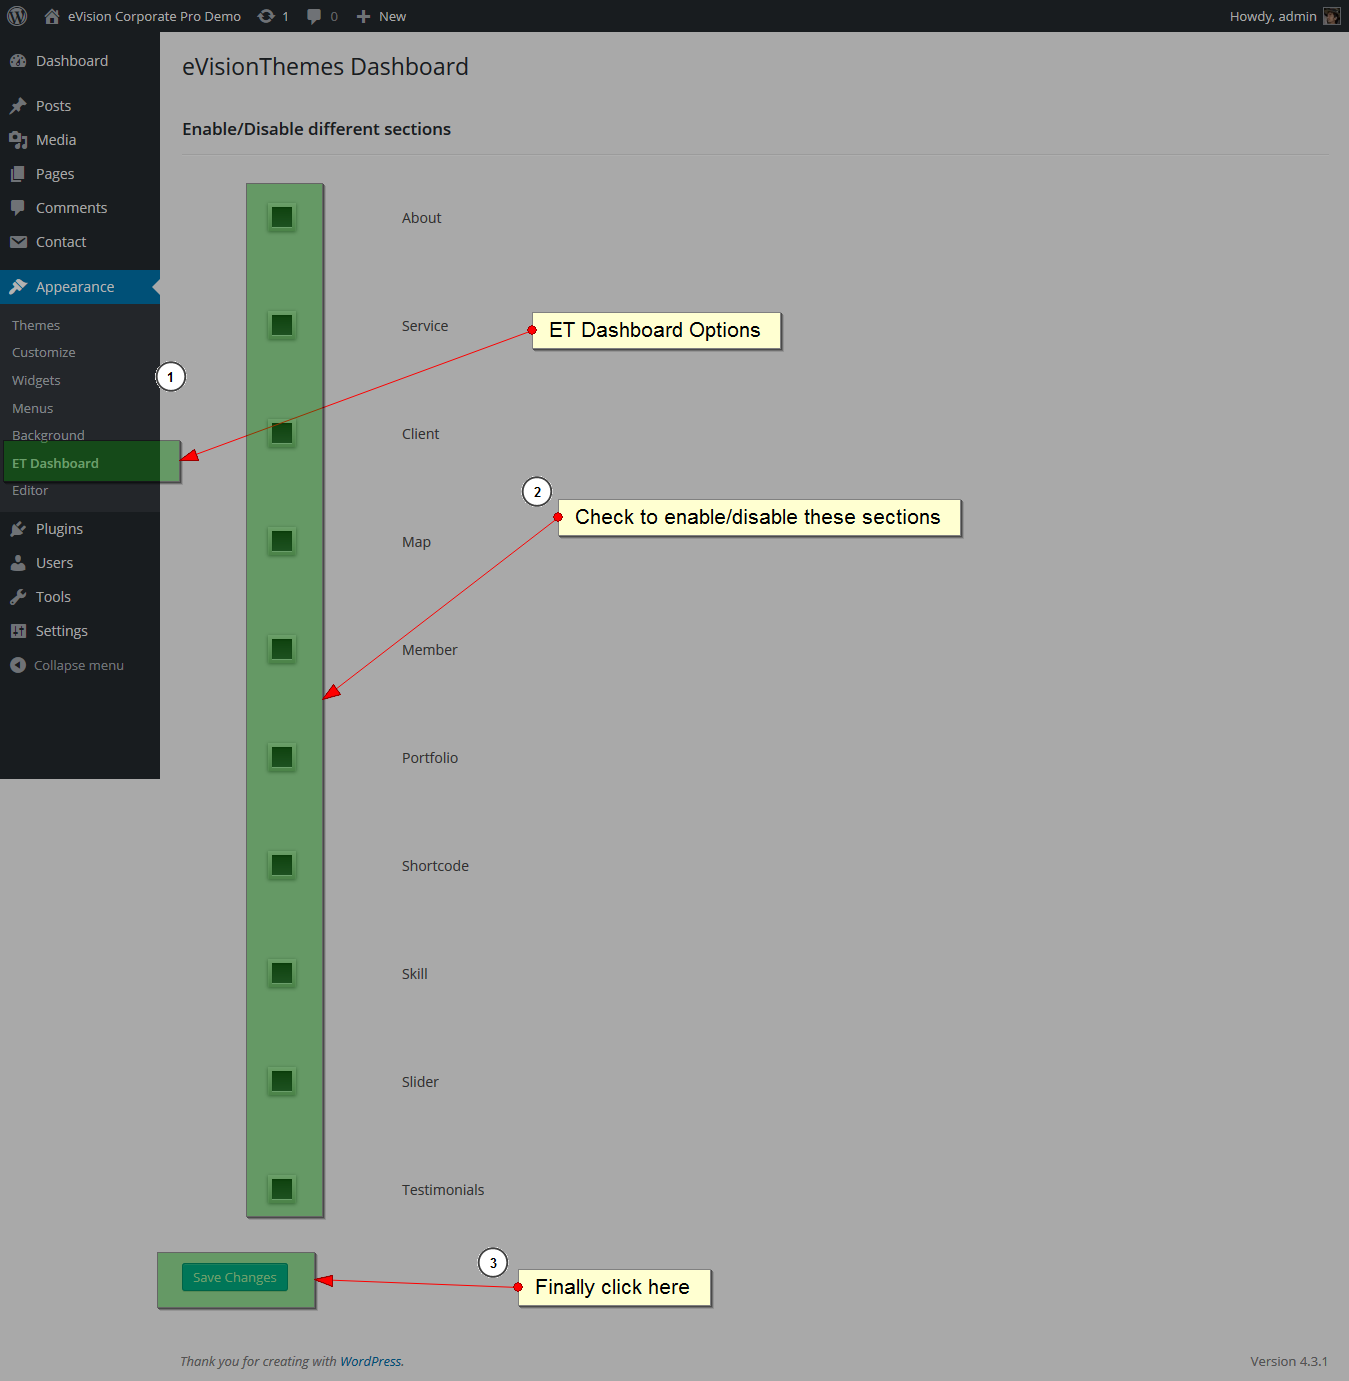
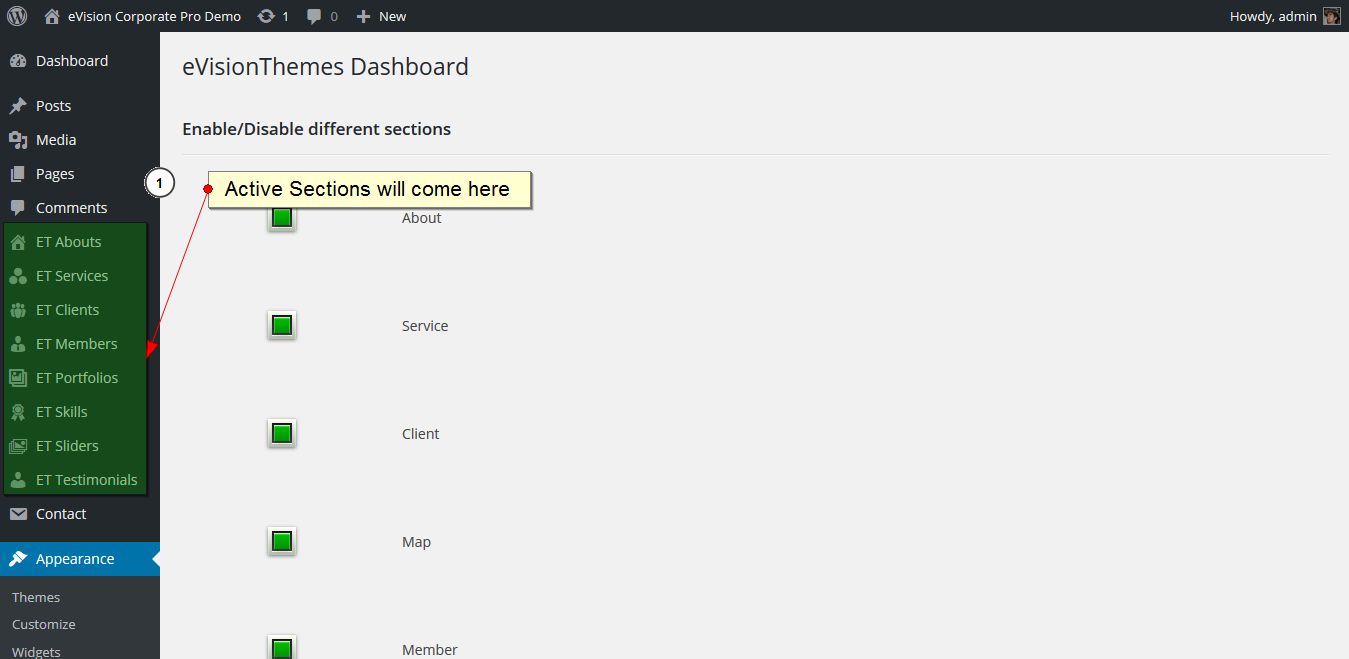
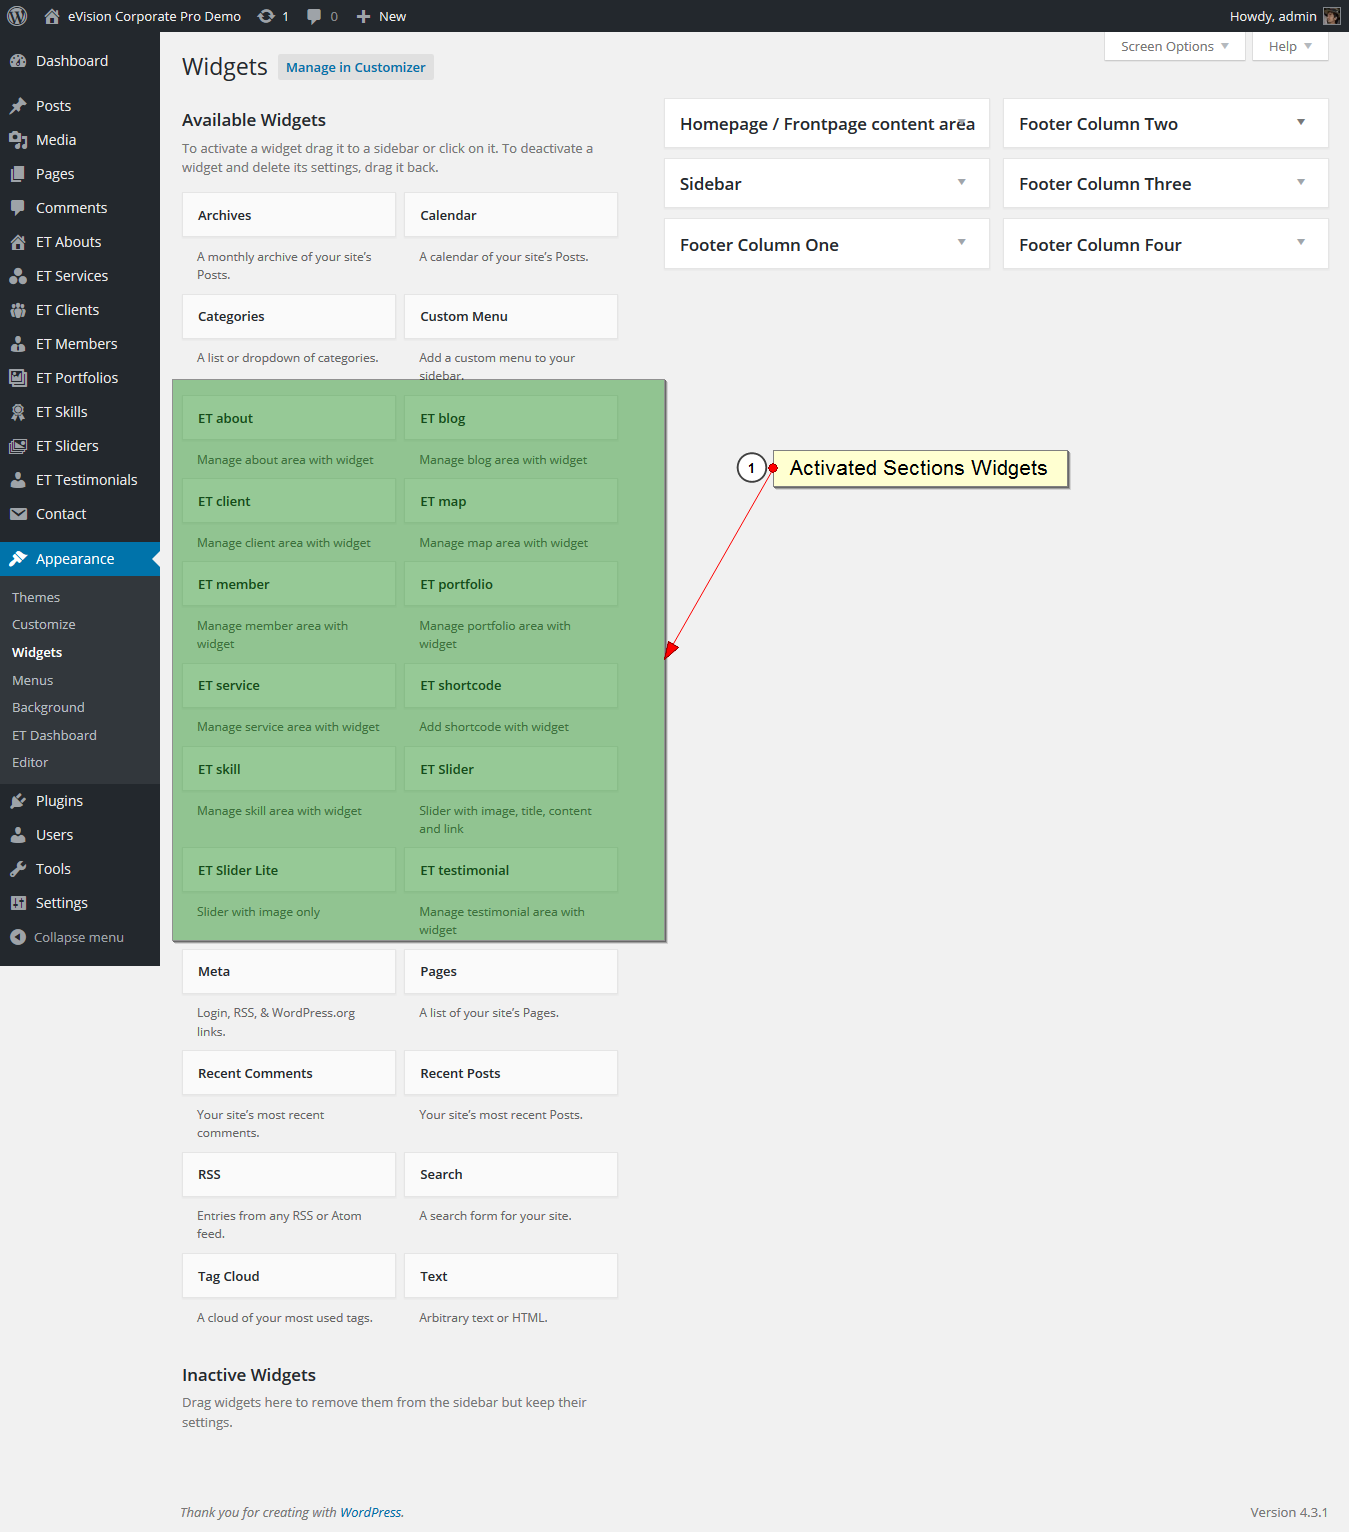
An advanced theme options based on customizer gives you full control to the content and setting on the theme.


We have created an advance color options. Using this color options you can change color of entire site including each and every sections.
From the font setting you will be able to change font family and font size of headings ( H1-H6 ), section title and paragraph.
1. From “Customize” section, go to Font setting.
2. You will find options for setting font family inside font family and font size inside font size.
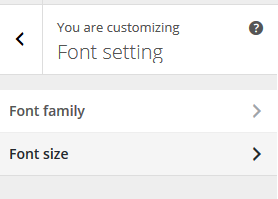
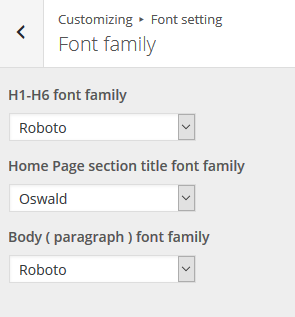
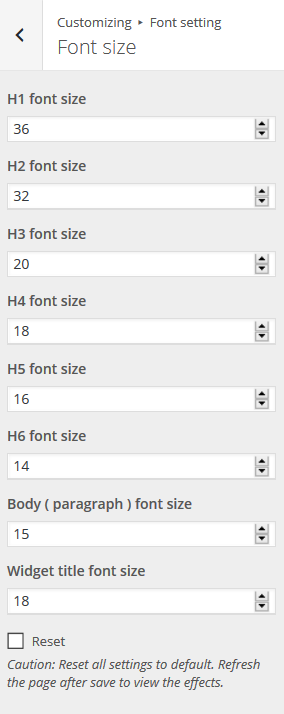
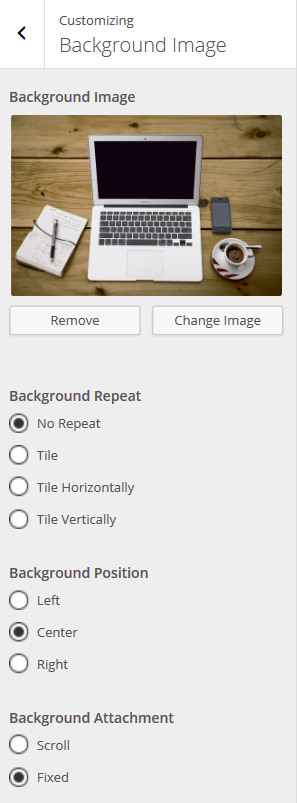
From the Background Image you will be able add/edit Background Image and customize it in various ways.
1. From “Customize” section, go to Background Image.
2. Select background image.
Customizing Menus
Now adding Items on menus:
- Supported social menus
    - facebook.com
    - twitter.com
    - linkedin.com
    - instagram.com
    - youtube.com
    - pinterest.com
    - plus.google.com
    - flickr.com
    - tumblr.com
You can setup extra menu setting from here
From “Customize” section, go to menu setting.
From the widgets you will be able to setup different widgets area including Home Page/Front Page.
From “Customize” section, go to Widgets.
You can also set up extra options from here.
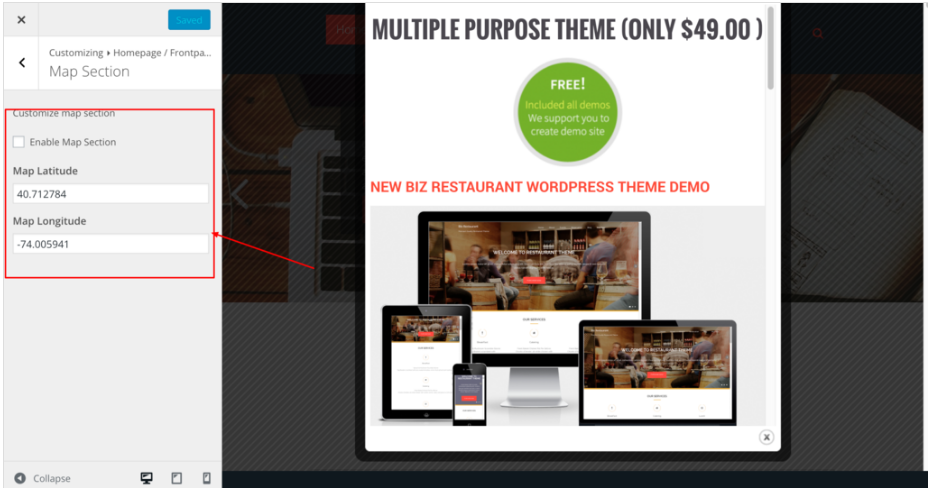
1. From Customize section, go to Home page/Front page .
2. From Home page/Front page, you will see Map Section.
3. In Map Section Options you will see:
To have the contact form as shown in the demo , you need to do the following things :
1. From Admin Panel , go to Contact.
2. From Contact , you will see Add New Options.
3.In Add New Options , You will see a block of code .
4.Replace the existing code with the code given below.
[text* your-name placeholder “Name”]
[text* your-email placeholder “Email”]
[text* your-subject placeholder “Subject”]
[textarea your-message placeholder “Message”]
[submit “Send Message”]
You can enable/disable social icon, theme name and also make changes to the copyright text in the footer area.
On the release of new update of the theme (2.2.0), due to minor issues on the slider an update for the ET Dashboard Plugin was also released along side, so if you are receiving a notice from the theme about updating to a new plugin from the old one, you will need to follow the following steps.


| Cookie | Duration | Description |
|---|---|---|
| cookielawinfo-checkbox-analytics | 11 months | This cookie is set by GDPR Cookie Consent plugin. The cookie is used to store the user consent for the cookies in the category "Analytics". |
| cookielawinfo-checkbox-functional | 11 months | The cookie is set by GDPR cookie consent to record the user consent for the cookies in the category "Functional". |
| cookielawinfo-checkbox-necessary | 11 months | This cookie is set by GDPR Cookie Consent plugin. The cookies is used to store the user consent for the cookies in the category "Necessary". |
| cookielawinfo-checkbox-others | 11 months | This cookie is set by GDPR Cookie Consent plugin. The cookie is used to store the user consent for the cookies in the category "Other. |
| cookielawinfo-checkbox-performance | 11 months | This cookie is set by GDPR Cookie Consent plugin. The cookie is used to store the user consent for the cookies in the category "Performance". |
| viewed_cookie_policy | 11 months | The cookie is set by the GDPR Cookie Consent plugin and is used to store whether or not user has consented to the use of cookies. It does not store any personal data. |


