
Themes Instructions
Select a Theme from the drop down menu
Table of Contents
- 1.Introduction
- 2.Installation
- 3.Installing required and recommended plugins
- 4.Bulk install required and recommended plugins
- 5.How to setup frontpage as shown in the demo?
- 5.1.Header Options
- 5.2.Social Options
- 5.3.Banner Options
- 5.4.Intro Options
- 5.5.Stat Options
- 5.6.Video Options
- 5.7.Mid Section Options
- 5.8.Accommodation Options
- 5.9.Instagram Options
- 5.10.Testimonial Options
- 5.11.Call To Action Options
- 5.12.Footer Options
- 5.13.Weather Options
- 5.14.Contact Page Options
- 5.15.Typography
- 6.Manage site title, logo and site icon.
- 7.How to add header image for inner pages?
- 8.Menu setup
- 9.How to manage background image?
- 10.How to change theme’s color?
- 11.How to setup sidebar?
- 12.How to manage additional CSS?
- 13.Shortcodes
- 14.Note:
Resortica
We would like to thank you for trying Resortica, responsive WordPress theme for your website. Before you get started, please be sure to always check out this documentation. Resortica can only be used with WordPress and we assume that you already have WordPress installed and ready to go.
To install this theme you must have a working version of WordPress already installed. For information in regard to installing the WordPress platform, please see the WordPress Codex article on installation.
The theme files can be uploaded in two ways:
- FTP Upload: Using your FTP program, upload the unzipped theme folder into the /wp-content/themes/ folder on your server.
- WordPress Upload: Navigate to Appearance > Add New Themes > Upload. Go to browse, and select the zipped theme folder. Hit “Install Now” and the theme will be uploaded and installed.
- Once the theme is uploaded, you need to activate it. Go to Appearance> Themes and activate your chosen theme.
After Installing and activating the theme you will see the following message at the top of the admin dashboard page. This theme requires few following plugins. Click, begin installing plugins link which will redirect to Install Required Plugins page.
You can install or update the required and recommended plugins at once just by clicking into “Begin Installing Plugins”.
Resortica requires “Opal Hotel Room Booking” and “Custom Post Type UI” plugin in order to function properly. Both plugins are free and you can download them from wordpress.org/plugin repository.
Resortica recommends Jetpack plugin which is also free. Infinite scroll feature of the plugin is supported by the theme.
To make your site’s homepage look like exactly like our demo, you should first create a page, say, “homepage” and assign it to the “Home – Template” template and follow the step by step instructions below.
The demo of the front page can be further divided into following sections. You should navigate into Appearance > Customizer > Theme Options and find the similar settings for the sections listed below.
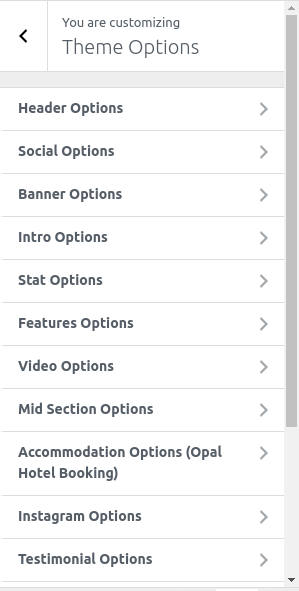
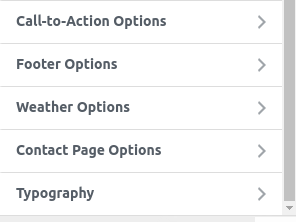
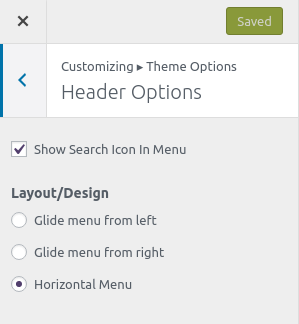
Header options lets you hide or show search icon in menu, gives you three menu layout options as shown in the screenshot.
Social options lets you add social icons, email id, phone number in header and in footer of your site. You can also show or hide social section in header or footer.
Banner options lets you choose banner type of the site be it slider, image or video banner. Banner title and description can also be added along with the image or video. You can show or hide gradient overlay in the banner image, video or slider. To get slider banner feature, you must install “Custom Post Type UI” plugin and activate it. Furthermore, you can choose any post type created using CPTUI and the featured image will be displayed as slider.
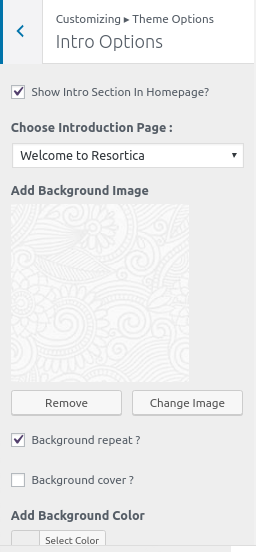
Intro options allows you to choose introduction page which will be shown below the site’s banner. You can also add background image, background color to this section. Settings like background cover and background repeat can be adjusted.
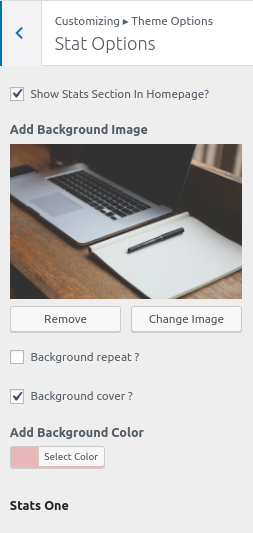
This section lets you add maximum four titles and their numbers of your site. You can also add background image to this section. Settings like background cover and background repeat can be adjusted.
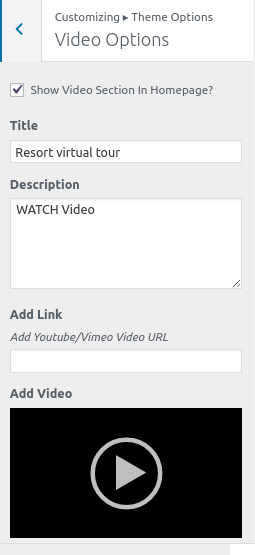
You can upload video or add youtube/vimeo video link in this section. A play button is shown which when clicked the video pops up. Title, description and background image also can be added.
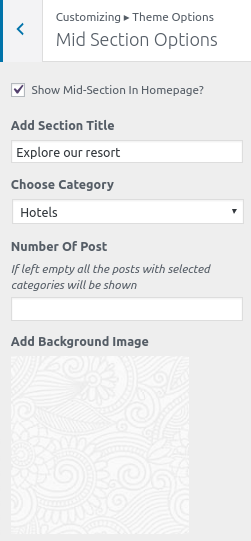
This section comes below the video section in the homepage, where you can add title and choose category of post which will be shown as slider.Settings like background cover and background repeat can be adjusted.
This option lets you manage accommodation section which is next to the mid-section in the homepage. You can add title and limit number of room post type in this section. This option is show only if you have installed and activated “Opal Hotel Room Booking” plugin. Settings like background cover and background repeat can be adjusted.
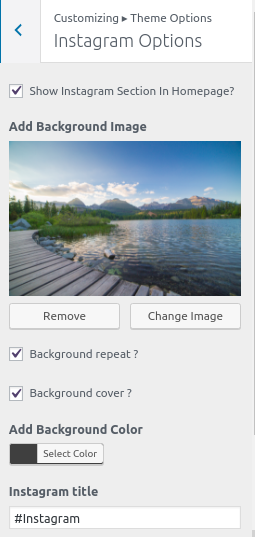
The instagram section in the homepage comes into play after you add a user name from this option.You can add background image, title for this section and limit number of images to be displayed.
Note: The instagram account needs to be public.
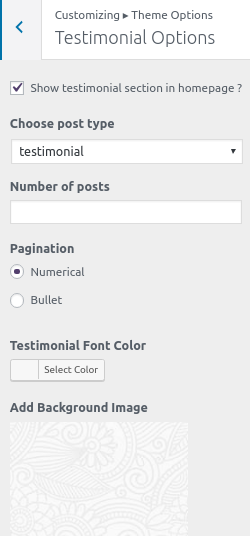
You can limit number of testimonial posts, change type of pagination (numerical or bullet) and change the font color of text from this option.
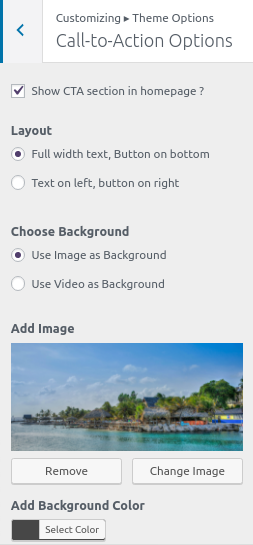
The call to action options lets you choose the layout of the call to action section. You can choose image or video as background, add title, description, button text and button link.
You can choose between two column or three column footer, only text, only menu and both text and menu from this option. It lets you add footer text, developed by text and developed by link of your site.
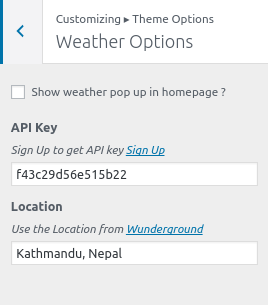
This option lets you enable contact form, add map source and other contact informations like contact title, address, phone number, mobile/skype, email and web URL.
From this option you can change section title, paragraph, heading, widget title, navigation font family and text color.
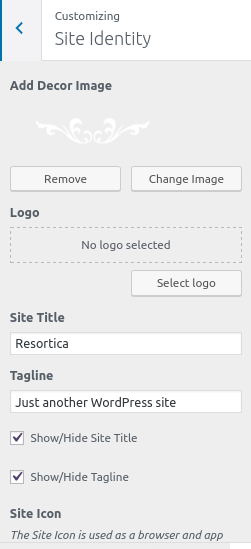
Set your site’s title, description and add logo by navigating to Customizer > Site Identity.
Logo: It changes the main logo of the site.
Decor Image: decor image accentuates your site appearance. It is displayed along with the logo.
Site Title: It changes the main site title of the site.
Tagline: It changes the tagline (i.e. Description) of the site.Just below site title.
Site Icon: The Site Icon is used as a browser and app icon for your site.Icon must be square, and at least 512px wide and tall.
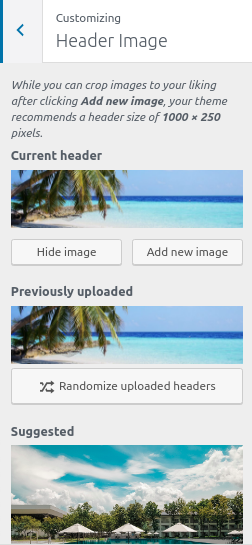
This section allows you to add different header images for other pages.
Navigate to Customize > Header Image
In Header Image Options you can add new image in the Header section by clicking Add new image.
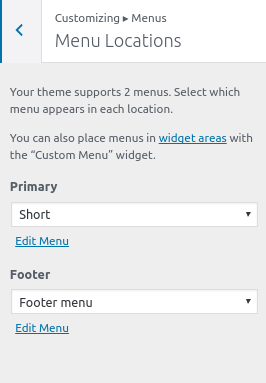
In admin menu’s Appearance > Menu page there are two predefined theme menu locations in,
- Primary and
- Footer menu
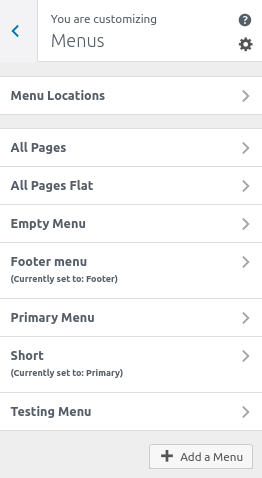
Go to Appearance > Customize >Menus.
- From Menus, click “Add a Menu” button and you will be able to create a menu.
- Now, click Add Items and you will be able to Add or Remove Menu Items according to your requirement.
- Select the Menu locations.
- Click Save and publish button.
Go to Appearance > Customize> Menus > Menu Locations
- Select the menu for Primary Menu. Primary menu appears as a main menu in header section.
- Select the menu for Footer Menu. Footer menu appears on the footer section.
- Click Save and publish
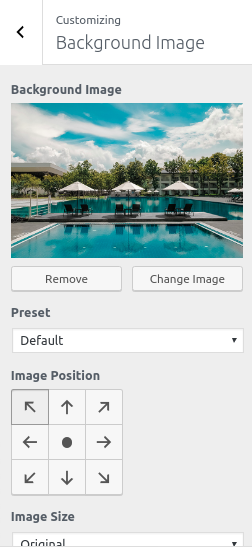
This section allows you to add background images for website.
- Navigate to Customize > Background Image
- Select the image for Background available on media library or upload from the other location.
- Click Save & Publish
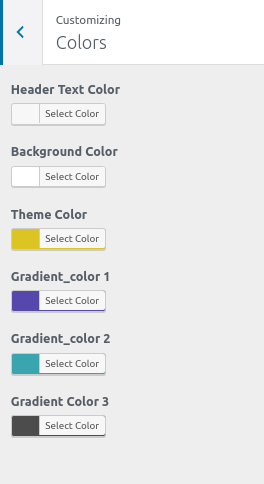
Colors option lets you choose theme color, gradients color and header text color.
- Theme color changes color of the theme.
- Gradients color change gradients of banner section.
- Header text color changes color of site title.
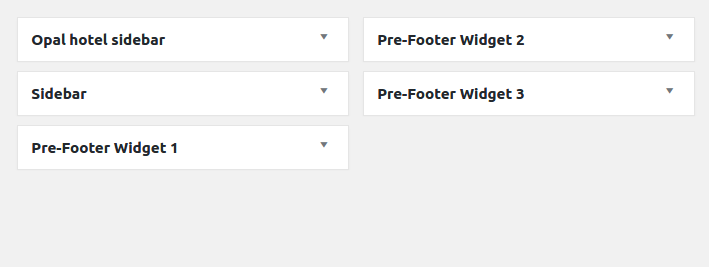
Navigate widget under Appearance in the dashboard to add widgets.
Resortica has two Sidebar Widgets and a Default Sidebar
- Pre-footer area (There are three widgetized sections in pre-footer)
- Opal hotel sidebar (If opal hotel plugin is activated)
Go to Appearance > Customize >Additional CSS, you can add extra CSS to tweak your website’s design.
There are seven shortcodes that you can use any where in the website. They are for banner and for call to action.
[slider_default] => for slider banner
Attributes
number_posts = “”
[slider_image_banner] => for image banner
Attributes
‘title’ => ”,
‘description’ => ”,
‘image_url’ => ”,
[video_banner] => for video banner
Attributes
‘title’ => ”,
‘description’ => ”,
‘button_text’ => ”,
‘button_link’ => ”,
‘video_url’ => ”,
[cta_center_button_image] => call to action with button in the center and image as background.
Attributes
‘title’ => ”,
‘content’ => ”,
‘button_text’ => ”,
‘button_link’ => ”
[cta_center_button_video] => call to action with button in the center and video as background.
Attributes
‘title’ => ”,
‘content’ => ”,
‘button_text’ => ”,
‘button_link’ => ”
[cta_right_button_image] => call to action with button in the right and image as background.
Attributes
‘title’ => ”,
‘content’ => ”,
‘button_text’ => ”,
‘button_link’ => ”
[cta_right_button_video] => call to action with button in the right and video as background.
Attributes
‘title’ => ”,
‘content’ => ”,
‘button_text’ => ”,
‘button_link’ => ”


