Themes Instructions
Select a Theme from the drop down menu
Table of Contents
- 1.Introduction
- 2.Theme Installation
- 3.Updating/Installation of Theme Using FTP
- 4.Setting-Up Front Page
- 5.Site Title, Tagline and Site Icon
- 6.Basic Color Options
- 7.Font Settings
- 8.Header Image
- 9.Background Image
- 10.Create and Modify Menus
- 11.Creating a Menu
- 12.Creating a Social Menu
- 13.Creating a Footer Menu
- 14.Adding widgets
- 15.Setting-Up Static Front Page
- 16.Setting-Up Home/Front Main Slider
- 17.Setting-Up Home/Front Service Option
- 18.Setting-Up Home/Front Featured Section
- 19.Theme Options
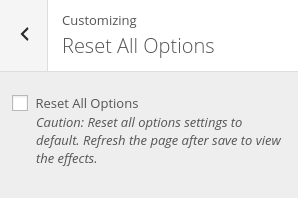
- 20.Reset All Options
Speedy Pro
Speedy Pro is a clean, minimalist WordPress blog theme for everyone. It’s suitable for any agencies, personal, blogger etc. in order to share life stories, experiences, information with images, audio and videos. This theme focuses on your content with a banner, featured images, featured slider, drag & drop options, multiple-layouts, services and a magnificent layout for recent blogs
Thank you for purchasing Speedy Pro. After you purchase and download your theme from Theme Palace you can choose either of the approaches given below to install your theme.
- Log in to the WordPress Administration Panels.
- Select the Appearance panel, then Themes.
- Select Add New.
- Then select Upload Theme.
- Click Browse Locate speedy-pro.zip Theme in your computer.
- Select speedy-pro.zip and click Install Now.
You can use FTP client like FileZilla to connect your web server.
- Unzip speedy-pro.zip to your Desktop.
- Using an FTP client to access your host web server, go to /wp-content/themes/ and upload your new copy of Speedy Pro Theme.
- Now, log into the WordPress Dashboard with your login details.
- Select the Appearance panel, then Themes.
- You will see the theme in the list.
- Then click Activate button.
- Now the theme will be activate and go through the following options to set up the theme step wise.
To update Theme though FTP, follow these basic steps:
- Download the latest version of speedy pro from your Theme Palace member My-Account to your Desktop
- Unzip speedy-pro.zip to your Desktop
- Using an FTP client to access your host web server, go to /wp-content/themes/ and upload your new copy of speedy pro Theme which shall replace the old files
Dividing the demo into the following section, you can set them up by following the below given insturctions.

- Site Identity:- Refer to, Site Title, Tagline and Site Icon section below.
- Social Menu Section :- Refer to, Creating a Social Menu section below.
- Search Section :- Refer to, Header Options -> Enable Search section below.
- Creating a Menu Section:- Refer to, Creating a Menu section below.
- Creating a slider:- Refer to, Setting-Up Home/Front Main Slider below.
- Services Sections:- Refer to, Setting-Up Home/Front Services Section below.
- Enabling Blog on Home Page:- To show blog on home page, from your Dashboard go to Settings. Inside it go to Reading and set Front Page Displays option to Your Latest Post
- Sidebar Widget Area:- Refer to Adding widgets section below to add a sidebar
- Featured Posts:- Refer to, Setting-Up Home/Front Featured Section below.
- Creating a Footer Menu Section:- Refer to, Creating a Footer Menu section below.
- Footer Option:-Refer to, Managing Footer Options section below
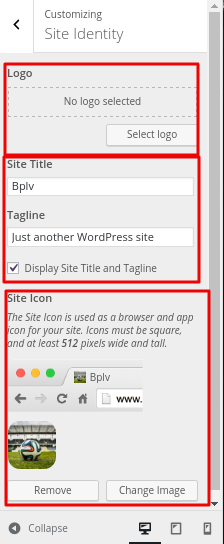
1. From “Customize” section, go to “Site Identity”.
2. From “Site Identity”, you will be able to add various options related to site identity like:
- Logo: It changes the logo for your site.
- Site Title: It changes the main site title of the site.
- Tagline: It changes the tagline (i.e. Description) of the site, just below site title.
- Site Icon: The Site Icon is used as a browser and app icon for your site. Icon must be square, and at least 512 px wide and tall.
- If you do not have a logo: You can enable or disable the site title and tagline.
1. From “Customize” section, go to “Colors”.
2. From “Colors” , go to “Basic Color Options” and you will be able to change basic colors.
3. If preview is fine, click on “Save & Publish” button to save the changes.

4. On the bottom you can also see the Speedy Color Reset option, which can be used to reset all the color options at once all you have to do is check the checkbox beside the title of the option and press the Save and Publish button.
5. You must refresh to view the changes on the Customizer.
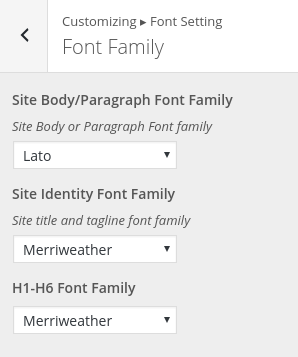
1. From “Customize” section, go to “Font Setting” .
2. From “Font Setting”, go to font “Font Family”.
3. From “Font Family”, you will be able to change font families of different sections.
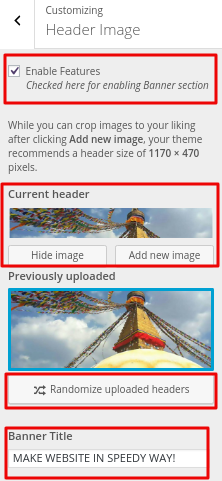
1. From “Customize” section, go to “Header Image”.
2. From “Header Image”, you will be able to change the Header image and the title on the header image.
1. From “Customize” section, go to “Background Image”.
2. From “Background Image”, you will be able to change the background image.

1. From “Customize section”, go to “Menus” .
2. From “Menus”, you will be able to manage menu locations as well as modify menus.

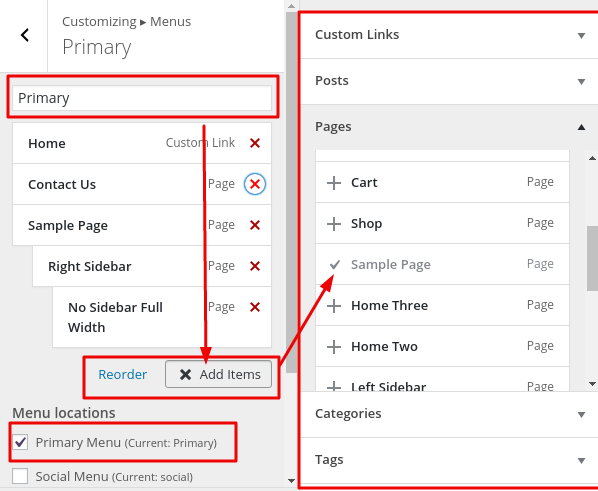
1. From “Customize” section, go to “Menus”.
2. From “Menus”, click “Add a menu” button and you will be able to create a menu.

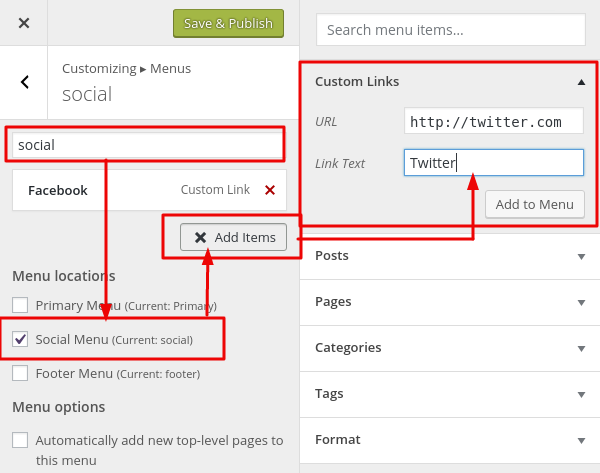
1. From “Customize” section, go to “Menus”.
2. From “Menus”, create a menu say “Social” a social menu will be created. Assign the theme location to “Social Menu”.
3. You should also enable the social menu from Customize / Theme Options / Header Options to show the menu on the top header.
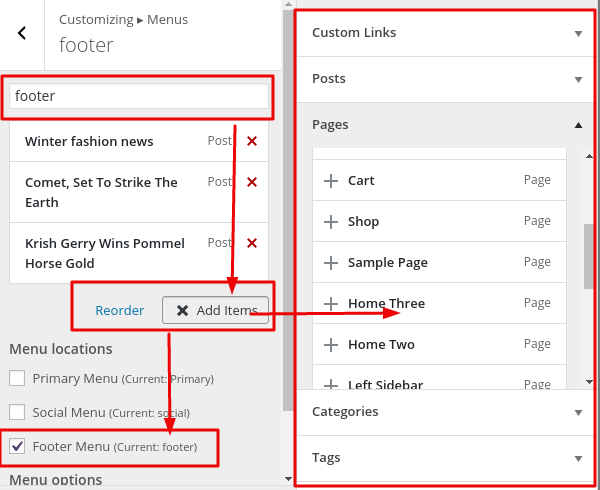
1. From “Customize” section, go to “Menus”.
2. From “Menus”, create a menu say “Footer” a social menu will be created. Assign the theme location to “Footer Menu”.
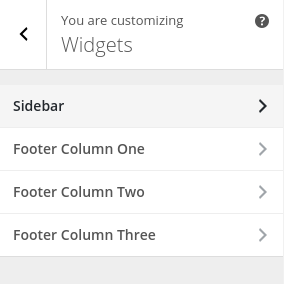
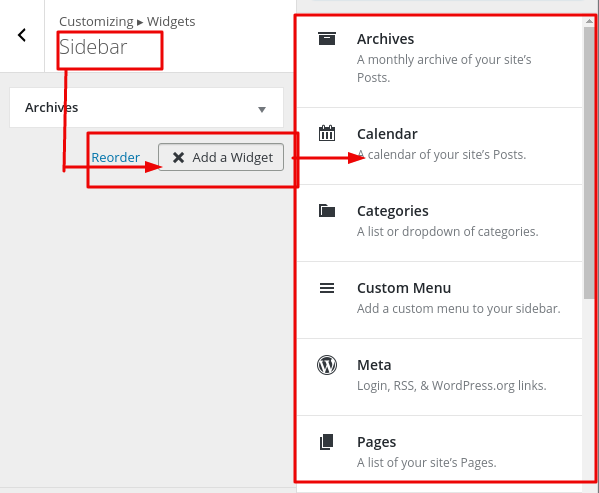
1. From “Customize” section, go to “Widgets”.
2. From “Widgets”, choose any widget area where you want to Add or Remove widgets.
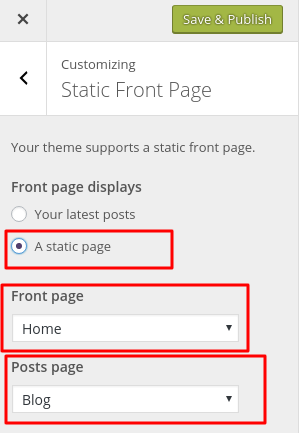
1. From “Customize” section, go to “Static Front Page”.
2. On “Static Front Page”, you will be able to set a set a front page and a blog page.
3. If you do not want blog posts to display on your front page, select a home page and a blog page. The home page will be your landing page and the blog page will be the page where your latest posts will be displayed.
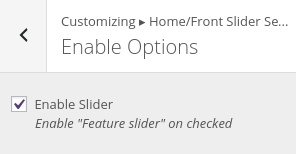
1. From “Customize” section, go to “Home/Front Main Slider”.
2. From “Home/Front Main Slider”, you will be able to select various options, but first you have to check Enable Slider On from “Enable Options” section.
Settings Option: It has option for the number of slides and from which option (Category or Page) will the slides be displayed from.
- Number Of Slider: Here you can select the number of slider.
- Select Slider From: It is described below:
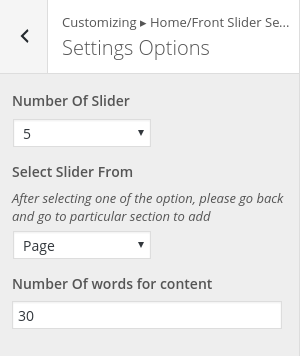
Select Slider From: You can select slider either from category of from page.
- Slider From Category: If you have selected to display the slides from a certain category on “Settings Option”, you will have to select a category here.

- Slider From Page: If you have selected to display the slides from certain pages on “Settings Option”, you will have to select pages here.

- Number Of words for content: Here you can write number of words to be displayed as content.
Slider Property: Here you will be able to Adjust the slider excerpt, Slider Mode, Pause Duration etc.
- Single Slider- Number Of Words: This will control the number of words of the content(Excerpt) to be displayed on each one of the slider.
- Slider Mode: Here, you can select the slider transition like Fade Out, Shuffle etc. and control the overall feel of the slider.
- Slide Transition Duration (in Sec): Here, you can assign the number of seconds each slider would take on the changing process, from one slide to another.
- Pause Time Duration (in Sec): Here, you can assign the number of seconds to pause each one of the slides whilst on autoplay.
- Enable Arrow: If checked, this will enable the arrows on the slider one on the left and one on the right which will change the slider to the previous and next slides respectively.
- Enable Pager: If checked, this will enable pagers on the bottom right of the slider. For each slider one pager will be present. Upon click on a pager it will change the slider to the respective slide of the pager.
- Enable Title: If checked, this will show the title of the slider(if any), written on the respective post or page.
- Enable Caption: If checked, this will show the content of the slider(if any), written on the respective post or page.
- Enable Feature Slider Button: If checked, this will show a text set on View Detail Button Text just below with the link to the particular post/page.

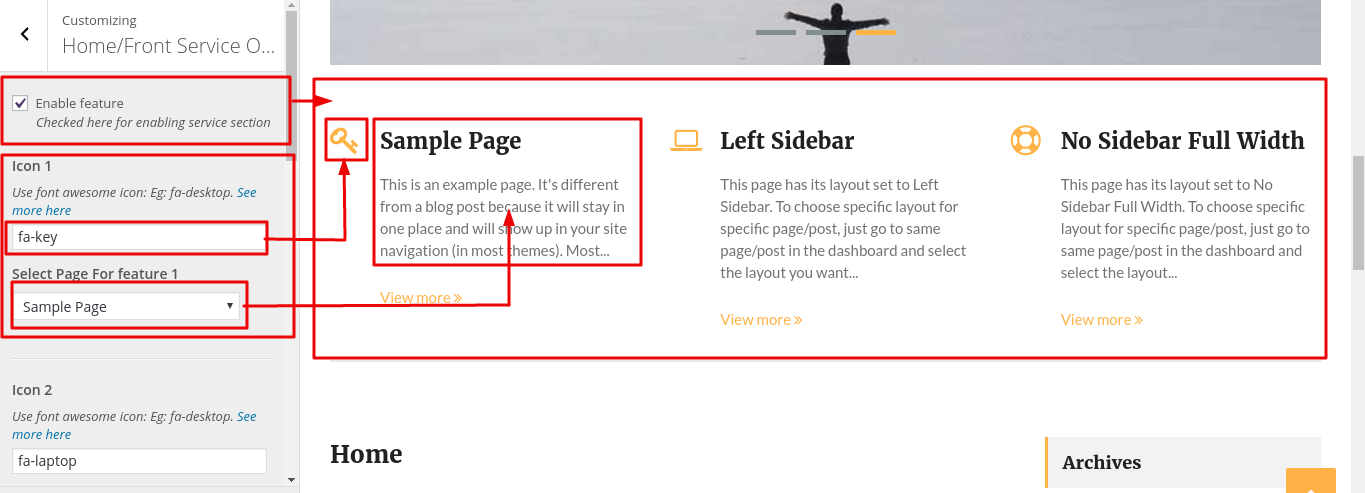
1. From “Customize” section, go to “Home/Front Service Option”.
2. From “Home/Front Service Option” you will be able to select various options, but first you have to check Enable Slider On from “Enable Options” on top of the section
3. Then you will have to assign an icon (font awesome : http://fontawesome.io/cheatsheet/ ) and a page for each service.
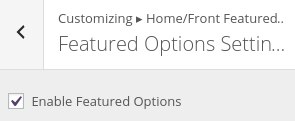
1. From “Customize” section, go to “Home/Front Featured Section”.
2. From “Home/Front Featured Section”., you will be able to select various options, but first you have to check Enable Featured Option On from “Featured Option Section Setting” section.
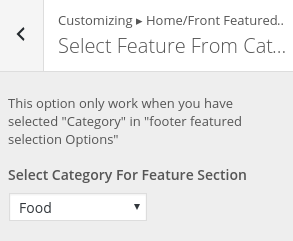
Featured Option Setting: Here, you can disable and enable the featured section. It also has option for the number of featured posts to show and from which option (Category or Page) will the featured posts be displayed from.
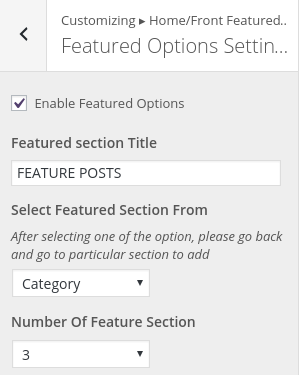
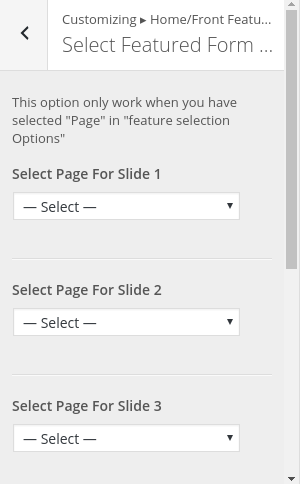
Select Featured Section From: You can select featured content either from category or from page.
- Select Feature From Category: If you have selected to display the featured posts from a certain category on “Featured Option Setting”, you will have to select a category here.
- Select Feature From Page: If you have selected to display the featured posts from certain pages on “Featured Option Setting”, you will have to select pages here.
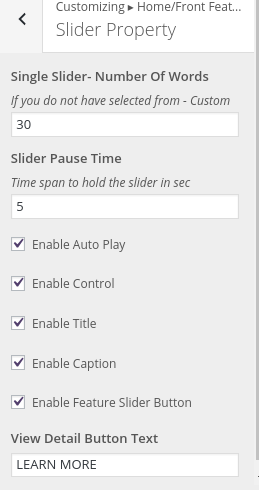
Slider Property: Here you will be able to Adjust the featured posts excerpt, Pause Duration etc.
- Single Slider- Number Of Words: This will control the number of words of the content(Excerpt) to be displayed on each one of the featured posts.
- Slider Pause Time(in Sec): Here, you can assign the number of seconds to pause each one of the featured posts whilst on autoplay.
- Enable Control: If checked, this will enable the arrows on the featured posts which will change the to the previous and next slides, this will also enable pagers on the bottom right of the featured content. For each content one pager will be present. Upon click on a pager it will change the content to the respective slide of the pager.
- Enable Title: If checked, this will show the title of the featured content(if any), written on the respective post or page.
- Enable Caption: If checked, this will show the content of the featured content(if any), written on the respective post or page.
- Enable View Detail Button Text: If checked, this will show a text set on View Detail Button Text just below with the link to the particular post/page.
i. From “Customize” section, go to “Theme Options”.
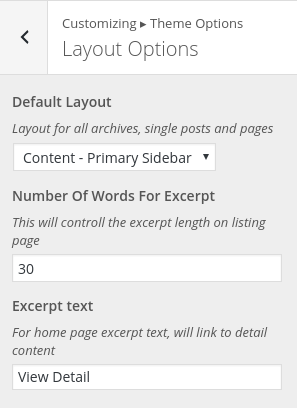
ii. From “Theme Options”, select the “Layout Options” to use different theme given layout options.
- Default Layout: Here, you can choose layouts for all archives, single posts and page.
- Number Of Words For Excerpt: Here, you can choose the number of words of content to be shown at the blog listing page.
- Alignment Of Image In Single Post/Page: Here, alignment of image can be selected for a single page and on the detail view of the posts.
i. From “Customize” section, go to “Theme Options”.
ii. From “Theme Options”, select the “Header Options” to use different theme given header options.
- Enable Social: If checked, the social icons will be shown on top right side of the theme. But first a Social menu should be assigned on the Menu settings for enabling Social menus.
- Enable Search: If checked, the search icon will be shown on top right side of the theme.
- Placeholder Search: This will be the label shown on search bar one the search icon is clicked.
i. From “Customize” section, go to “Theme Options”.
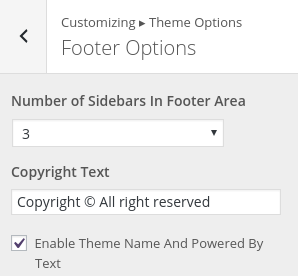
ii. From “Theme Options”, select the “Footer Options”
- Number of Sidebars In Footer Area: Number of widget areas to enable on footer section.
- Copyright Text: Remove the default text and write the text you would want to display on the footer.
- Enable Theme Name And Powered By Text: If checked Enable Theme Name And Powered By Text, the theme authors default credit text will be remain else it will be removed.
i. From “Customize” section, go to “Theme Options”.
ii. From “Theme Options”, select the “Back To Top Options”.
iiii. If checked Enable Back To Top, a button will appear on the bottom right side of your screen whilst you are scrolling down to the contents of your page. A click on this button will directly move the screen to the top content

i. From “Customize” section, go to “Theme Options”.
ii. From “Theme Options”, select the “Pagination Options”.
iiii. If selected Numeric, on a post listing page after the number set on Dashboard -> Settings -> Reading -> Post Per Page has been shown a numeric pagination will appear if any post is left to show.

i. From “Customize” section, go to “Theme Options”.
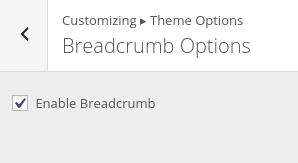
ii. From “Theme Options”, select the “Breadcrumbs Options”.
- Enable BreadCrumb: If checked, the breadcrumbs will be shown below the navigation bar. If a static front page is selected the breadcrumbs will not show on the homepage.
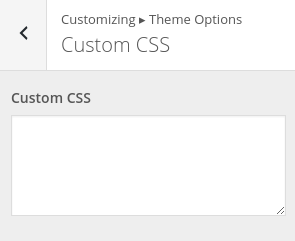
i. From “Customize” section, go to “Theme Options”.
ii. From “Theme Options”, select the “Custom Css”.
iii. Add Custom CSS here and find the changes.
iv. If preview is fine click on “Save and Publish” button to save the changes.