
Themes Instructions
Select a Theme from the drop down menu
Table of Contents
- 1.Theme Installation
- 2.Approach I : From your admin dashboard
- 3.Approach II : Upload and install theme through FTP client
- 4.Theme activation
- 5.How to setup front page as shown in the demo?
- 6.Home Page Sections
- 7.How to manage Site Title, Logo, Tagline and Site Icon?
- 8.How to manage Colors Options?
- 9.How to manage Header Image Options?
- 10.How to manage Background Image Options?
- 11.How to manage Menus?
- 12.How to create a Menu?
- 13.How to change Menu Locations?
- 14.How to add Widgets?
- 15.Available widget area
- 16.How to manage Homepage Settings Options?
- 17.How to manage Front Page Options?
- 18.Banner Slider
- 19.Trip Activities
- 20.Travel Process Guide
- 21.Popular Destinations
- 22.Featured Trips Slider
- 23.Popular Trip Pacakages
- 24.Counter
- 25.Blogs
- 26.Testimonial
- 27.Featured On
- 28.How to manage Theme Options?
- 29.Site Layout
- 30.Sort Sections
- 31.Top Bar
- 32.Footer
- 33.Additional CSS
- 34.Updating Travel Joy Pro
- 35.Update through FTP
- 36.Update via Admin Dashboard
Travel Joy Pro
After you download your theme from ThemePalace, you can choose either of the approaches given below to install your theme.
- Download Travel Joy Pro theme from ThemePalace account.
- Log in to the WordPress Administration Panels.
- Select the Appearance panel, then Themes.
- Select Add New.
- Then select Upload Theme.
- Click Browse Locate travel-joy-pro.zip Theme in your computer.
- Select travel-joy-pro.zip and click Install Now. OR
You can use FTP client like FileZilla to connect your web server.
- Download Travel Joy theme from your Theme Palace Account.
- Unzip travel-joy-pro.zip to your Desktop.
- Using an FTP client to access your host web server, go to /wp-content/themes/ and upload your new copy of Travel Joy Pro Theme.
- Now, log into the WordPress Dashboard with your login details.
- Select the Appearance panel, then Themes.
- You will see the theme in the list.
- Then click Activate button.
- Now the theme will be activate and go through the following options to set up the theme step wise.
After successfully installing the required theme, you need to activate your theme. Follow the given steps to activate the Travel Joy Pro theme.
- Select the Appearance panel, then Themes.
- You will see the Travel Joy Pro theme in the list.
- Then click the Activate button.
- Now the theme will be activated and go through the following options to set up the theme stepwise.
After activation by default, you will see the list of posts in the homepage. You can change the home page into structure as shown in Travel Joy Pro Demo Page. For that, you need to set up static front page.
How to manage Static Front Page?
To set a static front page we need to have a page that can be set as “A static page”. If you already have page then that’s fine otherwise follow the steps:
- Hover over the “Pages” menu
- You will see “Add New” under “All Pages”
- Click “Add New“
- You will be redirected to new page from.
- Add title “Home” or any title you want.
- Leave editor blank
- Click publish
- Hover over “Appearance”
- Click “Customize”
- Go to Homepage Settings.
- From Homepage Settings. section
- Choose “A static page” option under “Home page displays” title.
- You will be able to set any page as a static front page and blog page as shown on the image below.
- Click “Save & Publish” button to save changes.
The demo is divided into different section as shown in the image below:

- Top Header Section: This section is setup from Admin Panel / Appearance / Customize / Site Identity Section: The Site Identity section is setup from Admin Panel / Appearance / Customize / Site Identity Refer below How to manage Site Title, Logo, Tagline and Site Icon? Primary Menu: For the primary menu section you need to create a menu and assign its location to Primary Menu going to Admin Panel / Appearance / Customize / Menus / Menu Location. Refer below How to manage Menus? for more detail.
- Slider Section: To setup this section you need to go to Admin Panel / Appearance / Customize / Front Page / Banner Slider Sections . Refer below How to manage Banner Slider Sections? for more detail. Travel Search Section: This section will be activated after the activation of WP Travel plugin.
- Trip Activities Section: To set up this section you need to go to Admin Panel / Appearance / Customize / Front Page/ Trip Activities. Refer below Trip Activities Sections for more detail. Note: This section will only be available after the activation of WP Travel Plugin.
- Travel Process Guide Section: To set up this section you need to go to Admin Panel / Appearance / Customize / Front Page/ Travel Process Guide. Refer below Travel Process Guide Sections for more detail.
- Popular Destinations Section: To setup this section you need to go to Admin Panel / Appearance / Customize / Front Page / Popular Destinations. Refer below Popular Destinations section for more detail. Note: This section will only be available after the activation of WP Travel Plugin.
- Featured Trip Slider Section: To setup this section you need to go to Admin Panel / Appearance / Customize / Front Page / Featured Trip Slider. Refer below Featured Trip Slider section for more detail. Note: This section will only be available after the activation of WP Travel Plugin.
- Popular Trip Pacakages Section: To setup this section you need to go to Admin Panel / Appearance / Customize / Front Page / Popular Trip Pacakages. Refer below Popular Trip Pacakages section for more detail. Note: This section will only be available after the activation of WP Travel Plugin.
- Counter Section: To setup this section you need to go to Admin Panel / Appearance / Customize / Front Page / Counter. Refer below Counter section for more detail.
- Blog Section: To setup this section you need to go to Admin Panel / Appearance / Customize / Front Page / Blog. Refer below Blog Sections for more detail.
- Testimonial Section: To set up this section, you need to go to Admin Panel / Appearance / Customize / Front Page / Testimonials. Refer below Testimonials Sections for more detail.
- Featured On Section: To set up this section, you need to go to Admin Panel / Appearance / Customize / Front Page / Featured On. Refer below Featured On Sections for more detail.
- Footer Widget Section: This section is setup from widget. Widgets will be available in the widget sections. So you need to go to Admin Panel / Appearance / Customize / Widgets / Footer Widget 1 , Footer Widget 2 and Footer Widget 3 and add your desired widget. Currently, active widget is Text, Recent Post and Text. Refer below How to manage theme available widgets? for more detail.
- Footer Copyright Section: To setup this section you need to go to Admin Panel / Appearance / Customize / Footer Options / Footer Copyright. Refer below How to manage Footer Options? for more detail.
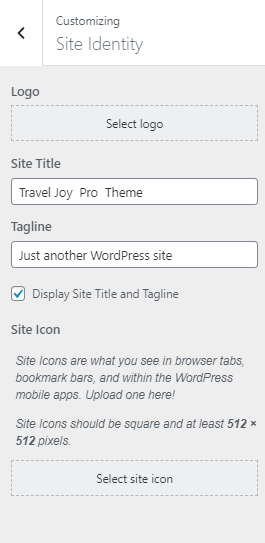
1. From the Customize section, go to Site Identity.
2. From Site Identity, you will be able to add various options related to site identity like:
- Logo ( Only available in WordPress version greater than or equal to 4.5 ): It changes the main logo of the site.
- Site Title: It changes the main site title of the site.
- Tagline: It changes the tagline (i.e: Description) of the site.Just below the site title.
- Display Site Title and Tagline: By default, if you choose the upload logo it will be displayed along with site title and tagline. If you want to hide site title and tagline then uncheck this option.
- Site Icon: The Site Icon is used as a browser and app icon for your site. Icon must be square, and at least 512px wide and tall.
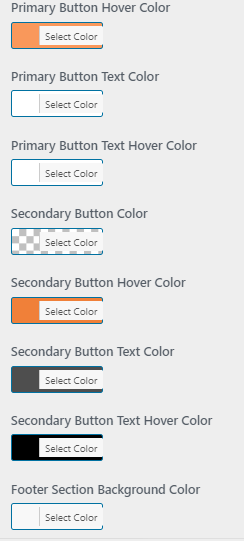
1. From the Customize section, go to Colors Options.
2. From Colors Options, you will be able to find multiple color options.
- Header Text Color: This option allows you to change the header text color.
- Background Color: This option allows you to change the background color.
- Link Color: This option allows you to change the link color.
- Link Hover Color: This option allows you to change the link hover color.
- Post Title Color: This option allows you to change the post title color.
- Primary Button Color: This option allows you to change the Primary Button color.
- Primary Button Hover Color: This option allows you to change the Primary Button Hover color.
- Primary Button Text Color: This option allows you to change the Primary Button Text color.
- Primary Button Text Hover Color: This option allows you to change the Primary Button Text Hover color.
- Secondary Button Color: This option allows you to change the Secondary Button color.

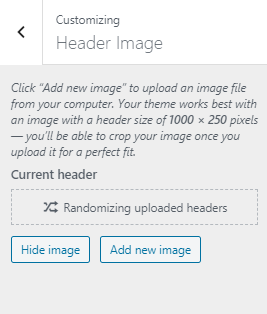
1. From the Customize section, go to Header Image Options.
2. From Header Image Options, you will be able to find two color options.
- Header Image: Select the image for Header available on media library or upload from the other location.
If the preview is fine, click on Save and Publish to apply recently selected/uploaded image as Header Image. - Hide Image: This option allows you to hide the header image.
- Add Image: This option allows you to add the header image.
- Click “Save & Publish” button to save changes.
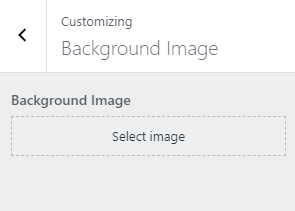
1. From the Customize section, go to Background Image Options.
2. From Background Image Options, you will be able to find two color options.
- Background Image: Select the image for Background available on media library or upload from the other location.
If the preview is fine, click on Save and Publish to apply recently selected/uploaded image as Background Image. - Click “Save & Publish” button to save changes.
Managing the menu is very easy. You can create and assign the menu from the backend as well from Customize > Menu.
1. From Customize section, go to Menus.
2. From Menus, click “Add a Menu” button and you will be able to create a menu.
3. Now, click Add Items and you will be able to Add or Remove Menu Items according to your requirement.
4. Select the Menu locations.
5. If the preview looks fine, save the changes by clicking on Save and publish button.

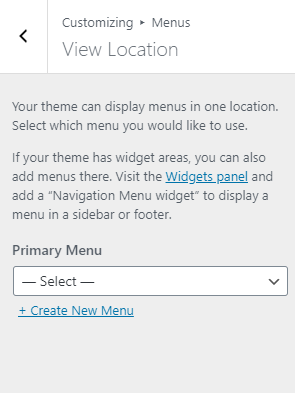
1. From Customize section, go to Menus and inside it you will find View Locations.
2. Here you can find following menu location:
- Select the menu for Primary Menu. A primary menu appears in a header section.
3. If the preview looks fine, save the changes by clicking on Save and publish button.
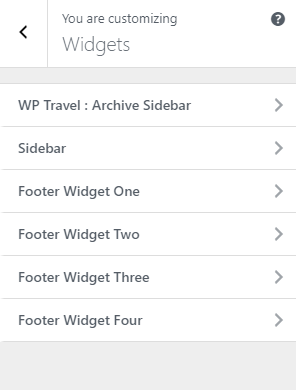
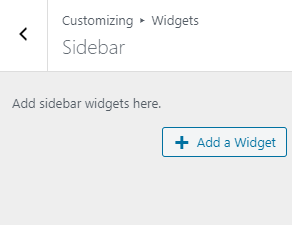
1. From Customize section, go to Widgets.
2. From Widgets, you will see different sections to add widget where you will be able to Add a Widget or Remove widgets by going to particular widget section.
3. And the added widget will be displayed in particular section that you have added.
1.From Customize section, go to Homepage Settings Options .
2.From Homepage Settings Options, You will be able to set any page as A Static page and you will find Your Latest Posts page option as well.
- Enable Home Content: If you want to display the content that is available on the page that you chose to set the Homepage then you can enable this section.

1. From the Customize section, go to Frontpage Options.
2. From Frontpage Options, you will see Banner Slider Options.
3. In Banner Slider Options you will see:
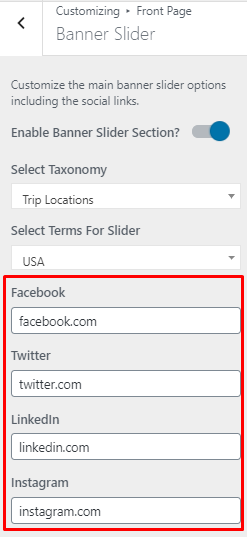
- Enable Banner Slider Section?: This option allow you to enable/disables the slider sections.
- Select Taxonomy: There are Four available options which you can choose according to your requirement.
- Post Categories
- Pages
- Trip Locations
- Trip Types
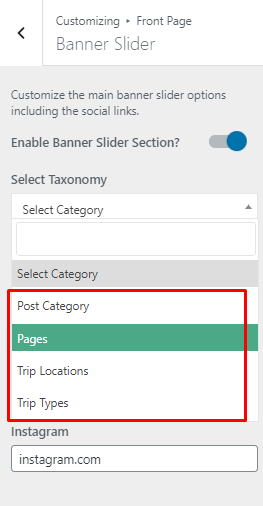
Options 1: When “Post Categories” is selected you will find the following option:
- Select Terms For Slider: This option will enable the choose the category to be displayed.
- Click “Save & Publish” button to save changes.
Options 2: When “Pages” is selected you will find the following option:
- Select Pages For Slider: This option will enable the choose the category to be displayed.
- Click “Save & Publish” button to save changes.

Note: Option 3 and 4 i.e. Trip Locations and Trip Types will appear in dropdown option only after activation of WP Travel Plugin which is recommended by the theme.
Options 3: When Trip Locations is selected you will find following option:
- Select Terms For Slider: Select the desired location for Slider section. The location that you have entered using the plugin will appear here.
- Click “Save & Publish” button to save changes.

Options 3 : When Trip Types is selected you will find following option:
- Select Terms For Slider: Select the desired Trip types for Slider section. Trip type that you have entered using the plugin will appear here.
- Click “Save & Publish” button to save changes.
 Number of posts to slide: This option allows you to set the no of slides.
Social Links:
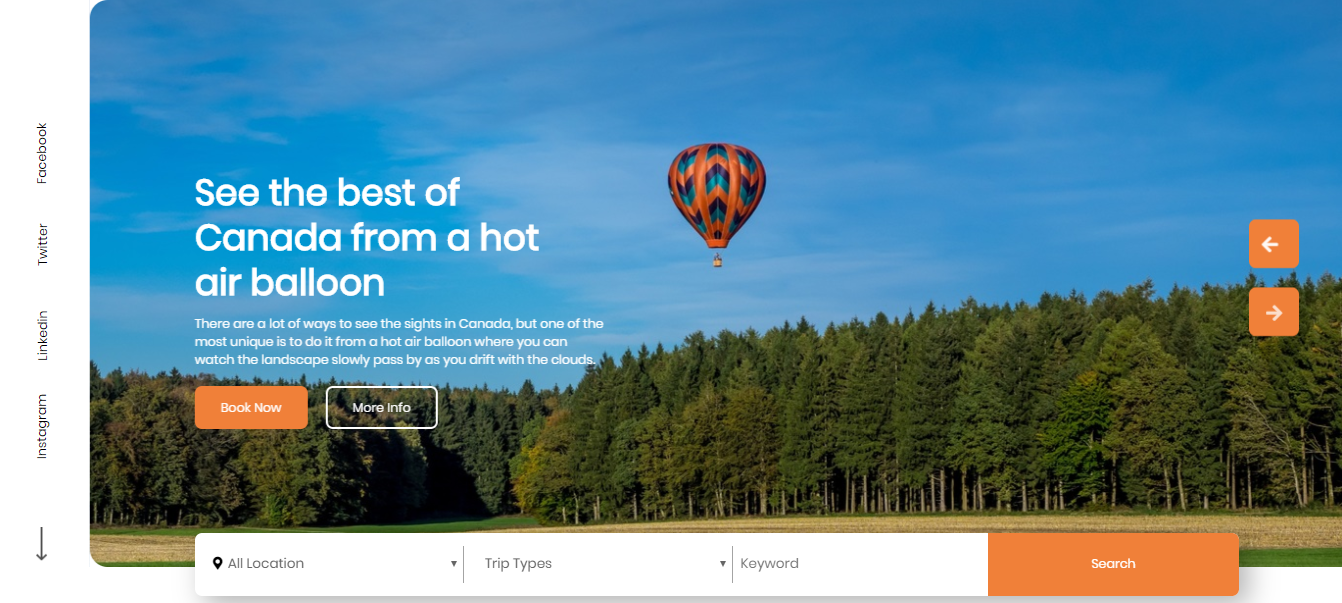
Here is the list of social links that appear in the slider section:
- Facebook: This option allows you to enter the Facebook link.
- Twitter: This option allows you to enter the twitter link.
- Instagram: This option allows you to enter the Instagram link.
- LinkedIn: This option allows you to enter the linkedin link.
Enable Search Filter: This option allows you to enable/disable the search filter below the banner section.
Front End:
Note: This section will only appear after activating the WP Travel Plugin. When WP Travel plugin is activated which is recommended by the theme itself, a new section will appear in the Home Page section i.e. Activities Section .
1. From the Customize section, go to Frontpage Options.
2. From Frontpage Options, you will see Trip Activities Options.
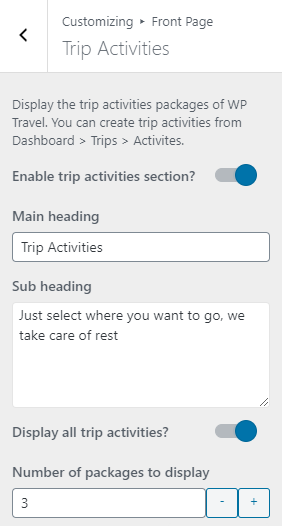
3. In Trip Activities Options you will see:
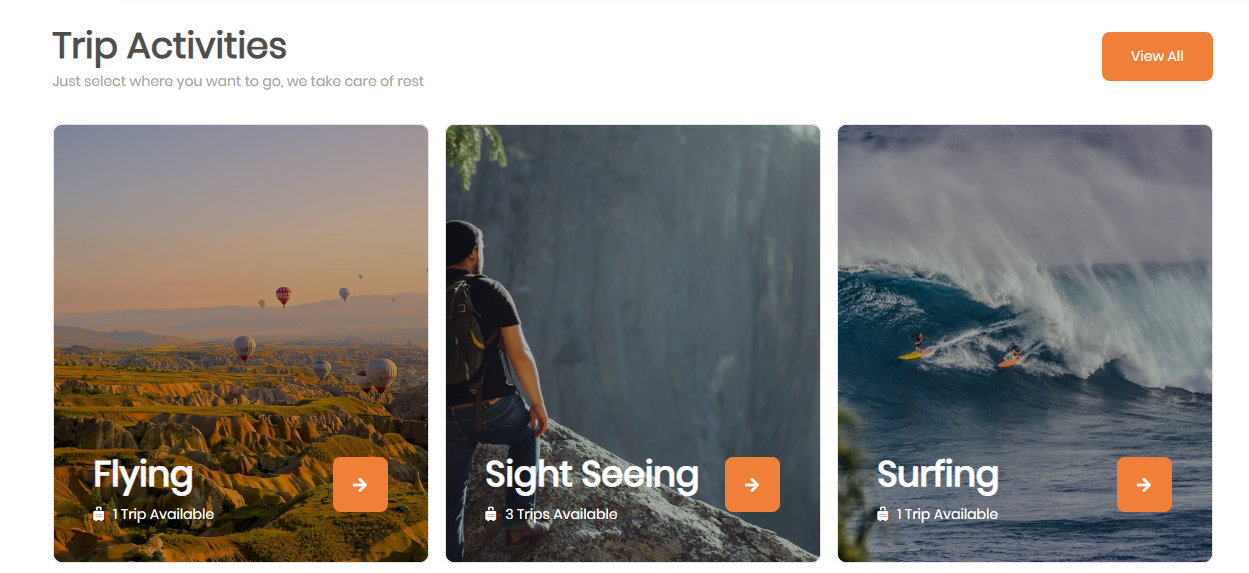
- Enable Trip Activities Section?: This option allows you to enable/disables the Activities sections.
- Main Heading: This option allows you to edit the main heading.
- Sub Heading: This option allows you to edit the subheading.
- Display all trip activities?: If you want to display all the trip activities that you have created then you can enable this option.
- Number of packages to display: This option allows you to manage the number of activities to be displayed.
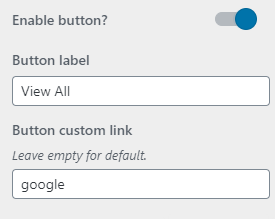
- Enable button?: This option allows you to enable/disable the “View All” Buton.
- Button label: This option allows you to edit the button label.
- Button custom link: This option allows you to enter the custom link to the button.
Front End:
1. From the Customize section, go to Frontpage Options.
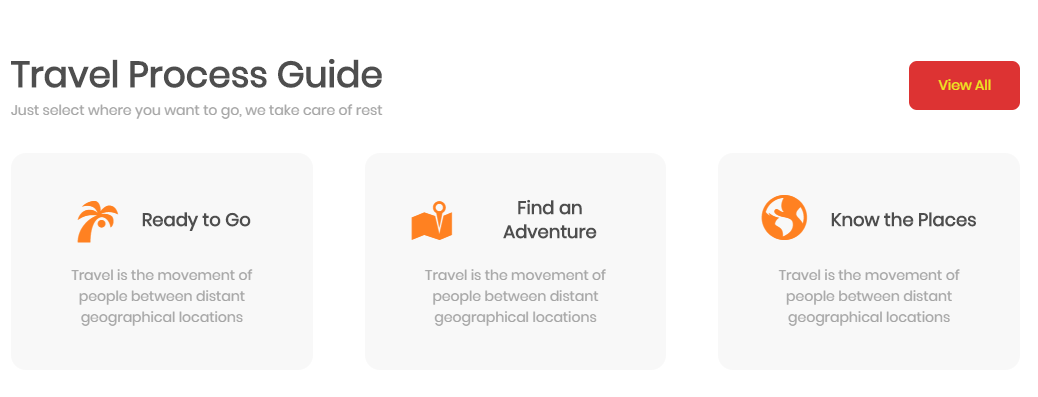
2. From Frontpage Options, you will see Trip Process Guide Options.
3. In Trip Process Guide Options you will see:
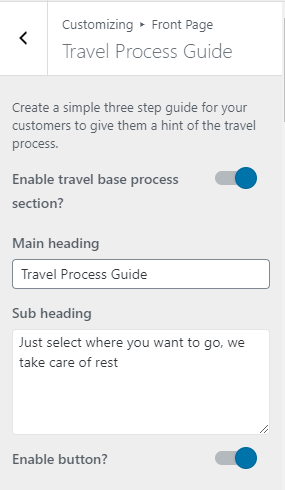
- Enable travel base process section?: This option allows you to enable/disables the travel base process sections.
- Main Heading: This option allows you to edit the main heading.
- Sub Heading: This option allows you to edit the subheading.
- Enable button?: This option allows you to enable/disable the “View All” button.
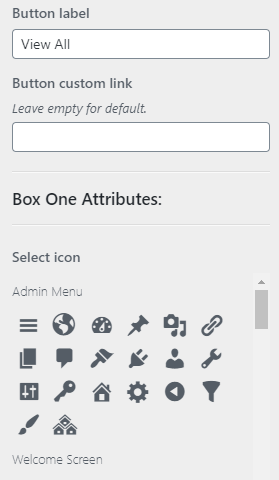
- Button label: This option allows you to edit the button label.
- Button custom link: This option allows you to enter the custom link to the button.
- Box One Attributes:
- Select icon: This option allows you to select the icon.
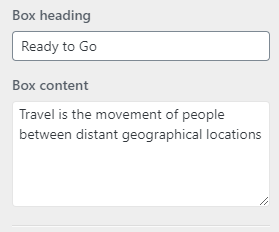
- Box heading: This option allows you to edit the box Heading
- Box content: This option allows you to edit the box content.
Front end:
Note: This section will only appear after activating the WP Travel Plugin. When WP Travel Plugin is activated which is recommended by the theme itself, a new section will appear in the Home Page section i.e. Popular Destinations.
1. From the Customize section, go to Frontpage Options.
2. From Frontpage Options, you will see Popular Destinations Options.
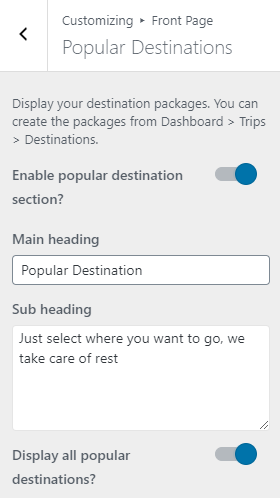
3. In Popular Destinations Options you will see:
- Enable Popular Destination Section?: This option allows you to enable/disables the Popular Destination sections.
- Main Heading: This option allows you to edit the main heading.
- Sub Heading: This option allows you to edit the subheading.
- Display all popular destinations?: If you want to display al the destinations that you have added then enable this option.
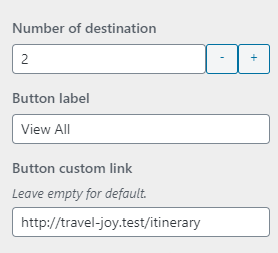
- Number of destination: This option allows you to manage the number of destinations to be displayed.
- Button label: This option allows to edit the button label
- Button custom link: This option allows you to enter the custom link.
Front End:
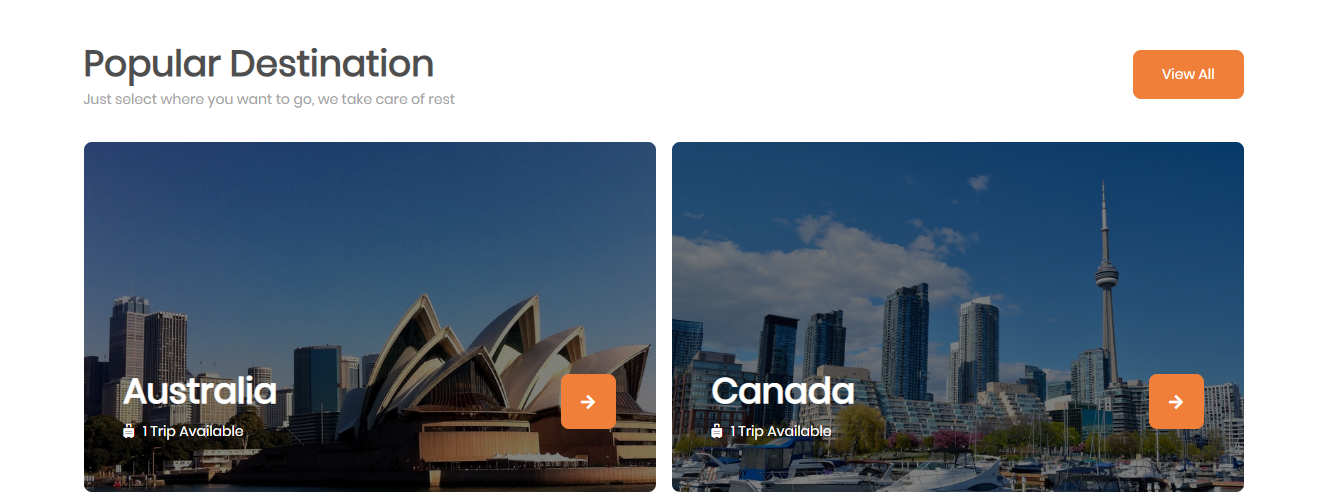
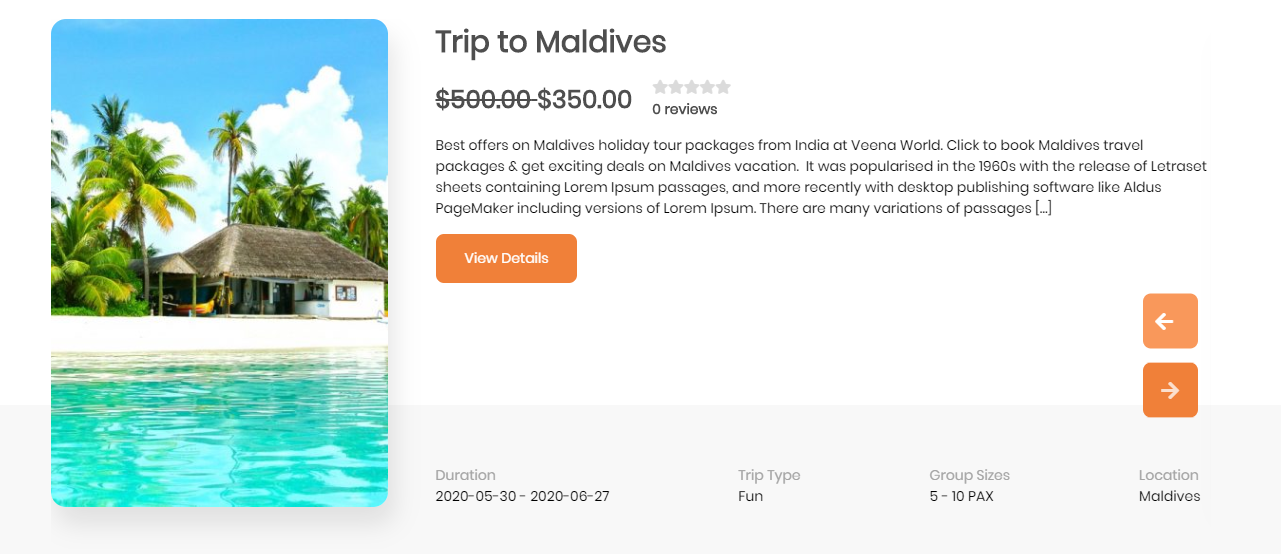
Note: This section will only appear after activating the WP Travel Plugin. When WP Travel Plugin is activated which is recommended by the theme itself, a new section will appear in the Home Page section i.e. Featured Trip Slider.
1. From the Customize section, go to Frontpage Options.
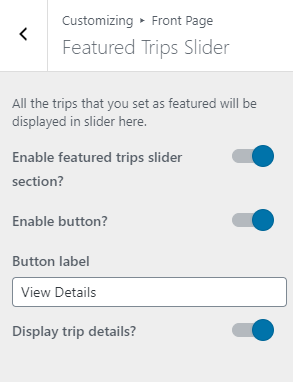
2. From Frontpage Options, you will see Featured Trips Slider Options.
3. In Featured Trip Slider Options you will see:
- Enable Featured Trips Slider Section?: This option allows you to enable/disables the Featured Trip Slider sections.
- Enable button?: This option allows you to enable/disable the button.
- Button label: This option allows you to edit the button label.
- Display Trip Details?: This option allows you to display the trip detail.
Front End:
Note: This section will only appear after activating the WP Travel Plugin. When WP Travel Plugin is activated which is recommended by the theme itself, a new section will appear in the Home Page section i.e. Popular Trip Pacakages.
1. From the Customize section, go to Frontpage Options.
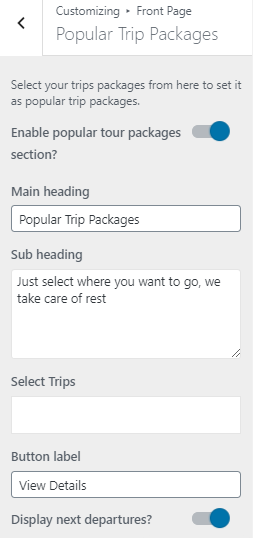
2. From Frontpage Options, you will see Popular Trip Packages Options.
3. In Popular Trip Packages
Options you will see:
- Enable Popular Trip Packages Section?: This option allows you to enable/disables the Popular Trip Packages sections.
- Main Heading: This option allows you to edit the main heading of the section.
- Sub Heading: This option allows you to edit the subheading of the section.
- Select Trips: This option allows you to select the trips.
- Button Label: This option allows you to edit the button label.
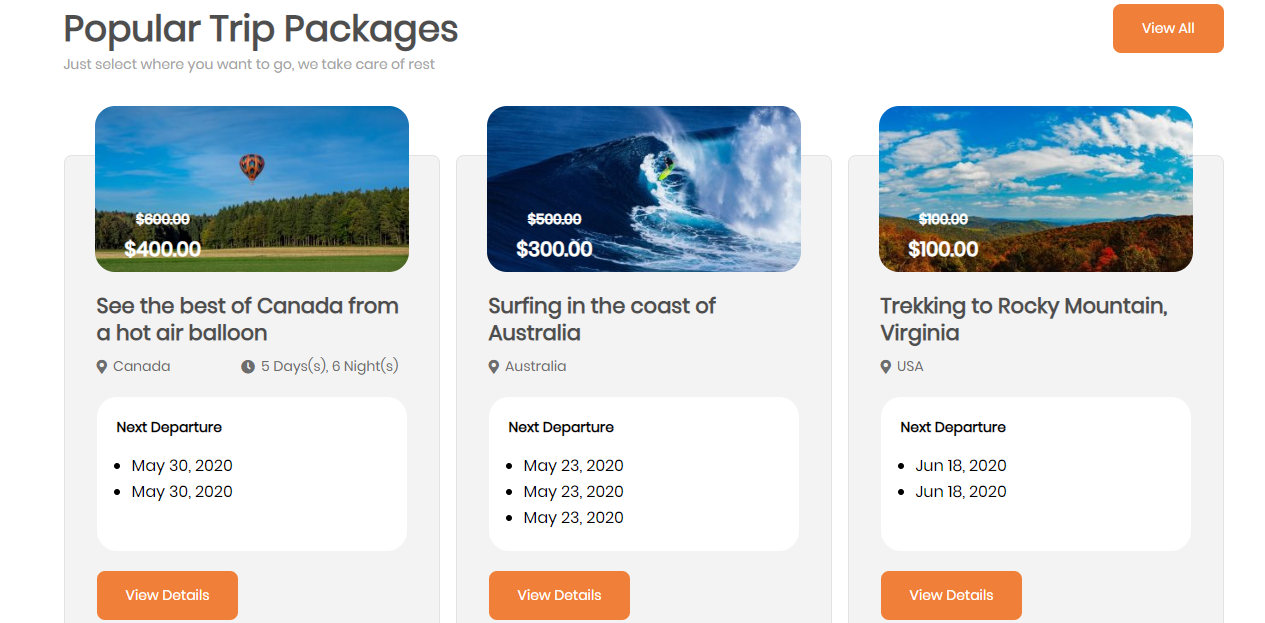
- Display Next Departures?: This option allows you to display the next departure date of that trip.
Front End:
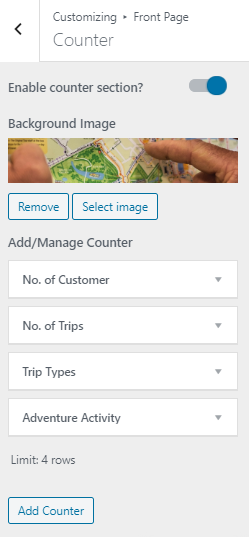
1. From the Customize section, go to Frontpage Options.
2. From Frontpage Options, you will see Counter Options.
3. In Counter Options you will see:
- Enable counter section?: This option allows you to enable/disables the travel base process sections.
- Background Image: This option allows you to edit the main heading.
- Add/Manage Counter: This option allows you to add/manage the counter.
- Counter label?: This option allows you to edit the counter label.
- Count upto: This option allows you to set no to display the count.
- Add Counter: This Option allows you to add the counter
Front end:

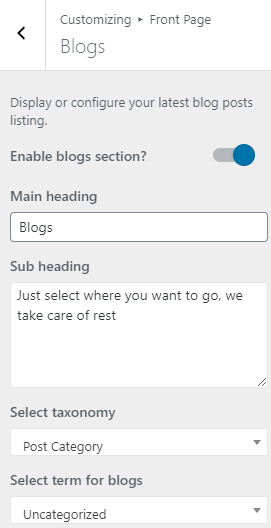
1. From the Customize section, go to Frontpage Options.
2. From Frontpage Options, you will see Blogs Options.
3. In Blogs Options you will see:
- Enable Blogs Section?: This option allows you to enable/disables the blog sections.
- Main Heading: This option allows you to edit the main heading of the section.
- Sub Heading: This option allows you to edit the subheading of the section.
- Select Taxonomy: This option allows you to select a taxonomy to display in this section.
- Select Term For Blogs: This option allows you to select the category to display in this section.
- Display number of blogs: This option allows you to manage the no of blogs to be displayed under this section.
- Enable Button?: This option allows you to enable/disable the “View All” button.
- Button label: This option allows you to edit the button label.
- Button custom link: This option allows you to enter the custom link to the button,.

Front End:

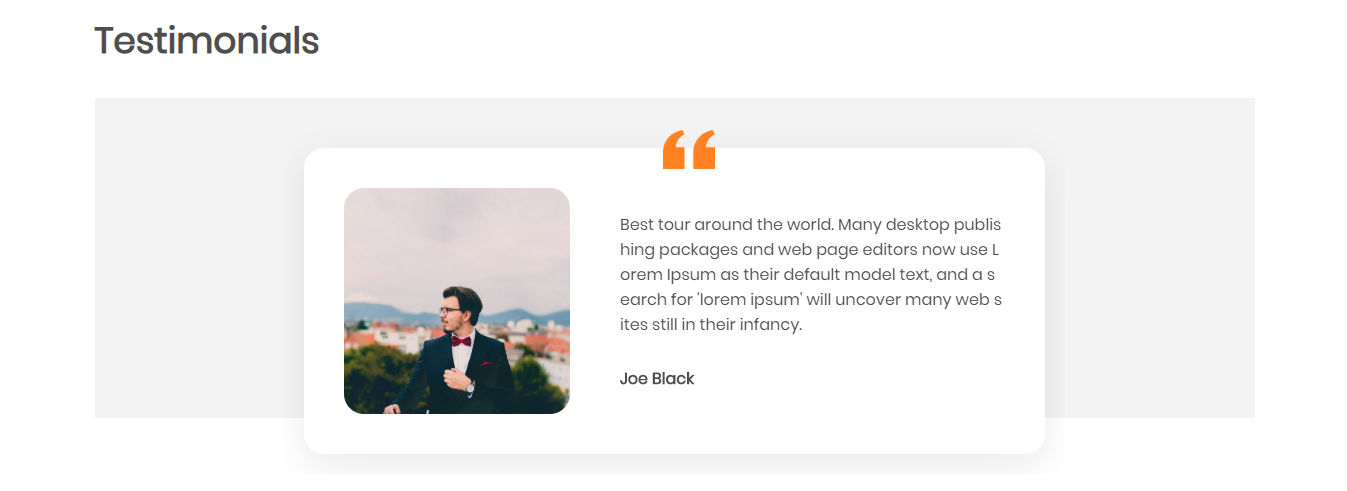
1. From the Customize section, go to Frontpage Options.
2. From Frontpage Options, you will see Testimonials Options.
3. In Testimonials Options you will see:
- Enable Testimonials Section?: This option allows you to enable/disables the testimonial sections.
- Taxonomy: This option allows you to choose the taxonomy. You will get to choose page/post as per your requirement.
- Select Term For Testimonials: This option allows you to select the category/Page to display in this section.
- Add/Manage Testimonials:
- Reviewer name: This option allows you to enter the reviewer’s name.
- Reviewer position: This option allows you to enter the reviewer’s position.
- Reviewer company name: This option allows you to enter the reviewer’s company name.
- Reviewer message: This option allows you to enter the reviewer’s message.
- Reviewer image: This option allows you to enter the reviewer’s image.


Front End:
1. From the Customize section, go to Frontpage Options.
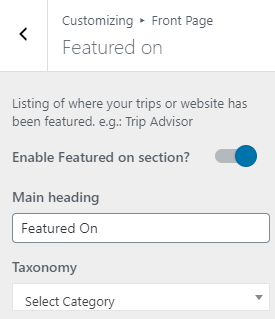
2. From Frontpage Options, you will see Featured On Options.
3. In Counter Options you will see:
- Enable Featured on section?: This option allows you to enable/disables the Featured on sections.
- Main heading: This option allows you to edit the main heading.
- Taxonomy: This option allows you to add/manage the counter.
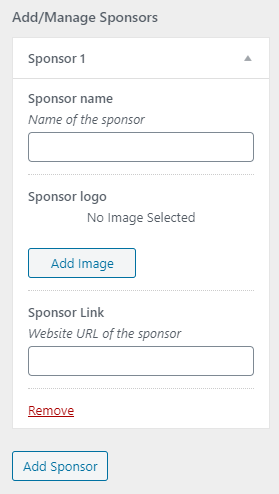
- Add/Manage Sponsors: This Option allows you to add the counter
- Sponsor name: This option allows you to add the Sponsor Name
- Sponsor logo: This option allows you to add the sponsor Logo
- Sponsor Link: This option allows you to add the sponsor link

Front end:

1. From the Customize section, go to Theme Options.
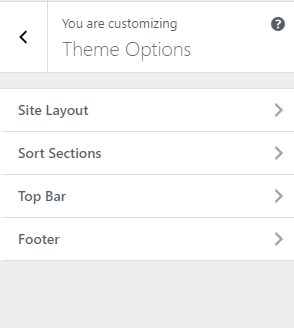
2. From Theme Options, you will see different sections. They are:
1. From the Customize section, go to Theme Options > Site Layout Options.
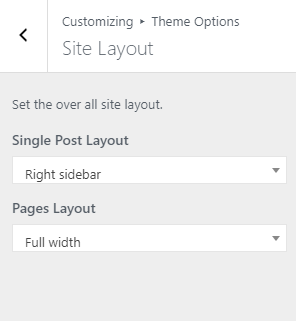
2. From Site Layout Options, you will see different options. They are:
- Single Post Layout: Under this option, you will find two dropdown options:
- Full Width: Selecting this option will adjust your single post page layout to full width.
- Right Sidebar: Selecting this option will adjust your single post page with right sidebar.
- Pages Layout: Under this option, you will find two dropdown options:
- Full Width: Selecting this option will adjust the layout of your pages to full width.
- Right Sidebar: Selecting this option will adjust your pages with right sidebar.
- Click “Save & Publish” button to save changes.
1. From the Customize section, go to Theme Options > Sort Sections.
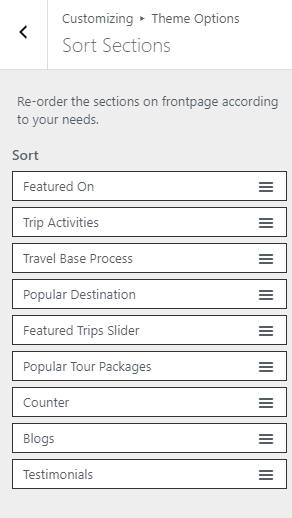
2. From Sort Sections Options, you will see different options. They are:
- Sort: This option allows you to sort the section.
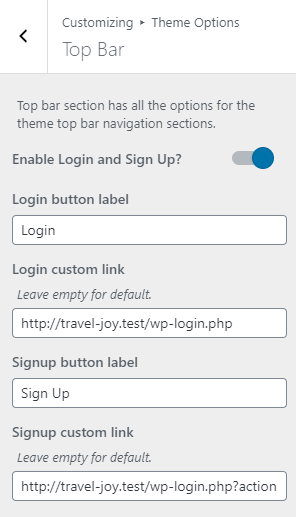
1. From the Customize section, go to Theme Options > Top Bar Options.
2. From Top Bar Options, you will see the option to display social links. They are:
- Enable Login and Sign Up?: This option will allow you to enable/disable login and signup button at the header.
- Login button label: This option will allow you to edit the login button label.
- Login custom link: This option will allow you to enter the custom link for the login button.
- Signup button label: This option will allow you to edit the signup button label
- Signup custom link: This option will allow you to enter the custom link for the signup button.
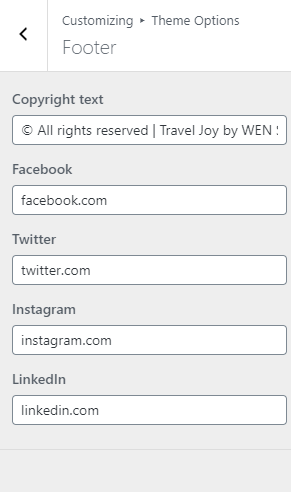
1. From the Customize section, go to Theme Options > Footer Options.
2. From Footer Options, you will see the option to display social links. They are:
- Copyright Text: This option will allow you to edit the copyright text that appears in the footer.
- Facebook: This option will allow you to enter the Facebook link.
- Twitter: This option will allow you to enter the Twitter link.
- Instagram: This option will allow you to enter the Instagram link.
- LinkedIn: This option will allow you to enter the LinkendIn link.

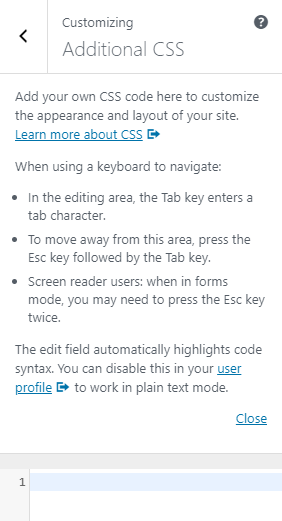
From the Customize section, go to Additional CSS. In the Additional CSS, you will see following option.
- You can add your own CSS here.
You can update the theme following two method.
- Through the Admin Dashboard
- Through FTP
To update Theme though FTP, follow these basic steps:
- Download the latest version of Travel Joy Pro from WordPress theme directory
- Unzip travel-joy-pro.zip to your Desktop
- Using an FTP client to access your host web server, go to /wp-content/themes/ and upload your new copy of Travel Joy Pro Theme which shall replace the old files.
