
Themes Instructions
Select a Theme from the drop down menu
Table of Contents
- 1.Introduction
- 2.Theme Installation
- 3.Theme Options
- 3.1.How to change site title and tagline?
- 3.2.How to customize background?
- 3.3.How to change logo?
- 3.4.How to show search Box in Header?
- 3.5.How to show social icons in Header?
- 3.6.How to show tagline Header?
- 3.7.How to change logo and icons?
- 3.8.How to change search placeholder?
- 3.9.How to change the site layout?
- 3.10.How to change pagination?
- 3.11.How to change copyright text?
- 3.12.How to change excerpt length and read more text?
- 3.13.How to change Breadcrumb type?
- 3.14.How to show social icons in Header?
- 3.15.Advanced Setting?
- 3.16.How to change featured slider setting?
- 4.Home page settings
- 5.Navigation
WEN Business
WEN Business is a spacious , generous , Corporate theme that offers convenience to anyone setting up the theme. Simplicity and roomy sections, all well-knit to deliver an exceptionally personal, professional or private showcase.
Thank you for using WEN Business. The below steps will guide you to install and use this theme.
- Log in to the WordPress Administration Panels.
- Select the Appearance panel, then Themes.
- Select Add New.
- Then select Upload Theme.
- Click Browse Locate wen-business.zip Theme in your computer.
- Select wen-business.zip and click Install Now.
- Unzip wen-business.zip to your Desktop.
- Using an FTP client to access your host web server, go to /wp-content/themes/ and upload your new copy of WEN Business Theme.
- Now, log into the WordPress Dashboard with your login details.
- Select the Appearance panel, then Themes.
- You will see the theme in the list.
- Then click Activate button.
- Now the theme will be activate and go through the following options to set up the theme step wise.
A simplified theme options that give you more customization options. These are general guidelines to perform some of the basic yet useful features of WEN Business Theme. ( Hint: We assume we are in “Customize” section for whole theme customization part i.e. Appearance > Customize.)
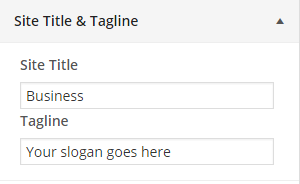
- From “Customize” section, go to Theme Options > Site title and tagline
- From the Site title section, enter the site title
- From the tagline section, enter the site slogan
- If the preview is fine, click on “Save & Publish” to apply on site.
To customize background color
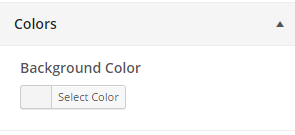
- From “Customize” section, go to Theme Options > Colors
- Select the background color palette
- If the preview is fine, click on “Save & Publish” to apply on site.
To customize background image
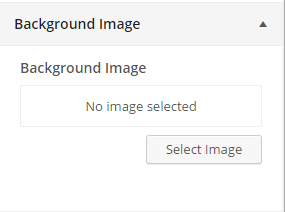
- From “Customize” section, go to “Background Image”, click on “Select Image” and upload image either from your System or Media files.
- Set additional options include “Background Repeat”, “Tile”, “Tile Horizontally” and “Tile Vertically”.
- Click on “Save & Publish” to save the changes.
- From “Customize” section, go to Theme Options > Header.
- From the “Logo” section, click on “Select Image” and upload image either from your System or Media files.
- If the preview is fine, click on “Save & Publish” to apply recently uploaded logo.
- From “Customize” section, go to “Theme Options > Header” section.
- Turn on “Show Search Box” checkbox to show search icon.
- Click on “Save & Publish” to save the changes.
- From “Customize” section, go to “Theme Options > Header” section.
- Turn on “Show Social Icons” checkbox to show social icons. (You need to create social menu and assign it to “Social”)
- Click on “Save & Publish” to save the changes.
- From “Customize” section, go to “Theme Options > Header” section.
- Turn on “Show tagline” checkbox to show slogans.
- Click on “Save & Publish” to save the changes.
- From “Customize” section, go to Theme Options > Icons.
- To change favicon, click on “Select Image” from “Favicon” section and upload image.
- To change Web Clip Icon ,click on “Select Image” from “Web Clip Icon” section and upload image
- If the preview is fine, click on “Save & Publish” to apply recently uploaded logo.
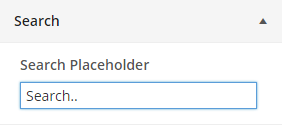
- From “Customize” section, go to Theme Options > Search
- Change the text of the placeholder.
- If the preview is fine, click on “Save & Publish” to apply the placeholder text.
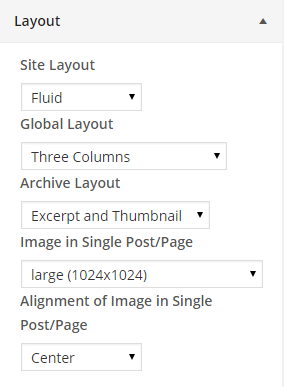
Form “Customize” section go to Theme Options>Layout.
- To change site layout choose Site layout, Fluid or Boxed.
- To change global layout, choose the available options form drop down arrow. Primary sidebar-content, Content-primary sidebar, Three columns and No sidebar are available options.
- To change archive layout, choose the available options from drop down arrow. Excerpt Only, Excerpt and thumbnail, Full post are available options.
- To change Image in single post/page, choose the available options form drop down arrow.
- To change image in single post page, choose the available options from drop down arrow. The available options are None, Left, Center and Right.
- If preview is fine, click on “Save and Publish” to save the above changes.
- From “Customize” section, go to Theme Options > Pagination.
- Select Default Older post/Newer post or Numeric.
- If preview is fine, click on “Save and Publish” to save the above changes.
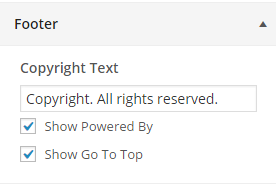
- From “Customize” section, go to “Theme Options > Footer” section.
- Modify “Copyright Text”.
- Check “Show Powered By”, if “Powered By label” is needed on footer.
- Check “Show Go To Top”, if “Go To Top” is needed on footer.
- Click on “Save & Publish” to save the changes.
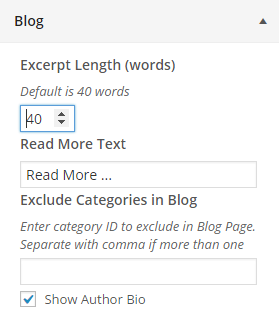
- From “Customize” section, go to “Theme Options > Blog” section.
- Change the excerpt length and read more text form here. Default excerpt text length is 40 words and Read more text default is “Read more…”
- Exclude categories in blog, Enter category ID to exclude in Blog Page. Separate with comma (,) if more than one
- Click on “Save & Publish” to save the changes.
- From “Customize” section, go to “Theme Options > Breadcrumb” section.
- Choose the breadcrumb type and Separator.
- If the preview is fine click on “Save and Publish” button.
- From “Customize” section, go to “Theme Options > Social Icons” section.
- Turn on “Show Social Icons” checkbox to show social icons. (You need to create social menu and assign it to “Social”)
- Click on “Save & Publish” to save the changes.
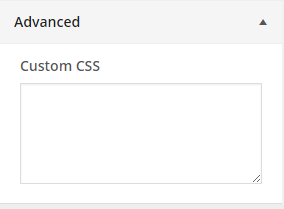
- Add Custom CSS here and find the changes.
- If preview is fine click on “Save and Publish” button to save the changes.
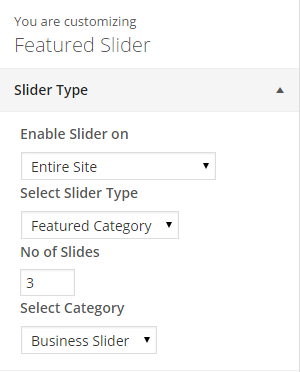
Change Slider type:
- From “Customize” section, go to “Featured slider> slider type” section.
- Enable slider on setting > choose the options “Disable” or “Entire site” or “Home page/Front page”.
- Select slider type > choose the available option.
- Number of slides > Put the number of slider you want to display.
- Select category > Select the category from which you want to display the slider.
- If the preview is fine click on “Save and publish” to save the changes.
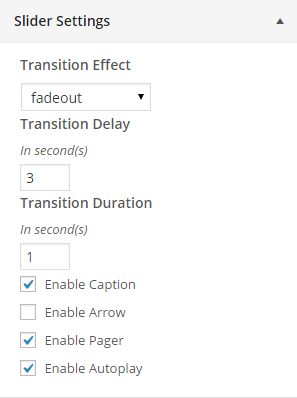
- Select the available options for transition effect.
- Put the Transition delay time in second.
- Put the transition duration in second.
- Checked if needed “Enable Caption”
- Checked if needed “Arrow” on slider.
- Checked for “Enable pager”.
- Checked if “Enable Auto play” needed.
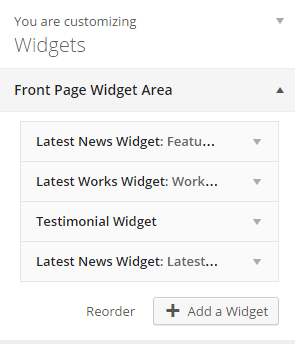
- Go to “Customize” section and then “Widgets”.
- Select the front page widgets area.
- Reorder or add the widgets for the front page widgets.
- Check the preview, if it looks fine, save the changes.
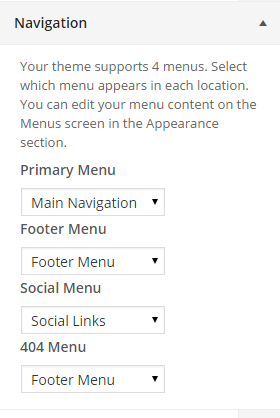
The theme supports 4 menus. Select which menu appears in each location. You can edit your menu content on the Menus screen in the Appearance section.
From “Customize” section, go to “Navigation” section.
- Select the menu for Primary menu. Primary menu appears as a main menu in header section.
- Select the menu for Footer menu. Footer menu appears on the footer section.
- Choose the Social menu, which shows the social links title as a menu.
- Select the menu for 404. This menu appears on 404 page.
- If preview looks fine, save the changes by clicking on “Save and publish” button.
